Learning Science: How To Make The Periodic Table Fun!

Does the mere mention of the periodic table give you flashbacks to high school chemistry class? You might remember staring at that giant chart, feeling a wave of intimidation. If you’re now teaching your own kids, you probably want to make the experience a lot more engaging. The good news is, you can! With a little creativity, you can transform this essential science tool from daunting to delightful. This guide is packed with fun periodic table activities that will help you bring chemistry to life right in your homeschool classroom.

The periodic table isn’t just a random assortment of letters and numbers; it’s the ultimate cheat sheet for understanding the building blocks of the universe. When you’re teaching chemistry to kids, the key is to make it tangible. Abstract concepts become clear when children can see, touch, and interact with them. By turning lessons into games and experiments, you’re not just teaching them to memorize elements; you’re showing them how science works in the world around them.

This approach helps build a strong foundation. Kids who enjoy their early exposure to complex topics are more likely to stay curious and confident as they advance. These activities are designed to be accessible, using common household items whenever possible. Let’s get ready to turn your kitchen into a laboratory and make some science magic happen!

Fun Periodic Table Activities Using Games

One of the best ways to get kids excited about learning is to turn it into a game. Competition and play make memorization feel less like a chore and more like a challenge. Here are a few ideas to get you started.

Element Bingo:

  • Create Bingo cards with element symbols in the squares instead of numbers.
  • Call out the element’s name, atomic number, or a fun fact about it (e.g., “This element is what makes bananas radioactive… Potassium!”).
  • The first one to get five in a row wins a small prize. This is a great way to practice quick recall.

2. Periodic Table Battleship:

  • Print out two copies of the periodic table for each player. Just like the classic game, one is for tracking your “ships,” and the other is for guessing your opponent’s.
  • Players secretly circle groups of two, three, four, and five adjacent elements to represent their ships.
  • They take turns calling out coordinates (element symbols) like “H” for Hydrogen or “Fe” for Iron. A hit is a “hit,” and a miss is a “miss.”
  • The first to “sink” all of their opponent’s element ships wins!

3. Element Scavenger Hunt:

  • Make a list of elements that can be found in common household items.
  • For example: Aluminum (foil), Carbon (pencil lead), Sodium (salt), and Iron (cast iron pan).
  • Have your kids go on a scavenger hunt to find items containing these elements. It’s a fantastic way to show them that chemistry is all around them, not just in a textbook.

Building Your Own Periodic Table

Building Your Own Periodic Table

Creating a physical, three-dimensional periodic table can make the elements much more memorable. When kids build something with their own hands, they develop a stronger connection to the information. This project can be as simple or as elaborate as you want, depending on your child’s age and interest level.

Start by gathering your materials. You could use building blocks like LEGOs, wooden cubes, or even painted rocks. Assign a different color to each element group (like alkali metals, noble gases, halogens, etc.). This visual grouping helps children intuitively understand that elements in the same column share similar properties. For each block, have your child write the element’s symbol, name, and atomic number.

As they build the table, they will physically place each element in its correct spot. This hands-on process reinforces the table’s structure. You can talk about why certain elements are placed where they are. For instance, explain that the atomic number increases as you move from left to right. This isn’t just a craft project; it’s an interactive lesson in atomic structure and elemental properties that they are literally constructing from the ground up.

Edible Elements: A Tasty Lesson

What’s better than learning? Learning with snacks! An edible periodic table is a guaranteed way to capture your kids’ attention. Use a large sheet cake, a grid of brownies, or an array of sugar cookies as your base.

  • Cupcake Chemistry: Bake a batch of cupcakes and arrange them in the shape of the periodic table. Use different colored frosting to represent the element groups. On each cupcake, use writing gel or small candies to create the element’s symbol and atomic number.
  • Cookie Elements: Give each child a few square or round sugar cookies. Assign them specific elements to decorate. This is a great group activity where each child can take ownership of a few elements before combining them to create the full table.
  • Healthy Options: If you want to avoid a sugar rush, use a grid of crackers with different toppings or a veggie tray where you “write” the symbols with dip.

The best part is discussing the elements as you decorate. You could talk about how Sodium (Na) and Chlorine (Cl) come together to make table salt, which they might be using in their recipe. This project makes abstract concepts deliciously concrete.

Science Experiments For Homeschool Chemistry

Simple experiments bring the properties of elements to life. You don’t need a state-of-the-art lab; many impactful demonstrations can be done with household items. These experiments help connect the symbols on the chart to real-world reactions.

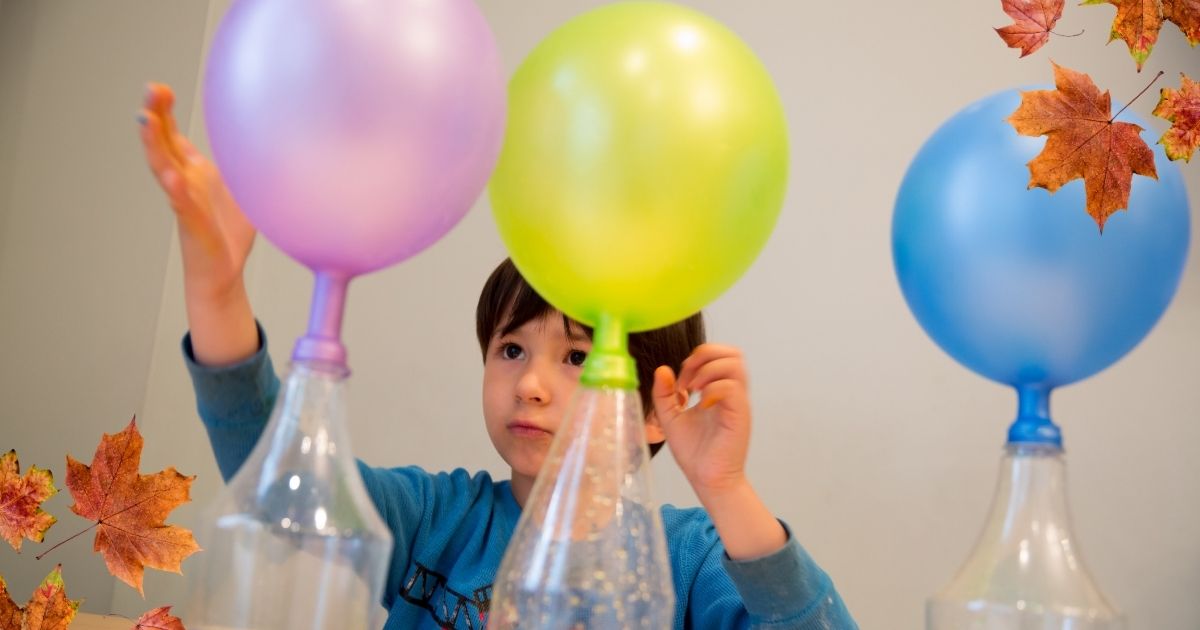
1. Exploring Density with Liquids:

  • Concept: This experiment demonstrates that different liquids (made of different molecules) have different densities.
  • Materials: A tall clear glass, water, vegetable oil, corn syrup, and food coloring.
  • Procedure: First, add a few drops of food coloring to the water. Slowly pour the corn syrup into the glass. Next, carefully pour the colored water on top of the syrup. Finally, add the vegetable oil. The liquids will form distinct layers because of their different densities. You can then drop in small objects like a grape or a piece of plastic to see where they settle.

2. Acids and Bases with Cabbage Juice:

  • Concept: This shows how indicators change color to identify acids and bases.
  • Materials: Red cabbage, hot water, a blender, a strainer, and several clear cups. For testing, use lemon juice (acid), baking soda mixed with water (base), and vinegar (acid).
  • Procedure: Chop the red cabbage and blend it with hot water. Strain the liquid to get your purple indicator juice. Pour a small amount into each cup. Add a different substance to each cup and watch the color change! The indicator will turn pink/red with acids and blue/green with bases.

3. Building Molecules:

  • Concept: This helps visualize how atoms of different elements combine to form molecules.
  • Materials: Gumdrops or marshmallows of different colors, and toothpicks.
  • Procedure: Assign an element to each color (e.g., white for Hydrogen, red for Oxygen). Use the toothpicks to connect the “atoms.” You can build a water molecule (H₂O) with two white gumdrops connected to one red one. Or try carbon dioxide (CO₂) with a black “carbon” atom in the middle and two red “oxygen” atoms on either side.

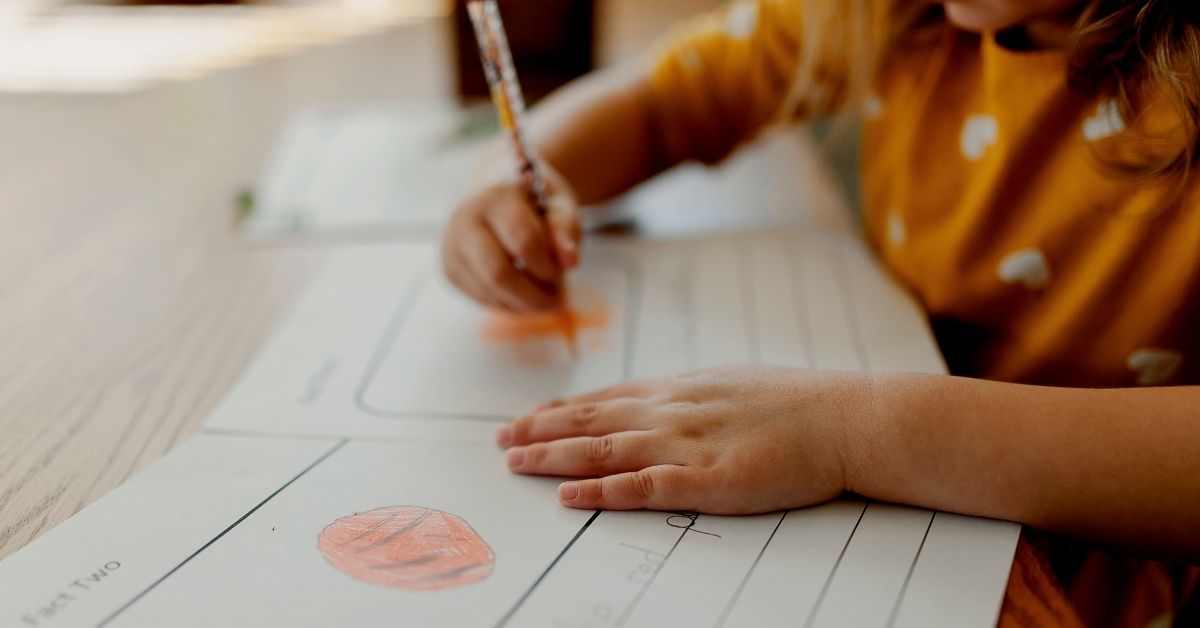
Making Element “Trading Cards”

Another engaging project is creating a set of element trading cards. This activity combines research, writing, and art. Each card can feature a single element and include key information that your child researches. It encourages them to dig deeper than just the symbol and atomic number.

For each card, they should include:

  • The element’s name, symbol, and atomic number.
  • A drawing of what the element looks like or what it’s used for.
  • Key properties, such as its state at room temperature (solid, liquid, gas).
  • A list of common uses (e.g., for Helium: balloons, for Neon: signs).
  • A “fun fact” they discover during their research.

Once the cards are made, you can use them for various games. Play a round of “Guess the Element” where one person reads clues from the card and others have to guess which element it is. You can also have them sort the cards into their respective groups, like noble gases or alkali metals. This project turns learning into a collectible hobby and provides a great study tool they can be proud of creating.

Keep Exploring And Learning

The periodic table doesn’t have to be a dry, difficult subject. By approaching it with a sense of play and curiosity, you can give your child a lasting appreciation for the wonders of chemistry. The key is to connect the chart on the wall to the world they experience every day. Whether you’re building with blocks, baking cookies, or conducting simple experiments, you are building a foundation of scientific understanding.

For more practical homeschool advice, lesson plans, and resources, be sure to explore more of our blog posts at DKM Homeschool Resource. We are here to help you make your homeschooling journey a success.

Rainy Day? Keep Your Child Busy With These 3 Fall Science Projects

When the weather turns gray and your plans for outdoor play get washed away, it’s time to turn your kitchen table into a mini science lab. Rainy days are perfect for hands-on learning, especially when your kids can mix, build, and discover all while staying warm and dry. That’s where rainy day science activities come to the rescue! These experiments are not only fun but educational — helping your homeschoolers explore STEM concepts in creative, fall-themed ways.

Below, you’ll find three engaging fall science projects for kids that are simple, affordable, and guaranteed to spark curiosity. No fancy lab coats required — just a sense of adventure (and maybe a towel for spills).

1. Leaf Chromatography: Discovering Hidden Colors

Fall is full of vibrant reds, oranges, and yellows — but have you ever shown your child where those colors come from? This classic homeschool science experiment reveals the hidden pigments inside leaves through a process called chromatography. It’s a fantastic way to tie science to the beauty of autumn.

What You’ll Need:

  • A few freshly fallen leaves (different colors work best)
  • Rubbing alcohol
  • Coffee filters or paper towels
  • Glass jars or cups
  • A spoon or craft stick
  • Tape
  • A pencil

Steps:

  1. Tear up the leaves into small pieces and place each type in a separate glass jar.
  2. Pour in a bit of rubbing alcohol — just enough to cover the leaves.
  3. Mash the leaves using the back of a spoon or craft stick to help release their pigments.
  4. Cover the jar loosely with plastic wrap and place it in a warm spot (like near a sunny window) for about 30–60 minutes.
  5. Cut a strip of coffee filter and tape it to a pencil so that the strip just touches the liquid in the jar.
  6. Watch the magic happen! Over the next hour, the pigments will travel up the paper, separating into bands of different colors.

Science Behind It:

Leaves contain various pigments — chlorophyll (green), carotenoids (yellow/orange), and anthocyanins (red/purple). In summer, chlorophyll dominates, but in fall, as the plant prepares for winter, chlorophyll breaks down and the other pigments shine through. Chromatography shows these hidden colors in action.

Try This Twist:

Compare the results of leaves from different trees — or even evergreen needles. Ask your child to guess which pigments they’ll see before they begin. Turn it into a mini science fair presentation by recording observations in a notebook.

2. Build a Pumpkin Volcano (Yes, Really!)

What’s more fall-themed than pumpkins? This experiment adds some fizz and fun to your homeschool day by turning a small pumpkin into a bubbling volcano. It’s one of those rainy day science activities that looks messy but teaches valuable lessons about chemical reactions — and gives you an excuse to use that leftover pumpkin from Halloween decorating.

What You’ll Need:

  • A small or medium pumpkin
  • Baking soda
  • Vinegar
  • Dish soap
  • Food coloring (optional, but highly recommended)
  • A tray or large plate to catch the mess

Steps:

  1. Cut off the top of the pumpkin and scoop out the seeds (save them for roasting later!).
  2. Place the pumpkin on a tray to contain the eruption.
  3. Add baking soda inside — about 3–4 tablespoons.
  4. Squeeze in dish soap and a few drops of food coloring.
  5. Pour vinegar into the pumpkin and watch the eruption!

Science Behind It:

The fizzing and bubbling are the result of an acid-base reaction between vinegar (acid) and baking soda (base). When they combine, they create carbon dioxide gas — the bubbles you see “erupting.” The dish soap adds frothiness, creating that lava-like flow.

Learning Extensions:

  • Measure the reaction: Try different amounts of baking soda or vinegar to see which combination gives the biggest eruption.
  • Add math: Have your child measure ingredients and record how the reaction changes.
  • Incorporate art: Afterward, use the pumpkin as a canvas — let your child paint or carve it with a “volcanic” design.

This is one of those perfect fall STEM projects for kids because it combines chemistry, art, and hands-on fun in one go.

3. Weather in a Jar: Make a Mini Water Cycle

Rainy days are a great time to talk about — well, rain! Teach your child how the water cycle works with this easy and visual experiment. They’ll create clouds, condensation, and even “rain” inside a jar.

What You’ll Need:

  • A large glass jar
  • Hot water
  • Ice cubes
  • A plate
  • Food coloring (optional)
  • Plastic wrap or lid

Steps:

  1. Pour hot water into the jar (about one-third full).
  2. Add a few drops of food coloring to make the water more visible.
  3. Cover the jar with a plate or plastic wrap.
  4. Place ice cubes on top of the lid.
  5. Watch what happens! In a few minutes, droplets will begin to form inside the jar and fall back into the water like rain.

Science Behind It:

This experiment demonstrates evaporation, condensation, and precipitation — the main parts of the water cycle. The hot water evaporates, the ice cools the vapor causing condensation, and the droplets that form eventually “rain” back down.

Discussion Prompts:

  • Ask your child: Where else do we see evaporation in daily life?
  • Have them draw and label the stages of the water cycle.
  • Talk about why rain helps plants grow — and why too much rain can cause problems like floods.

Why Fall Science Projects Are Perfect for Homeschoolers

Why Fall Science Projects Are Perfect for Homeschoolers

Autumn offers a unique mix of natural materials, changing weather, and cozy indoor time — all of which are great opportunities for hands-on STEM learning. The beauty of these experiments is that they don’t feel like “schoolwork.” Instead, they encourage creativity, observation, and curiosity — essential traits for young scientists.

When kids get to see and touch science, concepts that might seem abstract suddenly click. A rainy afternoon can transform into an unforgettable lesson about how nature works.

Here are a few more quick ideas to keep the curiosity flowing:

  • Create a “leaf library” by collecting and identifying different leaves.
  • Track the temperature over several days and make a graph.
  • Make bird feeders from pinecones and peanut butter, then observe which birds visit.

These small projects build problem-solving skills and spark independent exploration — the kind of learning that sticks far beyond the lesson.

Tips for Making the Most of Rainy Day Science Activities

To make your homeschool science sessions smoother (and less messy), keep these practical tips in mind:

  • Prepare a “science box.” Stock it with essentials like baking soda, vinegar, food coloring, droppers, plastic cups, and paper towels. Having supplies ready means you can jump into experiments anytime.
  • Let your child lead. Ask them what they notice, what they predict, and how they think it works. Encourage open-ended thinking rather than just “right answers.”
  • Document discoveries. Keep a science journal or photo log. Writing or drawing what they see helps reinforce learning.
  • Use nature as your classroom. Even when it’s raining, you can observe clouds, puddles, and the smell of wet soil — all parts of the science of weather and ecosystems.
  • Turn mistakes into learning. If something doesn’t work as expected, that’s part of the experiment! Talk about what could be changed next time.

Remember, the goal isn’t perfection — it’s exploration. Messy experiments often lead to the best “aha!” moments.

Keep the Learning Flowing — Even on Cloudy Days

A rainy day doesn’t have to dampen your homeschool spirit. With a few simple supplies and a sense of curiosity, your kids can explore chemistry, biology, and physics right from your kitchen table. Whether you’re uncovering the colors in leaves, erupting pumpkins, or making rain in a jar, these projects bring science to life in the most delightful way.

Homeschooling is about flexibility — using real-life moments (like rainy afternoons) as opportunities to learn together. So the next time storm clouds roll in, grab your “science box,” pour some cocoa, and let your little scientists get to work.

Keep Exploring with DKM Homeschool Resource

Looking for more creative homeschool ideas? Check out the latest posts on DKM Homeschool Resource for lesson plans, DIY projects, and educational tips tailored for hands-on learners. Whether you need more homeschool science experiments, creative writing prompts, or curriculum help, we’ve got you covered.

Make every season a learning season — rain or shine!

Best Curriculum For Geography Elementary Students

Homeschooling comes with the rewarding challenge of tailoring education to your child’s unique needs. When it comes to geography, developing an elementary school program doesn’t just nurture knowledge about the world—it fosters curiosity, cultural understanding, and critical thinking. For parents, finding the best geography curriculum for elementary students can sometimes feel overwhelming. 

This guide will walk you through some of the best homeschool geography programs and essential resources to make teaching geography engaging, effective, and fun.

What To Look For In A Geography Curriculum For Elementary Students

Before we dig into specific programs, it’s essential to know what to look for in a geography curriculum. Not all programs are created equal, and finding the right fit depends on your child’s learning style and your teaching goals. Here are the key elements to consider:

  • Age-Appropriate Content: The curriculum should align with your child’s developmental stage. Younger students often benefit from visual aids and interactive activities, while older elementary students can handle more comprehensive learning materials.
  • Global Perspective: Effective geography programs should introduce students to diverse countries, cultures, and environments to spark curiosity about the world.
  • Flexibility: Whether structured or relaxed, choose a program that fits your homeschooling schedule and philosophy.
  • Integration with Other Subjects: Geography ties beautifully with history, science, and even literature. A solid curriculum will make connections across subjects.

Each homeschool family is unique, and what works for one might not work for another. Explore these highly regarded options to find the one that feels tailored to your child’s learning experience.

Top Geography Curriculums For Elementary Homeschool Students 

  1. Beautiful Feet Books – Geography Through Literature

If you’re searching for a geography curriculum that weaves storytelling into learning, Beautiful Feet Books offers an innovative approach. This program combines reading with hands-on activities, teaching geography through classic children’s books.

  • Features: 
    • Students explore maps and cultures while reading family-friendly literature. 
    • Activities include map-making, creating timeline projects, and learning geographic facts embedded in stories. 
    • The curriculum includes discussion questions to support comprehension. 
  • Why It’s Great: 
    • Makes geography engaging through rich narratives that provide cultural depth. 
    • A flexible pace can be adjusted to your child’s learning speed. 
    • Promotes not only geographic understanding but also a love of reading. 

This curriculum is wonderful for children who thrive in imaginative environments and families that want to incorporate geography seamlessly into their literature studies. 

  1. Mapping the World by Heart

This award-winning curriculum emphasizes creativity and memorization, encouraging students to map the world entirely from memory.

  • Features: 
    • Includes exercises to learn continents, oceans, countries, and capitals. 
    • Encourages artistic activities like drawing maps and labeling geographic features intuitively. 
    • Independent learners can progress at their own pace, while younger students may require parental guidance. 
  • Why It’s Great: 
    • Develops strong map skills and spatial awareness. 
    • Encourages creative expression, ideal for visual learners. 
    • Builds long-term memory of geographic facts through engaging repetition. 

This program has been particularly praised for giving students a solid foundation in the “big picture” of world geography, which they can expand upon in later grades.

Top Geography Curriculums For Elementary Homeschool Students 

  1. Evan-Moor Geography Series

Evan-Moor’s Geography Skill Sharpeners is ideal if you’re looking for a straightforward, workbook-style program for elementary students.

  • Features: 
    • Workbooks are divided by grade level, catering to ages 4-11. 
    • Includes activities to develop map-reading and problem-solving skills. 
    • Students learn about landforms, capitals, and cultural customs. 
  • Why It’s Great: 
    • Affordable and easy to use, requiring minimal preparation for parents. 
    • Builds foundational skills step-by-step, offering clear progression. 
    • Covers a range of topics, from regional geography to global environments. 

Evan-Moor’s format is perfect for parents seeking a structured yet simple resource to add to their homeschooling toolkit.

Additional Elementary Geography Resources 

You don’t need to rely on a full curriculum to make geography education successful. Incorporating supplemental resources can enhance your child’s experience. 

Globes and Maps 

A high-quality globe or map is essential for making geography lessons tangible. Consider the following options: 

  • Laminated wall maps for reference and detailed discussions. 
  • Interactive globes with digital features (some even connect to apps for immersive learning). 
  • State or regional maps for closer studies of your local area. 

Geography Board Games 

Turn learning into a family activity with entertaining board games. Some of the best include: 

  • Scrambled States of America Game – Perfect for introducing U.S. geography in a fun way. 
  • Where in the World? – This trivia-based game challenges students’ global knowledge. 
  • Ticket to Ride – While primarily a strategy game, it doubles as an excellent way to study geography. 

Digital Resources 

Interactive online tools make geography more relatable to today’s tech-savvy learners. 

  • National Geographic Kids: Offers engaging articles, videos, and quizzes tailored for children. 
  • Google Earth: Take your child on virtual explorations around the globe. 
  • Sheppard Software: This website provides free geography games for different skill levels. 

Supplementing your chosen curriculum with these tools adds versatility to your homeschool approach, making geography not only educational but incredibly enjoyable. 

How To Teach Geography Without A Curriculum 

Sometimes, the best lessons come from real-world experiences rather than pre-packaged programs. By incorporating geography into everyday activities, you can help your child develop a natural interest in the subject.

  • Traveling (Even Locally): Take trips to nearby landmarks or parks. If possible, include road trips to teach regional geography or world travel to foster global awareness. 
  • Cooking: Prepare meals from different countries while discussing their geographic and cultural backgrounds. 
  • Documentaries: Watch kid-friendly documentaries on National Geographic or PBS to learn about different regions and cultures. 

The flexibility of homeschooling means you can create meaningful learning opportunities that go beyond workbooks and lesson plans.

Encouraging Curiosity in Young Geography Learners 

Children are naturally curious, and geography is a subject that lends itself to exploration. To keep students engaged, here are some creative strategies to use alongside your materials:

  • Create a Geography Journal: Have your child keep a journal where they draw maps, write about countries, or document what they’ve learned. 
  • Use Stories to Teach: Books like “Children Just Like Me” introduce children to the lives of kids from around the world. 
  • Celebrate World Cultures: Dedicate a week each month to a different region. Learn its traditions, holidays, or even simple phrases in its language. 

These activities are not only fun but also nurture a deeper appreciation for the diverse world we live in.

Why Geography Matters In Early Education 

Teaching geography in elementary school goes far beyond labeling countries on a map; it establishes crucial skills and worldviews. Geography builds spatial awareness, helping children understand their place in the world. It also widens their perspective, fostering empathy and cultural respect by exposing them to diverse ways of life.

Introducing geography early also ties in well with other subjects, such as history and science. For instance, while learning about a historical event, students can identify the regions involved on a map to connect past events with modern geography. By choosing a well-rounded approach—whether through a complete curriculum, supplemental activities, or real-world exploration—you can ensure your child develops a solid geographic foundation while enjoying the process.

Incorporating Your Child’s Interests In Their Homeschooling

Interest-led homeschooling is an approach that centers on your child’s unique passions and curiosities. It moves away from one-size-fits-all education in favor of a learning experience tailored to what excites your child. Not only does this foster a genuine love for knowledge, but it also equips them with skills and confidence that extend beyond academics. 

Here, we’ll explore how you can design a child-driven homeschool curriculum that turns your child’s interests into powerful educational tools.

Understanding The Foundations Of Interest-Led Homeschooling 

Interest-led homeschooling shifts the focus from rigid, pre-determined curricula to a more flexible, child-centered model. Instead of enforcing lessons, you allow your child to guide their education based on what fascinates them most. This doesn’t mean abandoning structure entirely — rather, it reshapes learning to be more dynamic and adaptable. 

Why It Works 

  • Motivation through Personal Interest 

Kids are naturally curious, but they thrive when the subject matter aligns with their passions. Learning becomes less of a chore and more of an exciting adventure. 

  • Deeper Engagement and Retention 

When children care about what they’re studying, their ability to focus and retain information increases significantly. This can lead to more meaningful and lasting learning experiences. 

  • Life-Long Learning Skills 

Interest-led homeschooling teaches kids how to research, pursue new information, and think critically about subjects they care about. These are essential skills not only for academics but also for life. 

Is It Right for Every Child? 

Every child is unique, and so are their learning preferences. While some thrive under interest-led homeschooling, others may work better with a combination of structured and child-driven learning. Observe and communicate with your child to find what works best for them. This approach is endlessly flexible, meaning you can adjust it to suit your child’s learning pace, attention span, and evolving interests.

Creating A Child-Driven Homeschool Curriculum 

Designing a curriculum that is both engaging and educational takes careful planning. Below are steps to help you structure an interest-led homeschooling plan tailored to your child

  1. Start with Observation 

Sometimes, children can articulate their interests, but at other times, you may need to pay close attention to their natural tendencies. Watch for patterns in their play, questions they frequently ask, or how they spend their free time. 

  • Do they devour books about animals or robots? 
  • Are they constantly building things with blocks or drawing elaborate pictures? 
  • Do they ask endless “how” and “why” questions about a specific topic? 

These observations will give you insight into what captivates their attention. 

  1. Build a Curriculum Around Core Subjects 

Even within an interest-led framework, it’s essential to cover foundational subjects like math, science, reading, and writing. The idea is to integrate these subjects into their interests. For example:

  • Math: If your child loves baking, teach fractions and measurements through following recipes. Are they into cars? Calculate speed, distance, or fuel efficiency. 
  • Science: Incorporate their interest in nature by exploring biology, ecosystems, or weather patterns. If they love crafting, use chemistry to explain how different materials interact. 
  • Reading and Writing: Provide articles, books, or stories about their favorite topics. Encourage them to write stories, reports, or journal entries tied to their interests. 
  1. Incorporate Hands-On Learning 

Children learn best when they can actively participate. Incorporate hands-on activities that immerse them in the subject matter. Here are a few examples:

  • If they’re fascinated by space, build a model solar system or try simple experiments to demonstrate gravity and inertia. 
  • Have an aspiring artist? Set up lessons in various mediums and visit art galleries for inspiration. 
  • For kids into animals, trips to the zoo or volunteering at a shelter can be life-changing experiences. 
  1. Use a Project-Based Approach 

Projects are a versatile way to combine multiple skills around one topic. For instance:

  • A child interested in history could create a diorama of an ancient civilization, research historical milestones, and present it as a report. 
  • For kids who love technology, encourage them to build a simple website or code a basic game based on their favorite hobby.

Tools And Resources For Interest-Led Homeschooling 

Tools And Resources For Interest-Led Homeschooling 

Transitioning to interest-led homeschooling doesn’t mean doing it all alone. There are plenty of tools, apps, and resources to ease the workload and inspire creativity. 

  • Online Platforms 

Websites like Outschool and Khan Academy offer online classes on diverse topics. If your child loves dinosaurs, they can find lessons specifically tailored to that. 

  • Library and Bookstores 

Nothing beats the variety and depth you’ll find at libraries or bookstores. A broad collection of books, magazines, and multimedia materials can enrich any curriculum. 

  • Community Resources 

Tap into local resources like museums, art centers, or science labs. Community groups or co-ops for homeschoolers might also have workshops or field trips tailored to kids’ interests. 

  • Educational Kits and Subscriptions 

STEM kits, crafting boxes, and coding subscriptions are excellent for hands-on activities aligned with your child’s passions. 

  • Apps and Software 

Numerous apps teach math, reading, coding, and more through game-like interfaces that hold your child’s interest. 

Practical Tips For Homeschooling Based On Interests 

Making an interest-driven curriculum effective requires balance. Here are a few actionable tips to keep things running smoothly:

  • Encourage Independence: Provide them with tools to explore topics independently. This could mean teaching them how to research online, borrowing library books, or giving them the freedom to experiment. 
  • Set Clear Goals: While child-led learning is flexible, having goals ensures progress. For example, decide with your child what they’d like to achieve by the end of a project or term. 
  • Take Breaks: Even topics that kids adore can lead to burnout. Include downtime and allow for variety in the daily schedule. 

Breaking Barriers in Interest-Led Homeschooling 

While this method is rewarding, challenges can arise — especially when trying to balance passions with academic requirements. It can be particularly tricky if your child’s interest doesn’t seem to overlap with traditional school subjects. 

For example, if your child loves video games, you might worry this isn’t an “educational” pursuit. However, this can be an opportunity to introduce game design, programming, or even the psychology of what makes games engaging. Similarly, a love of makeup can translate into studying chemistry (how formulas work), art (color theory), and business (marketing beauty products). 

Parents who follow the interest-led model often discover that no passion is without educational potential. With enough creativity and patience, any interest can serve as a gateway to meaningful learning.

Fostering Lifelong Curiosity Through Personalized Education 

Interest-led homeschooling isn’t just about academics; it’s about nurturing a lifelong love of learning. When children see that their passions are valued and treated seriously, they become more confident, excited, and capable learners. 

By incorporating your child’s interests into their education, you’re giving them the tools to explore the world on their terms — an empowering experience that carries long-term benefits. By blending creativity, adaptability, and structure, you can create an educational environment where learning feels natural, engaging, and deeply rewarding.

How Much Time Should Be Spent On Physical Education Per Day?

One of the best parts about homeschooling is the freedom to customize your child’s education. You get to pick the math curriculum, dive deep into historical periods that spark curiosity, and turn your kitchen into a science lab. But what about gym class? Figuring out the right amount of homeschool physical education can feel like a puzzle. Are you doing enough? Too much? Let’s be honest, some days just getting everyone dressed and fed feels like an Olympic event. 

This guide will help you understand the recommendations, find a rhythm that works for your family, and make fitness a fun and natural part of your homeschool day.

What Are the Official Recommendations?

When you’re trying to build a homeschool schedule, looking at official guidelines can be a great starting point. While homeschool laws vary by state, the fitness recommendations for children are pretty consistent across the country. The U.S. Department of Health and Human Services, along with organizations like the CDC, provides clear goals for physical activity in school-aged children. These aren’t just arbitrary numbers; they are based on extensive research into what kids need for healthy development, both physically and mentally.

For children and adolescents aged 6 through 17, the recommendation is 60 minutes or more of moderate-to-vigorous physical activity daily. This might sound like a lot, but it doesn’t have to happen all at once. You can break it up into smaller, more manageable chunks throughout the day. A 20-minute morning walk, a 20-minute playground session after lunch, and a 20-minute bike ride before dinner all add up to meet that daily goal. The key is to get their hearts pumping and their muscles working.

It’s also important to understand what “moderate-to-vigorous” activity actually means. Moderate-intensity activity will raise their heart rate and make them breathe harder, but they should still be able to talk. Think of a brisk walk, riding a bike on level ground, or a friendly game of tag. Vigorous-intensity activity will cause heavy breathing, and they’ll only be able to speak a few words at a time. Examples include running, swimming laps, or playing soccer. A good homeschool fitness plan incorporates a mix of both.

Building a Great Homeschool Physical Education Plan

Building a Great Homeschool Physical Education Plan

Creating a plan for homeschool physical education doesn’t need to be complicated. The goal is to make movement a regular and enjoyable part of your routine. Think about your child’s interests and your family’s lifestyle. Do they love being outdoors? Are they drawn to music and dance? Use their passions as a launchpad for your PE activities. A well-rounded plan should include a variety of activities that work on different aspects of fitness.

Here are the three main components the guidelines suggest including each week:

  • Aerobic Activity: This should make up the bulk of that 60-minute daily goal. Most of the 60 minutes per day should be either moderate- or vigorous-intensity aerobic physical activity. You should also aim to include vigorous-intensity physical activity on at least 3 days per week.
  • Examples: Running, skipping, swimming, dancing, bike riding, playing tag.
  • Muscle-Strengthening Activity: These activities make muscles do more work than usual. Include these as part of their 60 minutes of daily activity on at least 3 days a week.
  • Examples: Climbing on playground equipment, gymnastics, push-ups, sit-ups, tug-of-war.
  • Bone-Strengthening Activity: These activities produce a force on the bones that promotes bone growth and strength. Include these as part of their 60 minutes of daily activity on at least 3 days a week.
  • Examples: Jumping rope, running, basketball, tennis, hopscotch.

Notice how much overlap there is! An activity like running or basketball checks all three boxes. You don’t need to plan three separate types of activities each day. Just focus on providing diverse opportunities for movement.

Making Fitness Fun and Engaging

The biggest advantage you have as a homeschool parent is flexibility. You aren’t confined to a gymnasium or a rigid bell schedule. This freedom allows you to tailor physical education to your child’s unique personality and interests, which is the secret to long-term success. When kids enjoy what they are doing, they are more likely to stay engaged and build healthy habits that last a lifetime. Forget boring drills and think outside the box to make fitness a highlight of your homeschool week.

You can turn almost any interest into a physical activity. If your child is obsessed with superheroes, create a “superhero training” obstacle course in the backyard. If they love video games, look for active options on consoles like the Nintendo Switch that involve dancing or virtual sports. A nature lover might enjoy a “biology hike” where you identify plants and animals while getting your steps in. The goal is to connect movement with joy, not to treat it as a chore that needs to be checked off a list. Let your child have a say in planning PE activities to give them a sense of ownership and increase their excitement.

Ideas for Daily Homeschool PE (Grades 1-6)

Stuck in a rut? Sometimes you just need a list of fresh ideas to get the creativity flowing. Remember, you can mix and match these, do them indoors or outdoors, and adapt them for different ages and abilities. The best PE is the PE that actually gets done!

Here are some ideas to get you started:

  • Morning Wake-Up: Start the day with 15 minutes of activity. This could be a quick yoga session (plenty of free kid-friendly videos online), a dance party to their favorite songs, or a brisk walk around the block.
  • Skill of the Week: Focus on learning a new skill each week. This could be dribbling a basketball, learning to jump rope, practicing a new yoga pose, or trying to master a cartwheel. It provides a sense of accomplishment.
  • Themed Obstacle Courses: Use pillows, chairs, and blankets to create an indoor course on a rainy day. Outside, use pool noodles, cones, and chalk to design challenges. Time them to add a competitive element!
  • Nature Scavenger Hunts: Give your kids a list of things to find on a walk or hike (a smooth rock, a Y-shaped stick, a red leaf). The focus on finding items keeps them moving without them even realizing it.
  • YouTube Fitness Channels: There are amazing, high-quality channels dedicated to kids’ fitness. Look for channels that offer dance workouts, yoga adventures, and simple exercises designed for children. It’s a great option for a no-prep activity.
  • Backyard Olympics: Plan a mini-Olympics with events like the long jump (into a sandbox), the “discus” throw (with a frisbee), and short sprints. You can even make medals out of cardboard and ribbon.

Beyond the 60-Minute Guideline

While the 60-minute guideline is a fantastic benchmark, physical education in a homeschool setting is about more than just meeting a time requirement. It’s about cultivating an active lifestyle. Look for opportunities to weave movement into your entire day, not just during a designated “PE” block. These small moments can add up and make a big difference in your child’s overall health and well-being. It helps normalize activity, showing them that our bodies are made to move.

For example, you could use a mini-trampoline for bouncing while reciting spelling words. Or, practice math facts while doing jumping jacks—one jump for each part of the equation (2 + 2 = 4 is four jumps!). Taking frequent “brain breaks” for stretching or a quick dance party between subjects can help improve focus and retention. These integrated activities demonstrate that physical health and academic learning are not separate; they are deeply connected and support one another.

This holistic approach also extends to everyday chores and activities. Raking leaves, helping with gardening, washing the car, or carrying groceries are all forms of physical activity. Involving your children in these tasks not only teaches them responsibility but also keeps them moving. The goal is to shift the mindset from “exercising” to simply “living actively.” By embracing this philosophy, you help your kids build a foundation for a healthy, active life long after their homeschool years are over.

Remember that you are their biggest role model. When your children see you enjoying physical activity, whether it’s going for a run, taking a yoga class, or just having a family dance-off in the living room, they are more likely to view it positively. Your enthusiasm is contagious. Make movement a family value, and you’ll be giving your children a gift that supports their health for decades to come.

We hope this guide helps you feel more confident in planning physical education for your young learners. Every homeschool journey is unique, so find the rhythm and routine that brings joy and energy to your family.

For more practical homeschool advice and resources to support you on your educational adventure, be sure to explore more of our blog posts here at DKM Homeschool Resource.

Homeschooling On A Budget: Are Free Curriculums Any Good?

Parents who are trying to homeschool without draining their bank accounts almost always end up searching for the best free homeschool resources. The internet is full of websites claiming to offer full-year plans, lesson banks, printable worksheets, and even accredited-looking programs — all at no cost. 

The question is not whether free options exist. They do. The real question is whether they are any good, and whether they can realistically support a full year of homeschooling without leaving gaps or burning you out.

Are Free Homeschool Curriculums “Good Enough”?

A free curriculum can be genuinely strong if you understand what you’re getting (and what you’re not). Free rarely means “bad.” It usually means “incomplete,” “DIY-heavy,” or “time-intensive.” Paid programs cost money because they bundle the structure, hand-holding, assessments, and support. When you remove the price tag, you often also remove that “done-for-you” layer — not always content quality.

There are free programs written by credentialed teachers and subject-matter experts. Some are run by nonprofits. Some are parent-built and tested. Quality exists. But you must curate, not just download whatever ranks first on Google.

Best Free Homeschool Resources (Reviews & What They’re Best For)

Below are widely used free options — not random Pinterest finds — with quick notes on where they shine.

Easy Peasy All-In-One Homeschool

A K-12, Christian-leaning curriculum with full scope and sequence, printable worksheets, and online links.

  • Best for: families who want “open and go” with minimal planning
    Strengths: completely free, daily lesson plans, covers multiple subjects
    Limitations: religious framing not for everyone; layout can feel dense if you prefer modern UI

Khan Academy

Free video-based lessons, practice sets, progress tracking for math, reading, grammar, science, and SAT prep.

  • Best for: math mastery and independent work
    Strengths: high-quality instruction, mastery-based, no fluff
    Limitations: not a full humanities curriculum; you must build reading/writing around it

AmblesideOnline

A Charlotte Mason approach built on rich “living books,” narration, and gentle, literature-driven learning.

  • Best for: book-loving families and narrative learning
    Strengths: elegant reading lists, philosophy-strong, no worksheets needed
    Limitations: heavy parent involvement to source books and manage pacing

CK-12

STEM-heavy open educational resources with simulations, digital textbooks, and concept maps.

  • Best for: science and math support or spine curriculum
    Strengths: high content quality, adaptable, good for older grades
    Limitations: lacks whole-child “program” feel; build your own schedule

Homeschooling On A Budget

Liberty’s Kids / Crash Course / National Archives / PBS LearningMedia

Not full curriculums, but vivid supplements that make content land.

  • Best for: history enrichment and primary sources
    Strengths: free, engaging, documentary-rich
    Limitations: require you to scaffold into an actual course

Hidden “Costs” Of Free (That Are Not Money)

Free is not costless. The cost just shifts.

Common trade-offs:

  • Time: you become the designer — stitching, sequencing, pacing, and auditing gaps
  • Printer ink & paper: many free plans are worksheet-heavy
  • Decision fatigue: abundance of choices drains energy
  • Quality variance: anyone can publish “curriculum” online

None of that makes free bad — it just means you should count the cost in hours instead of dollars.

Four Areas Where Free Often Shines 

Free resources are particularly strong in skill-based subjects where the learning path is linear and assessable, like math, phonics, and grammar. These subjects lend themselves to drills, explanations, and mastery checks that work perfectly well in a free environment, especially when backed by platforms like Khan Academy or high-credibility OER (open educational resources). Another area where free shines is enrichment — documentaries, primary source archives, museum collections, and free ebook catalogs can make history and science richer than any textbook. 

Free also works extremely well for exploratory “low-risk” subjects like typing, coding fundamentals, and foreign language exposure, where you’re not committing to a multi-year spine. Finally, free excels when a parent already has a strong sense of pedagogy and wants control without paying for someone else’s structure.

Four Places Where Free Usually Struggles 

Where free tends to struggle is in full-program cohesion and muscle-saving structure. Many parents hit a mid-year wall not because the free lessons are weak, but because the planning workload stacks up. Another weak point is authentic writing feedback — you can get prompts for free, but you typically cannot get high-quality human feedback for free, and writing feedback matters. 

Free is also weaker for high-stakes high school planning where transcripts, accreditation, and counselor-backed documentation matter. And finally, free often lacks built-in accommodations for neurodivergent learners; you can adapt free resources, but the scaffolding is rarely embedded for you.

Budget-Friendly Tips To Make Free Curriculums Work Harder

  • Anchor one subject with a strong spine. Use Khan Academy for math or Ambleside for history, then add free supports around it.
  • Batch plan once a month. Don’t plan daily. Set one day to map 4–5 weeks.
  • Create a “minimum viable school day.” Define 3 must-do subjects so the day still “counts” when life implodes.
  • Standardize printing. Print by the month, not by the day; use grayscale; bind with cheap folders.
  • Use “platform pairs.” Example: Khan Academy (instruction) + CK-12 (readings) + Crash Course (context).
  • Outsource feedback surgically. Buy one writing course or tutor hour per term instead of a full paid curriculum.
  • Pre-decide your finish line. Decide what “done” means for each subject before you begin, so you don’t spiral in endless links.

A Parent Eye-Test For Evaluating Any Free Curriculum 

Before adopting a free program, skim the scope from quarter to quarter and ask: Does this sequence move forward in small, observable skill steps? Does it show what mastery looks like, not just what activities exist? Does it align with your worldview and local requirements? Can you tell at a glance what you are doing in Week 12, not only Week 1? 

If you cannot answer those questions after a short skim, you are adopting a mystery box and placing future stress on your own shoulders. Good free material is not just content — it is traceable learning over time.

What If You Mix Free With Low-Cost Instead Of Staying 100% Free?

You don’t get bonus points for spending zero dollars. You get results by spending dollars intentionally. A hybrid stack can preserve 80–90% cost savings while removing your biggest pain point. For example: stay free for math and history, spend $40–$60 on a writing program with actual feedback, and use your library for literature. Or buy one $35 PDF scope-and-sequence simply to “lock” your year, then populate it with free lessons. One strategic purchase often erases hours of planning debt.

When Free Is Actually The Best Choice

Free can be better than paid when you are trying homeschooling for the first time and don’t want to commit to a full purchase before you know your child’s learning style. It is also ideal when your child is ahead or behind grade-level because you can move horizontally across topics without fighting a paid program’s pacing guardrails. Free also allows generous rabbit trails — deep dives into astronomy, Roman law, digital art — without the guilt of “wasting money” on the detour.

When Paid Is Worth It

Paid is worth it when you are burned out managing all the invisible labor, when your teen needs transcript credibility, when you crave outside accountability, or when your child requires built-in accommodations that you do not have the bandwidth to design yourself. Paid is also the sanest choice when you’re multiplying for multiple kids and just need one system that runs without heroic planning.

So — Are Free Curriculums Any Good?

Yes — with eyes open. Free can deliver strong academics and rich experiences if you commit to doing the structural work a publisher normally does for you. The families who thrive on free don’t confuse “zero dollars” with “zero effort.” They plan in batches, define finish lines, pair platforms wisely, and spend surgically on the one or two constraints that money can solve faster than grit.

Parents who want to keep learning how to do this well have an advantage: you don’t have to figure it all out alone. Keep reading our blogs here at DKM Homeschool Resource for grounded advice, reviews, and real-world strategies that make homeschooling both doable and life-giving — even on a tight budget.

More Than A Hobby: Helping Kids Find Their Passion

Homeschooling creates a rare window for helping kids discover passions without the limitations of bells, rigid blocks, or a crowded curriculum. When children are given time, tools, and permission to go deep into something they care about, the result is more than a distraction or a pastime — it becomes a proving ground where they learn work ethic, identity, and resilience through meaningful work.

Why Passion Projects Matter in a Homeschool Setting 

Kids don’t discover what they care about by thinking — they discover it by doing. Homeschooling provides the breathing room that traditional school schedules often cannot. When a child spends hours sketching shoe designs, editing a video, learning to solve a Rubik’s Cube blindfolded, building a mini-greenhouse, or writing code, they are not wasting time. They are rehearsing skills that transfer: focus, iteration, patience, problem-solving, and self-direction. Passion projects are not “extra”; they are training for how young adults will navigate a world that rewards people who can learn independently and build things without waiting to be assigned.

Helping Kids Discover Passions in Daily Homeschool Rhythm

Here are practical ways to engineer your homeschool days so passions can surface without derailing academics:

  • Protect unstructured time on purpose. Passion cannot be scheduled tightly; leave margins.
  • Declare “project blocks” as valid schoolwork the same way math and reading count.
  • Allow rabbit holes to run long occasionally. Depth is often more valuable than finishing the worksheet.
  • Name the skills you see in the hobby. This reframes passion as real learning, not leisure.
  • Rotate exposure to new domains (crafts, trades, digital tools, outdoor skills, entrepreneurship).
  • Use a capture list (whiteboard or shared note) where kids log ideas they want to explore later.

What Parents Can Do to Make Passion Exploration Feasible 

What Parents Can Do to Make Passion Exploration Feasible 

Many children don’t advance beyond surface-level interest because starting feels heavy. A parent’s job is not to force or steer the passion, but to remove friction from entry. Put raw materials in reach — paper, scrap wood, old electronics to take apart, a camera app, a simple audio editor, a sewing kit, a domain to tinker with coding. Offer gentle prompts like, “Show me what you built today” rather than “Is it finished yet?” Make it easy to begin and safe to continue even when the outcome is unknown.

Signals That a Hobby Is Evolving Into a Real Passion

Passion is not an instant reveal — it shows up in repeated behavior. Watch for these observable markers:

  • Voluntary return without reminders
  • Tolerance for frustration without quitting immediately
  • Self-initiated upgrades (new tools, new skills, new methods)
  • Research without prompting (tutorials, forums, reverse-engineering others’ work)
  • Talking about it when they don’t have to
  • Trading other screen or leisure time to do it

When you see three or more of these consistently, you’re likely seeing passion, not a phase.

Guardrails That Keep Passion Projects Productive 

Freedom without framing can drift into chaos. The goal is not to run a child-led free-for-all, but to create a sandbox with edges. Set expectations: a project must be tangible, time-bounded, and visible. Ask your child to define a simple deliverable (“Build three prototypes,” “Record one finished clip each Friday,” “Grow something we can actually eat”). Add a review cadence — let children present work weekly to a parent or sibling. This single habit teaches accountability gently without killing intrinsic drive.

Guiding Without Controlling: Parent Tactics That Work

You don’t have to be the expert to be the enabler. These simple habits multiply momentum:

  • Ask questions that widen, not narrow:
    • What’s the next experiment you want to try?
    • Who is someone doing this well that you could model?
    • What obstacles are you hitting?
  • Co-plan constraints rather than outcomes: budget, tool list, deadline
  • Celebrate process not polish: show me what you tried, not just what worked
  • Narrate transferable skills aloud: “That revision loop is engineering thinking.”

Folding Passion Work into Official School Records 

If you track portfolios, transcripts, or evaluations, translate projects into academic language. A woodworking build becomes applied geometry and measurement. A video channel becomes composition, rhetoric, and media literacy. A micro-business becomes entrepreneurship and consumer math. Frame the same work in the vocabulary assessors recognize. This both dignifies the effort and reassures you that time spent is academically defensible.

Building a Repeatable Passion Project Cycle During the Year

To make passion cultivation sustainable instead of accidental, install a repeating rhythm:

  • Launch phase — proposal: problem, outcome, constraints, resources
  • Work phase — protected project blocks, logged time, visible Work-In-Progress
  • Review phase — weekly demo or short share-back to a real listener
  • Adapt phase — change scope, tool, or goal based on what was learned
  • Close phase — tangible artifact, written reflection, or public show-and-tell

Repeat this cycle 2–4 times per year instead of endlessly dragging one project.

Removing the Two Biggest Blockers: Perfectionism & Interruption

Perfectionism convinces kids they can’t start until it’s ideal; interruption convinces them there is never time to go deep.

To fight perfectionism:

  • Lower the bar of “first draft quality” on purpose
  • Require imperfect starts (e.g., “10 ugly sketches before 1 clean one”)
  • Make volume a metric (X attempts > one flawless output)

To fight interruption:

  • Give project blocks calendar priority
  • Reduce mid-block questions and task switches
  • Hold siblings and parents to the boundary

Depth only appears when the mind is allowed to stay.

When a Passion Stalls — How to Restart or Retire Gracefully

Stall does not always mean quit; it often means one of three things changed: difficulty, clarity, or stakes.

Use this triage:

  • If difficulty spiked: add tools, models, micro-lessons, or chunk the problem
  • If clarity faded: restate the goal in one sentence and shrink it
  • If stakes evaporated: add a real audience — a fair, exhibition, relative, or online post

If none of the above re-ignites interest, end with a closure ritual: name what was learned, archive the artifact, and free the mental shelf for the next thing. Ending clean is not failure — it is data.

The Parent Mindset That Makes This Work 

Treat passion like a muscle: exposure starts it, repetition grows it, continuity protects it. Resist the urge to over-engineer or narrate the child’s identity too early (“You are a painter”). Let identities stay provisional so children feel free to evolve without shame. Your posture is scaffolding, not steering. The win is not manufacturing a vocation at age twelve — it is raising a human who knows how to pursue one when the time comes.

Kids build futures out of the things they choose to work on when no one is grading them. Homeschooling gives parents unmatched leverage to make space for that kind of work. Protect it, name it, scaffold it lightly, and let it run long enough to matter. Then come back to DKM Homeschool Resource and browse more of our blogs for practical, usable guidance as you support your children with tools, structure, and confidence on the homeschool journey.

Pumpkin Spice In Homeschool? How To Use The Popular Flavor In Your Teachings!

As the leaves begin to turn and a crispness fills the air, the familiar scent of pumpkin spice seems to be everywhere. It’s in our coffees, our baked goods, and even our home fragrances. This beloved autumn flavor can be more than just a seasonal treat; it can be a powerful tool in your educational toolkit. 

By weaving the theme of pumpkin spice into your lessons, you can create engaging, multi-sensory learning experiences that capture the magic of the season. This guide will explore a variety of pumpkin spice homeschool activities that bring fall-themed lessons to life, turning your home into a vibrant and creative learning environment.

The beauty of homeschooling is the flexibility it offers. You can adapt your curriculum to your child’s interests and the world around them. What better way to connect with the season than by embracing one of its most popular symbols? From science experiments in the kitchen to creative writing prompts inspired by a warm mug of a pumpkin-spiced drink, the possibilities are vast. 

We will cover ideas for every core subject, showing you how to infuse your academic schedule with a dash of autumn fun. Prepare to make this fall a season of memorable and effective learning.

The Science Of Spice: Kitchen Chemistry And Botany

The kitchen is a fantastic laboratory, and pumpkin spice provides the perfect subject for a hands-on science lesson. The classic blend—cinnamon, nutmeg, ginger, cloves, and allspice—is a gateway to exploring botany, chemistry, and even human biology. By deconstructing the spice blend, you can teach your children where these flavors come from and the scientific principles that make them so appealing.

Start by examining each spice individually. You can create a sensory station where your child can see, smell, and touch each one. This leads naturally into a botany lesson.

  • Cinnamon: Explain that cinnamon comes from the inner bark of several tree species from the genus Cinnamomum. Show them pictures of the cinnamon tree and how the bark is harvested and rolled into quills (cinnamon sticks). You can even try grinding your own cinnamon sticks to compare the aroma to pre-ground powder.
  • Nutmeg and Mace: These two spices come from the same fruit of the Myristica fragrans tree. Nutmeg is the seed, while mace is the lacy, reddish covering around the seed. This is a great example of how one plant can produce multiple products.
  • Ginger: This pungent spice is the rhizome, or underground stem, of the Zingiber officinale plant. You can purchase a fresh ginger root from the store to show your child its unique shape and texture. This is an excellent opportunity to discuss different parts of a plant and their functions.
  • Cloves: Cloves are the aromatic dried flower buds of the Syzygium aromaticum tree. Their unique shape makes them easy to identify. You can discuss the life cycle of a flowering plant and how cloves are harvested before the flowers open.
  • Allspice: Despite its name, allspice is not a blend. It is the dried, unripe berry of the Pimenta dioica tree. It was named allspice because it was thought to taste like a combination of cinnamon, nutmeg, and cloves.

Once you’ve explored the origins, move on to some kitchen chemistry. A simple activity is to mix your own pumpkin spice blend. Provide your children with the individual spices and a recipe, and let them measure and mix. This practices measuring skills and fractions while creating a tangible product. You can then use this blend to explore concepts like solubility. 

Have them stir the spice mix into different liquids—hot water, cold water, oil, and milk—to observe how well it dissolves or suspends. This simple experiment introduces ideas about solutions, suspensions, and the role of temperature in chemical reactions.

Pumpkin Spice Homeschool Activities For Math And Logic

Pumpkin Spice Homeschool Activities For Math And Logic

Fall themes offer a wonderful backdrop for making math more engaging. Pumpkins, spices, and autumn treats can be used to teach a wide range of mathematical concepts, from basic counting to more complex problem-solving. The key is to connect abstract numbers to tangible, seasonal objects. For younger learners, a trip to a pumpkin patch or even the local grocery store can become a living math lesson. Have them count the pumpkins, sort them by size or color, and estimate their weight. You can bring a small scale to check their estimates, introducing the concepts of mass and measurement.

Back at home, use pumpkin seeds for counting, grouping, and simple addition and subtraction problems. For a more advanced activity, have your children carve a pumpkin and then estimate the number of seeds inside. Once they’ve cleaned and counted the seeds, they can calculate the difference between their estimate and the actual number. This process involves estimation, counting, and subtraction. You can extend this into a lesson on multiplication by having them group the seeds into sets of ten and count the groups. For a statistics project, you could weigh the pumpkin before and after carving to calculate the weight of the part you removed. You could also measure the pumpkin’s circumference and diameter, introducing basic geometry.

Baking pumpkin-themed treats is another fantastic way to incorporate math. Following a recipe for pumpkin bread or cookies requires precise measurement of ingredients, which reinforces fractions and units of measurement (cups, teaspoons, tablespoons). You can easily scale a recipe up or down to feed more or fewer people, which provides a practical application for multiplication and division. For example, ask your child, “This recipe makes 12 muffins. How would we change the ingredients if we only wanted to make 6?” or “What if we needed to make 24 for a party?” This type of real-world problem-solving helps solidify mathematical understanding far more effectively than a worksheet alone.

Spicing Up Language Arts: Reading And Creative Writing

The cozy feeling associated with pumpkin spice is the perfect inspiration for language arts. Autumn is a season of change and reflection, providing rich material for reading, writing, and storytelling. You can curate a fall-themed reading list that matches your child’s reading level. 

For younger children, this might include picture books about pumpkins, changing seasons, or autumn holidays. For older students, you could explore classic poems by Robert Frost or Emily Dickinson that capture the essence of fall. Reading aloud together, perhaps with a warm pumpkin-spiced drink in hand, can create a cherished homeschool tradition.

After reading, you can engage in discussions about the themes, characters, and imagery in the text. This builds reading comprehension and critical thinking skills. Encourage your child to identify sensory details in the writing—what did the author describe that you could see, hear, smell, taste, or touch? This exercise in literary analysis can then be turned into a creative writing prompt.

  • Descriptive Writing: Ask your child to write a detailed paragraph describing the experience of drinking a pumpkin spice latte or eating a piece of pumpkin pie. Encourage them to use all five senses. What does it look like? What sounds do they associate with it? How does it smell and taste? What is the texture?
  • Story Prompts: Provide a story starter, such as “The old pumpkin at the back of the patch started to glow…” or “I took a sip of the mysterious pumpkin spice potion and suddenly…” Let their imagination run wild and see what kind of creative tales they can weave.
  • Poetry: Autumn is a classic subject for poetry. Introduce different forms of poetry, like haikus, acrostic poems, or free verse. They could write a haiku about a falling leaf or an acrostic poem using the word “PUMPKIN.”
  • Recipe Writing: For a practical writing exercise, have your child write out the instructions for making their favorite pumpkin-themed treat. This teaches them the importance of clear, sequential, and concise writing. They need to list the ingredients and then provide step-by-step instructions that are easy for someone else to follow.

These activities not only improve writing skills but also encourage self-expression and creativity. By linking writing to a pleasant, multi-sensory experience, you can help your child develop a positive association with the writing process.

History And Geography Through The Spice Trade

The story of pumpkin spice is not just one of flavor; it is a story of global exploration, trade, and cultural exchange. The spices in the blend—cinnamon, nutmeg, cloves, and ginger—were once incredibly rare and valuable commodities. Their pursuit fueled empires, sparked wars, and led to the discovery of new lands. This makes pumpkin spice a fascinating entry point into lessons on world history and geography. 

You can use a world map to trace the origins of each spice. Mark the Spice Islands (the Maluku Islands in Indonesia) for nutmeg and cloves, Sri Lanka and Southeast Asia for cinnamon, and China and India for ginger.

This geographical exploration naturally leads to a discussion of the spice trade. Explain how, for centuries, Arab traders held a monopoly on the spice routes, keeping the sources of these valuable goods a secret. This drove European explorers like Vasco da Gama and Christopher Columbus to seek new sea routes to the East, an endeavor that reshaped the world map and led to the Age of Discovery. 

You can discuss the immense challenges these sailors faced and the profound impact their voyages had on global politics and economies. For older students, this can be a deep dive into the history of colonialism and the complex, often brutal, history of how these spices made their way to the West.

The pumpkin itself has its own rich history. Native to North America, pumpkins and other squashes were a staple food for many Indigenous peoples long before European settlers arrived. You can explore the history of agriculture in the Americas and how Native Americans cultivated pumpkins, corn, and beans together in a system known as the “Three Sisters.” 

This method of companion planting is a brilliant example of early agricultural science, as the three plants mutually support each other. The corn provides a stalk for the beans to climb, the beans fix nitrogen in the soil to fertilize the corn and squash, and the large leaves of the squash plant provide ground cover that retains moisture and suppresses weeds. When European colonists arrived, they learned how to grow and cook pumpkin from Native Americans, and it became a crucial food source for their survival, particularly during their first harsh winters. This history connects the pumpkin spice theme directly to early American history and the story of the first Thanksgiving.

Art, Music, And Movement Inspired By Autumn

Autumn is a feast for the eyes, with its brilliant palette of red, orange, and gold. This natural beauty provides endless inspiration for art projects. A simple nature walk can become an opportunity to collect leaves, acorns, and pinecones for various crafts.

  • Leaf Rubbings: Place leaves under a thin piece of paper and rub the side of a crayon over them to reveal their intricate vein patterns. You can use autumn colors to create a beautiful collage.
  • Pumpkin Painting: Move beyond carving and use pumpkins as a three-dimensional canvas. Children can paint faces, patterns, or entire scenes on their pumpkins using acrylic paints.
  • Spice Painting: Mix pumpkin pie spice with a small amount of water or glue to create a fragrant, textured paint. This adds a sensory dimension to your child’s artwork.
  • Nature Sculptures: Use clay or play-doh as a base and have your children create sculptures using the natural items they collected on their walk.

Music can also be tied to the season. You can explore classical pieces that evoke the feeling of autumn, such as Vivaldi’s “Autumn” from The Four Seasons. Listen to the music together and ask your child what images or feelings it brings to mind. Does the tempo or mood of the music change? What instruments can they hear? This is a wonderful way to introduce music appreciation. You could also create your own autumn-themed playlist with songs that mention fall, harvesting, or changing seasons.

Don’t forget to get moving. Physical activity is a crucial part of a balanced homeschool day. You can create a fall-themed obstacle course in your backyard that involves jumping over pumpkins, zig-zagging around trees, and raking leaves into a pile to jump in. A trip to a local farm with a corn maze is another excellent way to combine physical activity with problem-solving and teamwork. Even a simple game of tag can be renamed “Falling Leaves” to fit the seasonal theme. Integrating movement helps children burn off energy, improves focus for more sedentary tasks, and makes learning more dynamic and fun.

A Holistic And Engaging Educational Experience 

By incorporating these pumpkin spice and autumn-themed activities into your homeschool routine, you create a holistic and engaging educational experience. Learning becomes less about memorizing facts from a book and more about exploring the world with curiosity and joy.

This approach demonstrates the incredible adaptability of homeschooling, allowing you to tailor your children’s education to the rhythm of the seasons. As you lean into these creative teaching ideas, you are not just covering academic subjects; you are building lasting memories and fostering a genuine love of learning. For more practical resources and innovative homeschool lesson plans, be sure to explore the other articles on our blog.

Should You Teach Your Child About Social Media In Homeschool?

Many homeschooling parents carefully curate their child’s learning environment, focusing on a strong academic foundation and character development. In this controlled setting, the topic of social media can feel like an unwelcome guest. You might wonder if it’s better to avoid it altogether, shielding your child from its complexities. However, integrating social media education into your homeschool curriculum is not about encouraging its use; it’s about preparing your child for the world they will eventually navigate. Just as we teach them to cross the street safely, we must also teach them to navigate the digital world with wisdom and caution.

The digital landscape is an undeniable part of modern society. Whether your child gets a phone at 13 or waits until they are 18, they will encounter social media. It will be part of their friendships, their future university experience, and even their professional lives. 

By addressing social media education homeschool lessons early, you equip them with the critical thinking skills to handle online interactions responsibly. You turn a potential negative into a powerful teaching opportunity, reinforcing the values of integrity, kindness, and discernment you already instill through your homeschooling. This proactive approach empowers your child to become a confident and responsible digital citizen, rather than leaving them to figure it all out on their own.

The Case For Social Media Education In Your Homeschool

Deciding to teach about social media is a strategic choice in modern parenting and education. It’s an acknowledgment that digital literacy is a fundamental life skill, as important as financial literacy or learning to cook. Ignoring it doesn’t make it disappear; it simply leaves your child unprepared for the challenges and opportunities it presents. By incorporating this topic into your lessons, you maintain your role as their primary guide, shaping their understanding of a powerful and pervasive cultural force.

This proactive stance allows you to frame the conversation around your family’s values. You can discuss the potential pitfalls of social media—like comparison culture, cyberbullying, and privacy risks—within the safe context of your home. At the same time, you can explore its potential benefits, such as connecting with relatives, sharing creative projects, or learning about different cultures. This balanced perspective helps your child develop a healthy skepticism without fostering unnecessary fear. It’s about teaching them to be mindful consumers and creators of digital content, a skill that will serve them well beyond their school years. Ultimately, teaching social media in your homeschool is an extension of your commitment to providing a comprehensive, real-world education.

Core Pillars Of Social Media Safety

Core Pillars Of Social Media Safety

When you begin teaching your child about social media, safety should be the first and most important lesson. These are not one-time conversations but ongoing dialogues that evolve as your child matures and as technology changes. Think of these as the foundational “rules of the digital road.”

A critical first step is establishing strong privacy settings. Many children, and even adults, don’t realize how much personal information they share by default. Sit down with your child and explore the privacy settings on a demonstration account or a family account. Show them how to control who sees their posts, who can tag them in photos, and how their location is shared. This hands-on lesson makes the abstract concept of digital privacy tangible and manageable. Explain that their digital footprint—the trail of data they leave online—is permanent. An ill-advised post or photo can resurface years later, potentially affecting college admissions or job prospects.

Another essential pillar is teaching them to identify and handle uncomfortable situations. This includes recognizing cyberbullying, encountering inappropriate content, and understanding the risks of interacting with strangers. Role-playing can be a powerful tool here. Create scenarios and ask your child what they would do. What if a friend posts a mean comment? What if someone they don’t know sends them a message? Establish a clear rule: if anything online makes them feel sad, scared, or confused, they should come to you immediately without fear of punishment. This open line of communication is your greatest asset in keeping them safe.

Key Safety Topics to Cover:

  • Protecting Personal Information: Teach your children never to share sensitive details online. This includes their full name, home address, phone number, school name, or passwords. Explain that even seemingly harmless information, like posting vacation plans, can signal that your home is empty.
  • Stranger Danger Online: The age-old rule of not talking to strangers applies online, but with more complexity. Explain that people are not always who they say they are online. Teach them never to agree to meet someone in person whom they’ve only met online and to be wary of friend requests from unknown individuals.
  • Understanding Digital Footprints: Help them grasp that everything they post, comment, or “like” contributes to a permanent digital record. Use the “grandma test”: if you wouldn’t want your grandmother to see it, don’t post it. This simple rule can prevent many future regrets.
  • Recognizing and Reporting Bullying: Define what cyberbullying looks like—mean comments, embarrassing photos, spreading rumors—and establish a clear plan of action. Teach them not to engage with the bully, to save the evidence (screenshots), and to report it to you or another trusted adult.
  • Dealing with Inappropriate Content: Prepare them for the possibility of accidentally encountering content that is violent, sexual, or otherwise disturbing. Reassure them that they won’t be in trouble for seeing it, and emphasize the importance of closing the window and telling you right away.

Social Media Education Homeschool: Practical Lesson Ideas

Integrating social media education into your curriculum doesn’t have to be complicated. You can weave these concepts into subjects you already teach, from language arts to social studies. The goal is to foster critical thinking and responsible behavior. Here are some practical ideas to get you started.

  1. Digital Citizenship in Social Studies

Your social studies lessons are the perfect place to discuss what it means to be a good “digital citizen.” Just as we learn about rights and responsibilities in a community, we can explore them in the online world.

  • Lesson Idea: Create a “Digital Bill of Rights and Responsibilities.” Have your child brainstorm what rights they should have online (e.g., the right to privacy, the right to feel safe) and what responsibilities come with those rights (e.g., the responsibility to be kind, the responsibility to respect others’ privacy).
  • Activity: Analyze real-world case studies. Look at news stories about social media’s impact on social movements, politics, or public opinion. Discuss the positive and negative roles technology played in these events.
  1. Media Literacy and Critical Thinking in Language Arts

Language arts is all about communication and analyzing text. Social media posts are a modern form of text that requires sharp critical thinking skills to deconstruct.

  • Lesson Idea: “Fact vs. Opinion vs. Misinformation.” Select a few social media posts about a current event. Work with your child to identify which statements are verifiable facts, which are opinions, and which might be misinformation. Discuss how to fact-check information using reliable sources.
  • Activity: Analyze brand advertising. Find examples of influencers or companies promoting products on social media. Discuss the techniques they use to persuade their audience. This helps your child understand the commercial nature of many platforms.
  1. Understanding Algorithms in a Tech Unit

For older students, a basic understanding of how social media algorithms work is empowering. It demystifies why they see certain content and helps them recognize the “filter bubbles” that can limit their perspectives.

  • Lesson Idea: “You Are the Product.” Explain the business model of most social media platforms: users get a free service in exchange for their attention and data, which is then sold to advertisers. Watch a documentary or read an article on this topic together.
  • Activity: Conduct a simple experiment. Have your child search for a specific topic (e.g., “baking bread”) on a platform like YouTube or Pinterest. Then, observe how their feed changes over the next few days as the algorithm serves them more content related to that topic.
  1. Emotional Intelligence and Mental Health

A crucial part of social media education is discussing its impact on mental well-being. This can be integrated into health or personal development lessons.

  • Lesson Idea: “The Highlight Reel vs. Reality.” Talk about how people tend to post only their best moments online, creating a curated “highlight reel.” Discuss the dangers of comparing their own lives to these filtered versions of reality.

By embedding these lessons into your existing homeschool structure, you ensure that social media education is not an isolated, scary topic but a natural part of learning about the world.

Building Digital Resilience And Emotional Intelligence

Beyond the technical skills of privacy settings and password security, a robust social media education must focus on building emotional resilience. The online world can be a turbulent place, filled with social comparison, conflict, and pressure to conform. Your child needs a strong internal compass to navigate these emotional challenges successfully. This involves teaching them to separate their self-worth from online validation, such as likes, comments, and follower counts. 

Open conversations about the curated nature of online personas can help them understand that what they see is often a performance, not a complete reality. Encourage them to value their real-life accomplishments and relationships far more than any digital metric.

Furthermore, fostering empathy is a cornerstone of digital resilience. Teach your child to remember that behind every screen and every username is a real person with real feelings. Before posting or commenting, encourage them to ask: Is this true? Is this kind? Is this necessary? This simple filter can prevent a great deal of unintentional harm and helps them build a reputation for integrity and thoughtfulness. Role-playing exercises can be particularly effective here, allowing them to practice responding to difficult online situations with grace and empathy. 

By equipping your child with these emotional tools, you are not just protecting them; you are empowering them to be a positive force in their online communities, capable of handling negativity without losing their own sense of self.

A Parent’s Role: Modeling Healthy Digital Habits

As with all aspects of homeschooling, your example is the most powerful teaching tool. Your children are observing your relationship with technology every day. If you are constantly distracted by your phone during lessons or family meals, it sends a message that digital interruptions are acceptable. Conversely, if you model intentional and balanced technology use, they are more likely to adopt those habits themselves. This means being mindful of your own screen time and demonstrating that you value face-to-face connection over digital interaction.

Establish clear, family-wide rules for technology use. This might include “no-phone zones” at the dinner table or in bedrooms, or designated “unplugged” family time in the evenings or on weekends. When you do use social media, talk about it openly. Share a positive or interesting thing you saw, or express frustration with a piece of misinformation you encountered and show how you fact-checked it. By narrating your own digital experience, you demystify it and create more opportunities for conversation. You show them that being a responsible digital citizen is an ongoing practice, and it’s something you are learning and navigating right alongside them.

This journey of teaching your child about the digital world is a vital part of modern education. By addressing it head-on with thoughtful lessons and open communication, you equip them with skills that will last a lifetime.

At DKM Homeschool Resource, we are committed to providing you with the tools and information you need to give your child a comprehensive and well-rounded education. We encourage you to explore our other blog posts for more practical tips and insightful resources to support you on your homeschooling adventure.g

How To Incorporate Halloween Into Your Homeschool

The air turns crisp, leaves begin to fall, and a sense of excitement builds for one of the most anticipated holidays of the year: Halloween. For homeschooling families, this festive season offers a unique opportunity to blend education with fun, creating memorable learning experiences that go beyond traditional textbooks. Instead of seeing the holiday as a break from learning, you can use it to enrich your curriculum in creative ways. 

By thoughtfully planning some Halloween homeschool activities, you can cover subjects from science and history to art and math, all while embracing the spooky spirit of October.

This guide is designed to give you practical and actionable ideas for weaving the magic of Halloween into your daily lessons. We will explore how to turn spooky stories into literature lessons, transform pumpkin carving into a science experiment, and use candy for math challenges. You’ll find suggestions for all age groups, ensuring that every child in your homeschool can participate in the festive learning

Get ready to make this Halloween both educational and exceptionally fun for your entire family.

Fun Halloween Lessons For Your Homeschool

Holiday-themed lessons can capture a child’s attention in a way that standard curriculum sometimes cannot. The excitement surrounding Halloween provides a natural entry point for engaging, hands-on learning across multiple subjects. By connecting academic concepts to pumpkins, ghosts, and bats, you can foster a genuine love for learning and make complex topics more approachable and fun. These lessons don’t need to be elaborate; even simple tweaks to your existing plan can make a big difference in student engagement and retention.

Think about the natural curiosity children have this time of year. They are already talking about costumes, candy, and spooky decorations. As a homeschool parent, you can harness that enthusiasm and channel it into productive, educational pursuits. A trip to the pumpkin patch can become a lesson in life cycles and agriculture. A discussion about Halloween traditions can evolve into a deep dive into history and cultural studies. 

The possibilities are endless when you start to see the holiday as a vast educational resource waiting to be explored. The key is to be creative and flexible, allowing your child’s interests to help guide the lesson.

Spooktacular Science And Math

Science and math are often the easiest subjects to adapt for a Halloween theme. The holiday is filled with natural elements and quantifiable items that lend themselves perfectly to experiments and calculations.

Science Experiments

  • Pumpkin Guts Exploration: Turn pumpkin carving into a biology lesson. Have your kids explore the inside of a pumpkin, identifying the skin, pulp, seeds, and stem. You can weigh the pumpkin before and after carving, count the seeds, and discuss the pumpkin life cycle.
  • Volcanic Pumpkin: A classic science fair project with a spooky twist. Carve a jack-o’-lantern and place a small cup inside. Add baking soda to the cup, and then pour in vinegar mixed with a few drops of orange food coloring. The resulting “eruption” of foamy lava is a great demonstration of a chemical reaction between an acid and a base.
  • Bat and Spider Biology: Use the popular Halloween creatures to teach about animal biology. Research the life cycle of a bat, its role in the ecosystem (like pollination and insect control), and the science of echolocation. For spiders, you can study different types of webs, learn about venom, and discuss their importance as predators.
  • Spooky Slime Creation: Making slime is a fantastic chemistry lesson. You can find many recipes online using simple household ingredients like glue, contact lens solution, and baking soda. Discuss the concept of polymers and non-Newtonian fluids as you mix your gooey creation. Add plastic spiders or googly eyes for a festive touch.

Math Challenges

  • Candy Math: Use Halloween candy for a variety of math lessons. Younger children can practice sorting by color, shape, and size. They can also create patterns and use the candy as counters for simple addition and subtraction. Older children can calculate fractions, percentages, and create graphs showing the distribution of different candy types in their haul.
  • Pumpkin Measurement: Before carving, use a pumpkin for a lesson in measurement. Have your children measure the pumpkin’s circumference, height, and weight. They can estimate these values first and then compare them to the actual measurements. This is a great way to practice using tools like a measuring tape and a scale.
  • Spider Web Geometry: Challenge your kids to create a spider web using yarn and sticks or by drawing one on paper. This can be an introduction to angles, lines, and geometric shapes. Discuss radial symmetry and the structural strength of their designs.
  • Counting and Estimating: Fill a jar with candy corn or pumpkin seeds and have everyone in the family estimate the number inside. After everyone has guessed, count the items together. This simple activity reinforces estimation skills and counting in large numbers.

Ghoulishly Good Halloween Homeschool Activities In History And Language Arts

Ghoulishly Good Halloween Homeschool Activities In History And Language Arts

Halloween’s rich history and tradition of storytelling make it a perfect subject for history and language arts lessons. From ancient Celtic festivals to classic horror literature, there is a wealth of educational material to explore.

History and Social Studies

  • The Origins of Halloween: Dive into the history of the holiday. Research the ancient Celtic festival of Samhain, where many Halloween traditions originated. Discuss how the holiday evolved over time, incorporating influences from Roman festivals and Christian traditions like All Saints’ Day.
  • Halloween Around the World: Explore how other cultures celebrate this time of year. Learn about Día de los Muertos (Day of the Dead) in Mexico, a vibrant festival honoring deceased loved ones. Research other autumn festivals from around the globe to broaden your child’s cultural understanding.
  • Costume History: A lesson on the history of costumes can be fascinating. Discuss why people started wearing costumes for Halloween. You can explore different historical eras by having your children choose a figure from a period you are studying and designing a costume based on that person.

Language Arts

  • Spooky Story Writing: Encourage your children to write their own spooky stories. Provide them with story starters or prompts like, “The old house at the end of the street was empty, or so we thought…” This is a great way to practice creative writing, character development, and plot structure.
  • Monster Poetry: Introduce different forms of poetry, such as acrostics, haikus, or limericks, with a Halloween theme. Have them write a poem about their favorite monster, a haunted house, or the feeling of trick-or-treating at night.
  • Classic Horror Literature: For older students, October is the perfect time to introduce classic horror and gothic literature. Read excerpts from authors like Edgar Allan Poe (“The Raven,” “The Tell-Tale Heart”), Mary Shelley (“Frankenstein”), or Bram Stoker (“Dracula”). Discuss themes, literary devices, and the impact these stories have had on modern culture.
  • Halloween Vocabulary: Create a list of Halloween-themed vocabulary words. Define words like “eerie,” “macabre,” “supernatural,” and “phantom.” You can turn this into a game of charades or Pictionary to make learning the new words more interactive.

Homeschool Halloween Crafts For Creative Kids

Art and craft projects are a fantastic way to celebrate the season while developing fine motor skills, encouraging creativity, and providing a hands-on outlet for learning. Homeschool Halloween crafts can range from simple paper projects for little ones to more complex creations for older kids. The best part about these activities is that they often result in festive decorations you can use to adorn your home, making your learning space feel more spirited and fun. From painting pumpkins to crafting spooky creatures, these projects allow children to express themselves artistically while engaging with the themes of the holiday.

Setting aside time for crafts gives children a break from more structured academic work, allowing their minds to relax and engage in a different way. This creative time is not just for fun; it’s crucial for developing problem-solving skills and spatial awareness. When a child decides how to construct a paper bat or what colors to use on a painted pumpkin, they are making artistic choices and figuring out how to bring their vision to life. 

These projects can also be done together as a family, providing a wonderful opportunity for bonding and creating lasting memories. So, gather your supplies and let your children’s imaginations run wild with these festive craft ideas.

  • No-Carve Pumpkin Decorating: For a less messy and safer alternative to carving, let your kids paint their pumpkins. They can use acrylic paints to create funny faces, spooky scenes, or abstract designs. You can also use markers, glue, glitter, and other craft supplies to embellish the pumpkins.
  • Paper Plate Monsters: This is a simple and fun craft for younger children. Give them paper plates, construction paper, googly eyes, pipe cleaners, and markers. Let them design their own unique monsters. This activity is great for practicing cutting and gluing skills.
  • Coffee Filter Ghosts: Create a string of floating ghosts to hang around the house. All you need are coffee filters, a black marker, and some string. Drape a coffee filter over a small ball of tissue or another filter, draw a face on it, and tie a string around the “neck” to create a simple, spooky ghost.
  • Q-Tip Skeletons: This craft is a fun way to learn about the human skeleton. Have your children arrange Q-tips on a piece of black construction paper to form a skeleton. They can use a full Q-tip for long bones like the femur and cut them in half for smaller bones like ribs and fingers.
  • Spooky Window Silhouettes: Use black construction paper to cut out Halloween shapes like bats, cats, witches, and haunted houses. Tape them to your windows to create a spooky silhouette effect when viewed from the outside, especially at dusk. This project helps with scissor skills and spatial design.

As you integrate these fun and educational activities into your homeschool, remember that the goal is to spark curiosity and make learning an enjoyable process. This Halloween, you have the chance to create an immersive learning environment that your children will remember for years to come.

For more helpful guides, creative lesson ideas, and homeschooling resources, be sure to explore the other articles on our blog. We are dedicated to supporting you on every step of your homeschooling journey.