How Technology Is Changing Homeschool Education

Technology is changing homeschool education by giving families more flexibility, more learning options, and easier access to resources than ever before. From online classes and educational apps to virtual field trips and digital planning tools, parents can now build a homeschool day that fits their child instead of forcing their child to fit one rigid system.

Technology is changing homeschool education by making learning more flexible, personalized, and accessible. Homeschool families can use online courses, digital libraries, apps, videos, and virtual communities to support lessons at home. The key is using technology as a tool, not letting it replace real conversations, hands-on learning, reading, movement, and family connection.

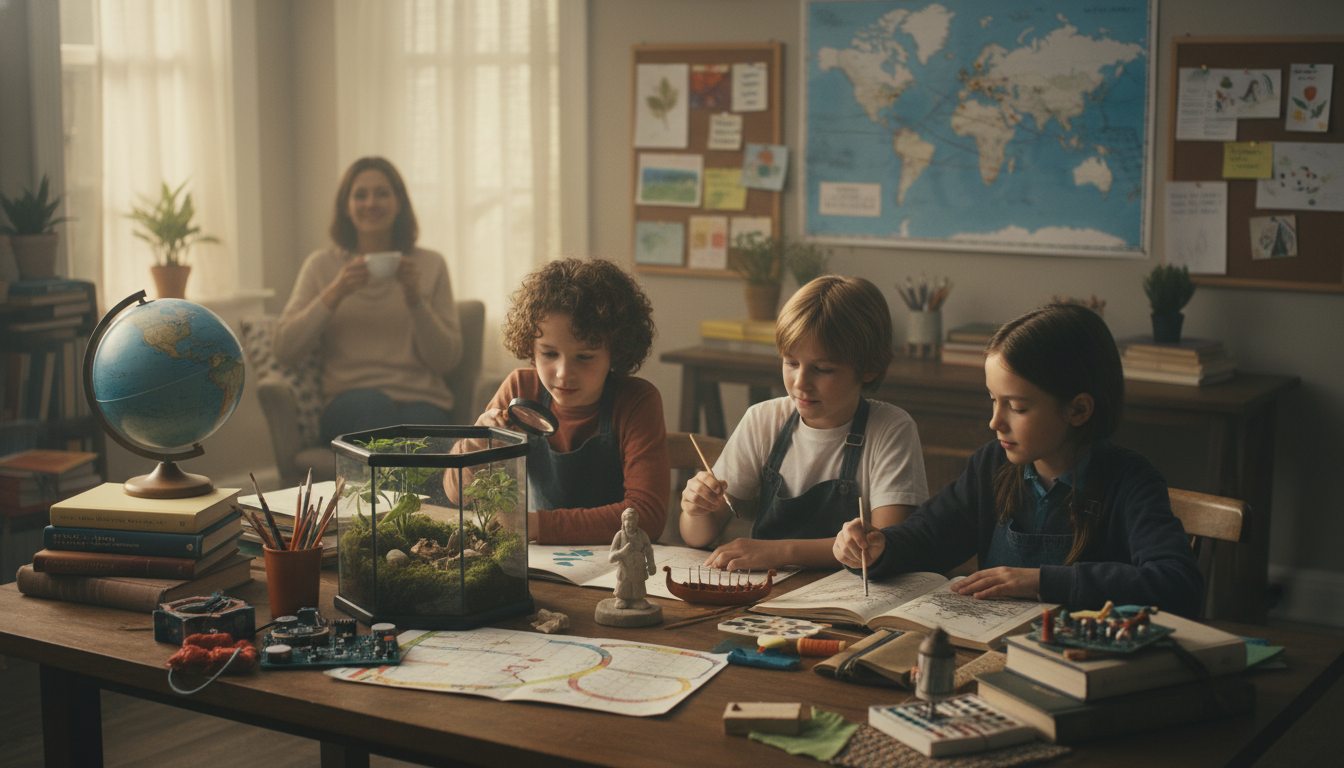
At DKM Homeschool Resource, we see technology as a helpful assistant, not the main teacher. It can simplify your homeschool day, open doors to subjects you may not feel confident teaching, and give your child exciting ways to practice skills. But like chocolate chips in pancakes, a little can be wonderful, while too much may throw off the whole meal.

Is too much screen time harmful in homeschooling?

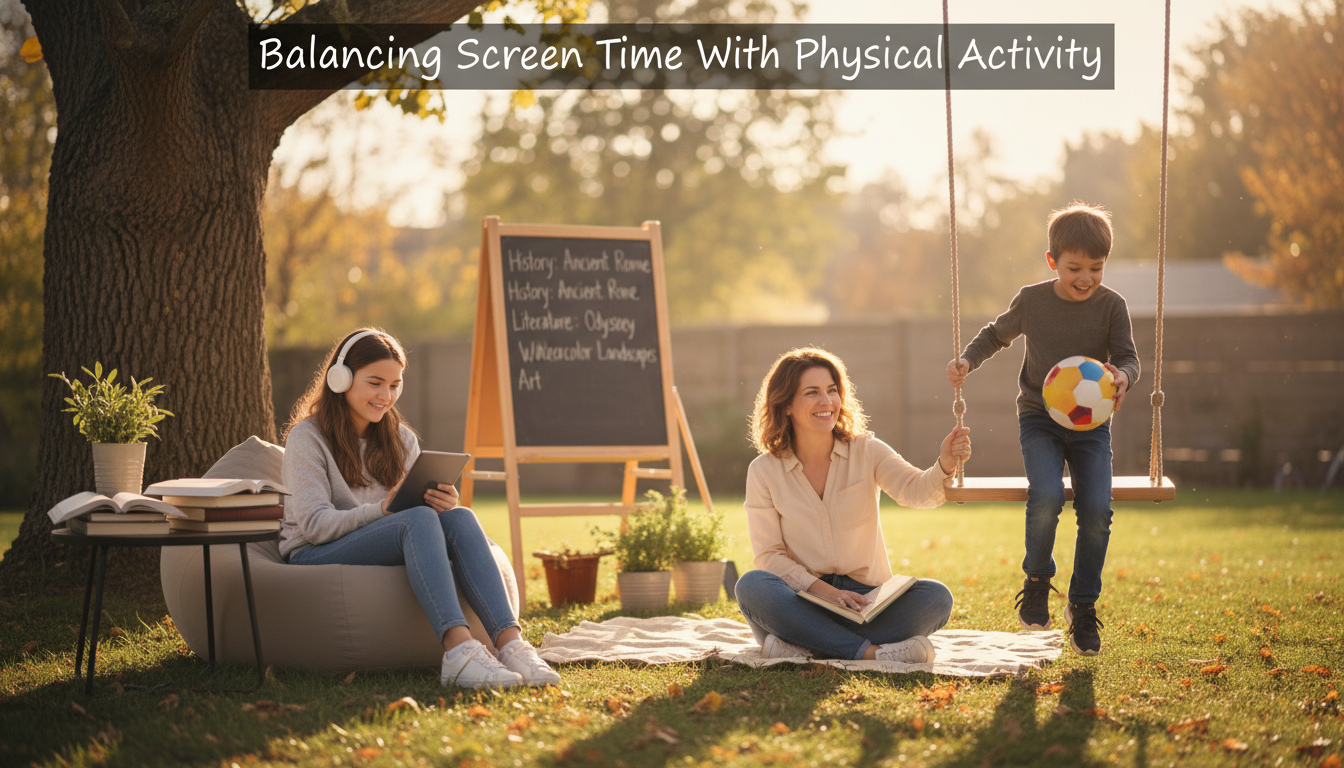
Too much screen time can be harmful in homeschooling when it replaces active learning, face-to-face discussion, outdoor play, reading, creativity, or rest. Screens are not automatically bad, but they do need boundaries.

A child who spends five hours clicking through lessons may not be getting the same depth of learning as a child who watches one short video, discusses it with a parent, writes a response, and builds a simple project afterward. The screen is only one part of the learning process.

A good question to ask is not, “Are screens bad?” but, “What is this screen helping my child do?”

Technology can help your child:

  • Practice math facts
  • Watch a science demonstration
  • Take an online writing class
  • Listen to an audiobook
  • Connect with a tutor
  • Explore a museum virtually
  • Learn coding, music, art, or a foreign language

But technology can also become a problem when it leads to:

  • Short attention spans
  • Constant distraction
  • Rushed, shallow work
  • Eye strain or headaches
  • Less movement
  • Less independent thinking
  • More arguments over devices

Here is a simple screen-time check parents can use this week:

  1. Write down every digital tool your child uses for school.
  2. Label each one as “helpful,” “optional,” or “distracting.”
  3. Keep the helpful tools.
  4. Limit the optional ones.
  5. Remove or replace the distracting ones.

For example, an online math program may be very helpful because it gives instant feedback and adjusts to your child’s level. But a video platform that leads your child from a history lesson to random toy reviews in three clicks may need tighter supervision.

One of the best ways to manage homeschool screen time is to pair digital learning with offline follow-up. After a child watches a video about volcanoes, have them draw a diagram, make a baking soda volcano, write three facts, or explain the lesson to a sibling. This turns passive screen use into active learning.

At DKM Homeschool Resource, we encourage parents to create “screen anchors.” These are predictable times when technology is allowed for schoolwork, such as math practice after breakfast or an online class after lunch. When children know when screens fit into the day, they are less likely to beg for them all day long.
The Biggest Ways Technology Is Changing Homeschool Education

The Biggest Ways Technology Is Changing Homeschool Education

Technology has made homeschooling more accessible for parents who once felt completely unqualified. Years ago, a parent may have worried, “How will I teach algebra, chemistry, or high school writing?” Now, that same parent can find online classes, video lessons, digital textbooks, tutoring platforms, and homeschool communities with just a few clicks.

This does not mean homeschooling has become effortless. Parents still need to guide, encourage, check progress, and create a healthy learning rhythm. But technology has widened the toolbox in a big way.

Here are some of the biggest changes families are seeing.

Technology makes personalized learning easier. If your child is ahead in reading but behind in math, you can choose resources at different grade levels without making a big deal about it. A child can use a fifth-grade reading list, a third-grade math app, and a beginner Spanish course all in the same homeschool plan.

Technology also gives parents more teaching support. Maybe you love literature but freeze when fractions appear. That is okay. Online math lessons, printable worksheets, video explanations, and practice apps can help fill the gap while you stay involved as the coach.

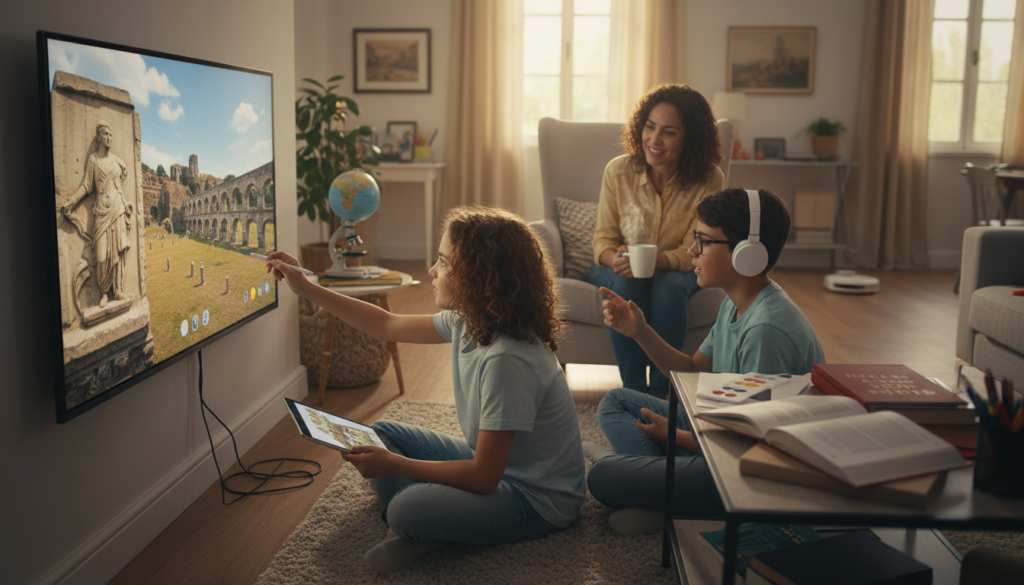
It also makes learning more visual and interactive. Some children understand a topic faster when they can see it. A short animation of the water cycle, a 3D model of the heart, or a virtual tour of ancient Rome can make a lesson click in a way a paragraph alone may not.

Technology has also changed how homeschool families find community. Parents can join online support groups, attend virtual workshops, participate in co-op classes, and find encouragement from other families walking a similar path. For beginners especially, this can make homeschooling feel much less lonely.

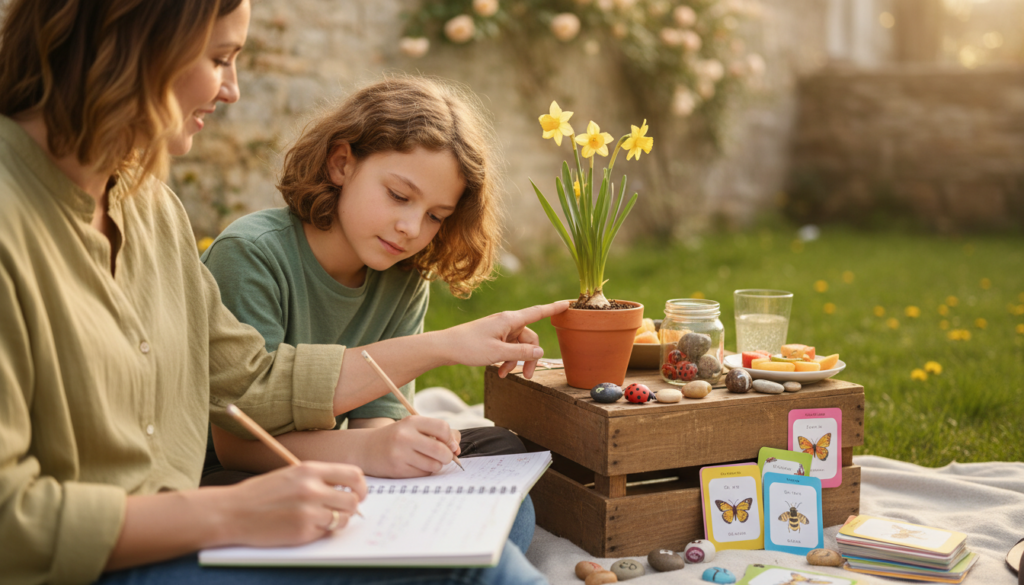
A realistic homeschool morning might look like this: your child does 20 minutes of online phonics, reads a physical book with you on the couch, watches a short science clip about bees, then heads outside to observe insects in the yard. That is a healthy blend. The technology supports the lesson, but it does not own the whole day.

How to Use Online Homeschool Tools Without Feeling Overwhelmed

The number of online homeschool resources can feel exciting for about five minutes. Then it can feel like standing in a grocery aisle with 84 kinds of cereal while your toddler is licking the cart handle. There are apps, subscriptions, printable bundles, YouTube channels, online academies, digital planners, and curriculum platforms all promising to change your life.

The trick is to choose fewer tools and use them well. More resources do not always mean better learning. Sometimes more resources just mean more passwords, more tabs, more decision fatigue, and more unfinished lessons.

Start with your actual needs. Do not begin by asking, “What is everyone else using?” Ask, “What problem am I trying to solve?”

Common homeschool problems technology can help solve include:

  • “My child needs more math practice.”
  • “I need help teaching writing.”
  • “We need a better way to track assignments.”
  • “My child learns better with videos.”
  • “We need affordable science demonstrations.”
  • “I need audiobooks for a struggling reader.”
  • “My teen wants a self-paced high school course.”

Once you know the problem, choose one tool to test for two weeks. Not five tools. Not the entire internet. One tool.

Try this simple process:

  1. Pick one subject that feels stressful.
  2. Choose one digital resource for that subject.
  3. Use it consistently for two weeks.
  4. Watch your child’s focus, attitude, and understanding.
  5. Keep it, adjust it, or drop it.

For example, if spelling is causing tears, you might try a free spelling game or audio-based practice app three times a week. If your child enjoys it and spelling improves, great. If your child rushes through it just to earn game rewards, it may not be the right fit.

Low-cost and free resource ideas include:

  • Library apps for ebooks and audiobooks
  • Free typing practice websites
  • Educational YouTube channels with parent supervision
  • Public domain books
  • Museum websites
  • NASA, National Geographic, or Smithsonian resources
  • Free printable worksheets from trusted homeschool blogs
  • Podcast episodes for history, science, and literature
  • Online flashcard tools
  • Digital timers and checklist apps

One common mistake is buying a full-year subscription before testing whether your child actually likes the format. Many programs offer free trials, samples, or monthly plans. Use those first. Homeschool budgets are real, and nobody needs a pile of unused logins collecting digital dust.

Another mistake is expecting an app to fix a habit problem. If a child avoids work, rushes, or guesses, a shiny platform may not solve it. They may still need shorter lessons, parent check-ins, clearer expectations, or a better daily rhythm.

A good online homeschool tool should make your day smoother, not more complicated. If you need a notebook just to remember how to log in, assign lessons, find reports, reset passwords, and print certificates, the tool may be doing too much. Simple often wins.

Balancing Digital Learning With Real-Life Homeschooling

The best homeschool education still includes books, conversations, nature, chores, creativity, movement, field trips, and everyday life. Technology can strengthen those things, but it should not crowd them out.

Children need to touch, build, move, ask, test, fail, and try again. A child can watch a video about measuring cups, but baking muffins will teach measurement in a completely different way. A child can play a geography game, but reading a map on a road trip makes the skill feel real.

This balance matters because homeschooling is not just about finishing lessons. It is about helping children become curious, capable, thoughtful learners. Real-life learning gives children context, confidence, and memorable experiences that screens alone cannot provide.

Try thinking of technology as the “spark,” not always the “whole fire.” A video can introduce a topic. An app can practice a skill. An online class can explain a hard concept. But the deeper learning often happens afterward, when your child talks, writes, draws, experiments, or applies the idea in real life.

Here are simple ways to balance digital and offline learning:

  • After an online history lesson, make a timeline on paper.
  • After a math app session, solve three problems on a whiteboard.
  • After a science video, do a kitchen-table experiment.
  • After a virtual museum tour, sketch your favorite artifact.
  • After an audiobook chapter, narrate the story aloud.
  • After typing practice, write a real email to Grandma.
  • After a coding lesson, explain the project without looking at the screen.

You can also create tech-free blocks in your homeschool day. Many families do well with screens later in the morning after reading, chores, and outdoor time. Others prefer to use screens first for independent subjects while the parent works with younger siblings.

There is no one perfect schedule, but there should be a rhythm that protects your family’s peace.

A helpful weekly balance might look like this:

  • Monday: Online math and offline reading
  • Tuesday: Science video and hands-on experiment
  • Wednesday: Audiobook and nature walk
  • Thursday: Writing class and notebook journaling
  • Friday: Virtual field trip and family discussion

Technology works best when it has a job. When every tool has a purpose, it becomes easier to say yes to what helps and no to what distracts.

Practical Tech Tips Parents Can Use This Week

You do not need to overhaul your entire homeschool to use technology well. Small changes can make a big difference, especially if your current system feels scattered.

Start with a simple family tech plan. This does not need to be fancy. A handwritten list on the fridge works beautifully.

Include basic rules such as:

  • School screens happen in shared spaces.
  • Entertainment tabs stay closed during lessons.
  • Headphones are used only when needed.
  • Parent-approved websites only.
  • Breaks happen after focused work, not after endless reminders.
  • Devices are charged in one central spot.
  • No screens during meals unless it is part of a special lesson.

Next, create a “tech basket” or “device station.” Keep chargers, headphones, styluses, login cards, and printed schedules in one place. This prevents the daily treasure hunt for the missing charger, which somehow always disappears right before the online class starts.

You can also make a weekly digital checklist for your child. Keep it short and visual.

Example:

  • Math app: Monday, Wednesday, Friday
  • Typing practice: Tuesday, Thursday
  • Online science lesson: Wednesday
  • Audiobook: Daily quiet time
  • Virtual co-op class: Friday

For younger kids, use pictures or stickers. For older kids, use a simple planner or digital checklist. The goal is to help children know what to do without asking you 47 times before lunch.

Here are a few smart habits to begin this week:

  1. Preview videos before assigning them.
  2. Bookmark approved websites.
  3. Use a timer for screen-based lessons.
  4. Sit nearby during new online activities.
  5. Ask your child to explain what they learned.
  6. Take movement breaks every 20–30 minutes.
  7. Keep one full subject offline each day.

Common mistakes to avoid:

  • Using screens as the default for every subject
  • Assuming “educational” always means useful
  • Letting children multitask during lessons
  • Skipping parent involvement completely
  • Adding too many subscriptions at once
  • Ignoring signs of screen fatigue
  • Forgetting hands-on learning

Screen fatigue can look like crankiness, zoning out, rushing, rubbing eyes, headaches, or suddenly forgetting how to do work they knew yesterday. When that happens, do not panic. Try a snack, a walk, reading aloud, a whiteboard lesson, or a hands-on activity instead.

One of our favorite DKM-style resets is the “close the laptop and tell me three things” method. After a digital lesson, ask your child to close the device and tell you three things they learned. This quick check helps you know whether the lesson actually landed or just played in the background while your child thought about lunch.

Technology can also support parents, not just students. Use digital planners, reminder apps, online grade trackers, or shared calendars if they reduce stress. But if paper planners make more sense for your brain, use paper proudly. Homeschooling does not hand out extra points for being fancy.

FAQ: What is the best technology for homeschooling beginners?
The best technology for homeschooling beginners is simple, affordable, and tied to a clear need. Start with online homeschool resources like library apps, free educational videos, basic math practice, audiobooks, and a simple planning tool. Avoid buying too many programs at once.

FAQ: How many hours of screen time should homeschoolers have?
There is no perfect number for every family, but homeschool screen time should be purposeful, age-appropriate, and balanced with offline learning. Younger children usually need shorter screen sessions, while older students may use technology longer for online classes. Watch your child’s focus, mood, and quality of work.

FAQ: Can online learning replace a homeschool curriculum?
Online learning can support or even provide parts of a homeschool curriculum, but parents still need to guide the overall plan. Digital learning tools work best when combined with reading, writing, discussion, projects, and real-life practice. Think of technology as support, not autopilot.

We Are Here To Help!

Technology is changing homeschool education in wonderful ways, but you do not have to use every tool, app, program, or platform available. The goal is not to create a high-tech homeschool. The goal is to create a homeschool that helps your child learn well, grow steadily, and enjoy the process along the way.

Start small. Choose one area where technology could make life easier, test one resource, and keep what truly helps. Add offline activities, family conversations, movement, books, and hands-on projects so your homeschool feels balanced and alive.

You are not behind because you are still figuring it out. Every homeschool family experiments, adjusts, and learns as they go. That is part of the beauty of homeschooling.

For more practical homeschool advice, encouragement, and resource ideas, keep reading the DKM Homeschool Resource blog. We are here to help you build a homeschool rhythm that feels doable, thoughtful, and right for your family.

How Much Physical Activity Do Kids Really Need?

Kids need at least 60 minutes of physical activity every day—that’s the widely recommended baseline from health experts. The good news? It doesn’t have to look like traditional gym class. As homeschooling parents, you have flexibility to build movement naturally into your day.

How Long Should Gym Class Be?

If you’re trying to replicate a “school-style” gym class at home, aim for 30–60 minutes, 3–5 days per week. But here’s the truth most parents don’t realize: you don’t need a formal gym class every day to meet your child’s physical activity needs.

Instead, think in terms of total daily movement.

Here’s a simple way to break it down:

  • Structured activity (20–40 minutes)
    Think: planned exercise, sports, or a “gym class” block. 
  • Unstructured play (20–40 minutes)
    Think: backyard play, biking, climbing, imaginative games. 
  • Light activity throughout the day
    Think: walking, chores, movement breaks between lessons. 

This flexible approach works especially well for homeschooling families because it fits naturally into your routine without adding pressure.

Why Physical Activity Matters More Than You Think

Physical activity isn’t just about burning energy—it directly impacts your child’s brain, mood, and learning ability. Many parents notice better focus after their kids have had time to move, even if it’s just 15 minutes outside.

Regular movement helps:

  • Improve concentration during lessons 
  • Reduce stress and anxiety 
  • Support healthy growth and development 
  • Build confidence and social skills 
  • Improve sleep (which makes everything easier) 

When kids don’t get enough movement, you’ll often see the opposite: restlessness, lack of focus, and frustration during school time.

One of the biggest mindset shifts for homeschooling parents is realizing that physical activity isn’t “extra.” It’s a core part of learning, just like reading or math.

There’s a moment most homeschooling parents experience at some point: your child is bouncing in their seat, staring out the window, or melting down over a simple worksheet. It’s easy to assume it’s a discipline or attention issue, but often it’s something much simpler—they need to move. Movement resets their brain in a way sitting still never will. When you start seeing physical activity as a learning tool instead of a break from learning, your entire homeschool day begins to flow more smoothly.

How To Build Physical Activity Into Your Homeschool Day

The easiest way to meet the 60-minute goal is to spread activity throughout the day instead of trying to cram it into one block.

Here’s a simple framework you can start using this week:

1. Start the Day With Movement

Before jumping into academics, try:

  • A short walk 
  • Stretching or yoga 
  • A quick backyard game 

Even 10–15 minutes can make a big difference in focus.

2. Add Movement Breaks Between Subjects

Instead of going straight from math to reading:

  • Do jumping jacks 
  • Have a quick dance break 
  • Walk around the block 

3. Schedule a Midday “Gym Time”

This can be your structured activity window:

  • Sports practice 
  • Workout videos 
  • Bike rides 
  • Park time 

4. Use Active Learning

Sneak movement into lessons:

  • Spell words while tossing a ball 
  • Practice math facts while hopping or pacing 
  • Read aloud while walking 

5. End With Free Play

Let kids unwind naturally:

  • Backyard play 
  • Neighborhood games 
  • Creative movement 

This approach keeps kids engaged without feeling like they’re stuck in a rigid schedule.

Child wearing jeans and tan sneakers climbs a wooden playground ladder on a sunny autumn day.

Easy Physical Activities For Homeschool Families

You don’t need expensive equipment or a full gym setup to keep your kids active. Some of the best activities are simple, free, and easy to repeat.

Here are practical ideas you can rotate:

Outdoor Activities

  • Bike riding 
  • Nature walks or hikes 
  • Playing tag 
  • Jump rope 
  • Obstacle courses using household items 

Indoor Options (Rainy Days)

  • Dance parties 
  • YouTube kids’ workout videos 
  • Yoga for kids 
  • Balloon volleyball 
  • Hallway races 

Structured Activities

  • Local sports leagues 
  • Martial arts classes 
  • Swimming lessons 
  • Homeschool co-op PE classes 

Chores That Count as Exercise

  • Raking leaves 
  • Sweeping 
  • Carrying groceries 
  • Gardening 

Yes—chores absolutely count as physical activity. It all adds up.

One homeschooling mom told us she stopped stressing about “gym class” entirely when she realized her kids were already moving constantly throughout the day. Between helping in the yard, riding bikes, and playing outside with neighbors, they were easily hitting the recommended activity levels. What changed wasn’t their routine—it was her perspective. Sometimes the problem isn’t that kids aren’t active enough, but that we’re trying to force movement into a box it doesn’t need to fit in.

Common Mistakes Parents Make (And How To Fix Them)

Even with the best intentions, it’s easy to overcomplicate physical activity in your homeschool.

Here are a few common pitfalls:

1. Treating Gym Like a Formal Subject

You don’t need:

Fix: Focus on consistency, not perfection.

2. Expecting Long Attention Spans

Younger kids especially won’t stick with 45 minutes of structured exercise.

Fix: Break it into smaller chunks throughout the day.

3. Relying Too Much on Screens

While workout videos are helpful, they shouldn’t be the only activity.

Fix: Prioritize outdoor and hands-on movement when possible.

4. Skipping Activity on Busy Days

This happens often when school runs long.

Fix: Use quick 10-minute movement bursts instead of skipping entirely.

5. Comparing to Traditional Schools

Homeschool doesn’t need to mirror public school schedules.

Fix: Use your flexibility as an advantage.

Simple Steps You Can Take This Week

If you’re feeling overwhelmed, don’t worry—you don’t need a complete overhaul. Start small.

Here’s a realistic plan:

  1. Pick one daily movement habit
    Example: 15-minute walk after breakfast. 
  2. Add one fun activity
    Example: family dance party or backyard game. 
  3. Set a reminder for movement breaks
    Even 5 minutes between lessons helps. 
  4. Get outside once per day
    Fresh air makes everything easier. 
  5. Let go of perfection
    Some days will be more active than others—and that’s okay. 

The goal is consistency, not a perfect schedule.

Some days will look amazing—you’ll get a full hour of activity, sunshine, and happy, energized kids. Other days will fall apart, and you’ll be lucky if anyone leaves the couch. That’s normal. Homeschooling isn’t about perfect days; it’s about building rhythms over time. When movement becomes a natural part of your routine instead of a checklist item, it sticks in a way that feels sustainable for the long haul.


FAQ: How much exercise do kids need each day for homeschooling?
Children need at least 60 minutes of daily physical activity, including a mix of active play, exercise, and movement. Homeschooling makes this easier by allowing flexibility—short bursts throughout the day can fully meet physical activity requirements.

FAQ: What counts as physical activity for homeschool PE?
Physical activity includes anything that gets kids moving—sports, outdoor play, chores, dancing, and even active learning. You don’t need a formal homeschool PE curriculum as long as your child stays active consistently.

FAQ: Do homeschoolers need a structured gym class?
No, homeschoolers don’t need a formal gym class to meet physical activity goals. A combination of structured exercise and unstructured play works just as well, and often better, for maintaining healthy movement habits.


Keep Learning With DKM Homeschool Resource

Finding the right balance between academics and physical activity can feel overwhelming at first, but it becomes second nature with time. Your kids don’t need a perfect gym schedule—they need consistent opportunities to move, play, and grow.

The beauty of homeschooling is flexibility. You can create a rhythm that works for your family, your space, and your child’s energy levels. Start small, stay consistent, and adjust as you go.

If you’re looking for more practical homeschool tips, encouragement, and simple strategies that actually work in real life, explore more articles here at DKM Homeschool Resource. We’re here to help you build a homeschool life that feels doable—and even enjoyable.

Balancing Screen Time With Physical Activity

Homeschool organization hacks can completely transform your day, and your sanity. When your homeschool runs smoothly, everything from lesson time to cleanup becomes easier and more enjoyable.

At DKM Homeschool Resource, we’ve worked with countless families who felt overwhelmed at first, but found that a few simple systems made all the difference. Let’s walk through the practical strategies that actually work.

What Causes Burnout In Homeschooling Parents?

Burnout in homeschooling parents is usually caused by trying to do too much without clear systems in place. Many parents feel pressure to replicate traditional school at home, leading to long days, cluttered schedules, and constant frustration.

Other common causes include:

  • Lack of structure or inconsistent routines 
  • Trying to manage every subject, grade, and child alone 
  • Overloaded curriculum choices 
  • No clear boundaries between school and home life 
  • Constant comparison to other homeschool families 

When everything feels chaotic, even simple tasks become exhausting. That’s why organization isn’t just helpful, it’s essential.

Here’s the key truth: you don’t need to do more, you need to organize better.

Create A Simple Homeschool Routine (Not A Rigid Schedule)

One of the biggest mistakes we see is parents creating overly detailed schedules that fall apart within days. Life with kids is unpredictable, and rigid plans often lead to frustration.

Instead, focus on a flexible daily rhythm.

Try this simple structure:

  1. Morning Block (Core Subjects)
    • Math, reading, writing 
  2. Midday Break
    • Lunch, outdoor time, free play 
  3. Afternoon Block (Light Learning)
    • Science, history, art, or projects 

This gives your day direction without locking you into exact times.

Quick Tip:
Use anchor points instead of exact hours. For example:

  • “Math happens after breakfast” 
  • “Reading happens before lunch” 

This keeps your day moving, even when things don’t go perfectly.

Declutter Your Homeschool Space (Yes, It Matters)

You don’t need a Pinterest-perfect homeschool room. But you do need a space that isn’t overwhelming.

Too much stuff creates:

  • Decision fatigue 
  • Lost materials 
  • Constant cleanup stress 

Start with a simple reset:

  • Keep only current curriculum within reach 
  • Store extra materials in bins or closets 
  • Limit supplies to what your kids actually use 

Example:
If your child uses the same 5 markers every day, they don’t need access to 40.

Less clutter = clearer thinking for both you and your kids.

Use Weekly Planning Instead Of Daily Panic

Use Weekly Planning Instead Of Daily Panic

Daily planning is one of the fastest ways to feel behind.

Instead, plan your homeschool week in one sitting.

Here’s a simple weekly system:

  • Pick 3–5 priorities for the week 
  • Assign subjects loosely to each day 
  • Leave 1 “catch-up” day open 

Example Weekly Plan:

This removes the pressure of “getting everything done today.”

This is where many parents experience a mindset shift that changes everything. Homeschooling doesn’t have to mirror traditional school in order to be successful. In fact, the more you try to recreate a classroom at home, the more friction you’ll feel in your daily routine.

When you begin to see your homeschool as a flexible learning environment rather than a strict system, your stress level drops significantly. Your children also respond better because the atmosphere feels calmer and more natural.

Over time, this approach builds confidence. Instead of second-guessing every decision, you begin to trust your rhythm, your pacing, and your ability to adjust when needed.

Organize Materials So Kids Can Be Independent

If you’re constantly being asked, “Where is my book?”, your system isn’t working yet.

The goal is independence.

Set up simple systems your kids can follow:

  • Label bins by subject 
  • Use folders for each child 
  • Keep daily materials in one easy-to-access spot 

Simple Setup Example:

  • “Math bin” with workbook + pencil 
  • “Reading basket” with current books 
  • “Art drawer” for creative time 

Game-Changer Tip:
Create a “Daily Basket” for each child with everything they need for that day.

This eliminates 90% of interruptions.

Avoid These Common Homeschool Organization Mistakes

Even with the best intentions, certain habits can make homeschooling harder than it needs to be.

Watch out for these:

  • Overplanning every minute of the day 
  • Buying too many curriculum options at once 
  • Not building in breaks 
  • Trying to teach all children at the same time 
  • Constantly switching systems 

Reality Check:
The most effective homeschool systems are simple, and repeatable.

If it feels complicated, it probably won’t last.

Build Systems That Save You Time Every Week

The secret to staying organized isn’t working harder, it’s creating repeatable systems.

Here are a few that make a big impact:

1. Sunday Reset

  • Prep materials for the week 
  • Review lesson plans 
  • Organize supplies 

2. End-of-Day Reset

  • Put materials back 
  • Clear workspace 
  • Prep for tomorrow 

3. Monthly Declutter

  • Remove unused curriculum 
  • Rotate books 
  • Reorganize supplies 

These small habits prevent overwhelm from building up.

There’s something powerful about walking into your homeschool space and knowing exactly where everything is. It creates a sense of calm that carries into your teaching and your children’s learning.

When your systems are working, you spend less time managing chaos and more time actually connecting with your kids. That’s where the real value of homeschooling shines through.

And here’s the encouraging part, these systems don’t have to be perfect to work. They just need to be consistent.

Simple Steps You Can Take This Week

If you’re feeling overwhelmed, don’t try to fix everything at once. Start small.

Here’s your action plan:

  • Pick ONE area to organize (desk, shelf, or bin) 
  • Create a simple daily routine 
  • Plan next week in one sitting 
  • Remove 25% of unused materials 
  • Set up one system (like daily baskets) 

Progress, not perfection, is what creates momentum.

Many parents hesitate to simplify because they worry they’re not doing enough. But the truth is, simplifying often leads to better results. When your homeschool is manageable, you show up more consistently, and your children learn in a more relaxed environment.

It’s also important to remember that your homeschool will evolve. What works this season may change next year, and that’s completely normal. Flexibility is not failure; it’s part of the process.

The more you give yourself permission to adjust, the more sustainable your homeschool becomes over time.

Homeschool FAQs

FAQ: How do I stay organized while homeschooling multiple children?
The best way to manage homeschooling multiple children is by using shared routines and simple systems like subject bins and daily baskets. Focus on independent work time and rotate your attention. Keeping your homeschool schedule flexible helps reduce stress and keeps everyone on track.

FAQ: What is the best homeschool schedule for beginners?
The best homeschool schedule for beginners is a simple routine with morning core subjects and lighter afternoon activities. Avoid strict time blocks and instead use a flexible homeschool routine. This makes it easier to stay consistent without feeling overwhelmed.

FAQ: How can I reduce homeschool stress quickly?
To reduce homeschool stress quickly, simplify your daily plan, declutter your space, and focus on just a few priorities each day. Using homeschool organization hacks like weekly planning and simple systems can make an immediate difference in how your day feels.

Supporting You Every Step Of The Way

Homeschooling doesn’t have to feel overwhelming or chaotic. With the right organization hacks, you can create a routine that works for your family, and actually enjoy the process along the way.

Start small, stay consistent, and give yourself grace as you build your systems.

At DKM Homeschool Resource, we’re here to support you every step of the way. Explore more of our blog for practical homeschool advice, encouragement, and tools designed to make your journey smoother and more rewarding.

How to Foster Lifelong Curiosity Through Homeschool Projects

Homeschooling is one of the best ways to foster lifelong curiosity, and projects are the secret weapon. When children explore topics through hands-on activities, they ask more questions, think deeper, and stay excited about learning. The key is making projects simple, meaningful, and connected to their interests.

What Age Should Children Start Independent Reading?

Children can begin independent reading as early as ages 5–7, but readiness varies. Some kids are eager sooner, while others need more time, and that’s okay. The goal isn’t rushing independence but building confidence, enjoyment, and comprehension at their own pace.

As homeschool parents, you’ll quickly notice that curiosity and reading often grow together. When kids are interested in a topic, they want to read about it. That’s why projects are so powerful, they naturally encourage reading without forcing it.

Why Homeschool Projects Build Lifelong Curiosity

Curiosity isn’t something you “teach” directly, it’s something you nurture. Projects create the perfect environment for that.

When children work on projects, they:

  • Ask their own questions 
  • Make choices about what to explore 
  • Learn by doing instead of memorizing 

This combination is what transforms learning from a task into an experience.

Think about it this way:
A worksheet might teach your child facts about plants.
A project, like growing a mini garden, teaches them how plants actually live.

What makes projects so effective?

  • Ownership: Kids feel like the learning belongs to them 
  • Exploration: There’s no single “right answer” 
  • Connection: Learning links to real life 

Projects also give children space to follow their interests in a way traditional schooling often doesn’t allow. When a child gets excited about something, whether it’s bugs, space, baking, or building, they naturally dive deeper, ask more questions, and seek out answers. That’s the foundation of lifelong curiosity.

In our experience at DKM Homeschool Resource, the most curious learners aren’t the ones who finish the most worksheets, they’re the ones who experiment, fail, try again, and keep asking “why.” Projects create a safe place for that process to happen over and over again.

Simple Ways To Start Project-Based Learning At Home

You don’t need fancy supplies or complicated lesson plans to start. In fact, simple projects are often the most effective.

Here are easy ways to begin this week:

1. Start With Their Interests

Ask:

  • “What do you want to learn more about?” 
  • “What’s something you’ve been wondering about?” 

Then build a project around it.

Example:
If your child loves animals → create a “habitat project”
If they love cooking → start a weekly recipe challenge

2. Keep It Small and Manageable

Avoid overwhelming yourself.

Instead of a month-long project, try:

  • A 3-day mini project 
  • A weekend experiment 
  • A one-hour build session 

3. Add a Hands-On Element

Every project should include something they can do:

  • Build 
  • Draw 
  • Test 
  • Create 

4. Let Questions Lead the Way

Encourage curiosity with prompts like:

  • “What do you think will happen?” 
  • “Why do you think that works?” 

One of the biggest mindset shifts for parents is realizing that projects don’t need to look “impressive” to be effective. A simple cardboard creation, a messy science experiment, or a homemade map can spark more curiosity than a polished, Pinterest-perfect activity.

Children remember what they experience, not what looks good in photos. When you focus on engagement instead of perfection, your homeschool becomes a place where curiosity thrives naturally.

Real-Life Homeschool Project Ideas That Work

Real-Life Homeschool Project Ideas That Work

If you’re wondering what this looks like in real life, here are practical examples you can use right away.

Beginner-Friendly Projects

  • Build a bird feeder and track visitors 
  • Create a simple weather chart 
  • Grow herbs in the kitchen 

Intermediate Projects

  • Design a “mini business” (lemonade stand, crafts, etc.) 
  • Build a model of a historical landmark 
  • Write and illustrate a short book 

Advanced Projects

  • Research and present a favorite topic 
  • Create a science experiment with a hypothesis 
  • Plan a family trip budget and itinerary 

Project Example (Realistic Scenario)

Let’s say your child is interested in space.

You could:

  1. Read a simple book about planets 
  2. Build a solar system model 
  3. Watch a short documentary 
  4. Write 3 fun facts about each planet 

That’s a full project, without stress.

It’s also important to remember that not every project will go smoothly, and that’s actually a good thing. When kids encounter challenges, they learn problem-solving, patience, and resilience. These are the exact skills that fuel curiosity long-term.

We’ve seen many parents worry when a project doesn’t “work out,” but those moments often lead to the best learning experiences. A failed experiment can spark even more questions than a successful one. When children feel safe to try and fail, they become more willing to explore boldly.

Common Mistakes That Kill Curiosity (And How To Avoid Them)

Even with the best intentions, it’s easy to accidentally shut down curiosity.

Here are the biggest pitfalls to watch for:

1. Over-Structuring Everything

If every step is planned, kids stop thinking for themselves.

Fix: Leave room for creativity and surprises.

2. Focusing Too Much on Outcomes

If the goal is a “perfect project,” kids feel pressure.

Fix: Focus on the process, not the result.

3. Jumping In Too Quickly

It’s tempting to correct or guide immediately.

Fix: Let them struggle a bit, it builds confidence.

4. Choosing Projects for Them

If they’re not interested, curiosity won’t grow.

Fix: Let them help decide the topic.

Another common mistake is underestimating how powerful simple, everyday moments can be. Curiosity doesn’t only happen during “school time.” It happens while cooking dinner, fixing something around the house, or even during a walk outside.

When parents learn to recognize and encourage these moments, learning becomes a natural part of daily life instead of something that only happens at a desk. That shift alone can completely transform how children approach learning.

Easy Weekly Plan To Build Curiosity Through Projects

If you want a simple system to follow, try this:

Weekly Curiosity Framework

Day 1 – Choose a Topic

  • Let your child pick something interesting 

Day 2 – Explore

  • Read, watch, or discuss 

Day 3 – Create

  • Build, draw, or test something 

Day 4 – Expand

  • Ask deeper questions 
  • Try a variation 

Day 5 – Share

  • Present what they learned 
  • Teach it to someone else 

This keeps things structured, but still flexible.

Quick Tips for Busy Parents

  • Keep supplies basic (paper, markers, cardboard, glue) 
  • Use free resources (library books, YouTube, printable worksheets) 
  • Limit prep time to 10–15 minutes 

You don’t need to overhaul your entire homeschool to make this work. Even adding one simple project per week can make a noticeable difference. Over time, those small efforts build a strong habit of curiosity, exploration, and independent thinking.

The goal isn’t to do more, it’s to do things differently. When learning feels engaging and meaningful, kids naturally want to keep going.

Homeschool Project FAQs

FAQ: How do homeschool projects improve critical thinking?
Projects encourage children to ask questions, test ideas, and solve problems independently. This hands-on approach builds critical thinking skills much more effectively than passive learning. In a homeschool curriculum, project-based learning helps children connect concepts and apply them in real-world situations.

FAQ: What are the best homeschool project ideas for beginners?
Start with simple, interest-based projects like building models, cooking, or nature observations. Beginner homeschool project ideas should be easy to set up and flexible. The goal is engagement, not complexity, so keep materials simple and focus on exploration.

FAQ: How often should I include projects in my homeschool routine?
You don’t need projects every day, 1 to 2 times per week is enough to build curiosity. Consistency matters more than frequency. Regular homeschool projects help reinforce learning and keep kids excited without overwhelming your schedule.

Explore More Guides With DKM Homeschool Resource

Fostering lifelong curiosity doesn’t require a perfect plan, it just requires a willingness to let your child explore, ask questions, and learn in a way that feels natural to them. Projects give you a simple, effective way to make that happen without adding stress to your day.

Start small, stay flexible, and focus on what sparks your child’s interest. You’ll quickly see how powerful curiosity-driven learning can be.

If you’re looking for more practical homeschooling tips, encouragement, and ready-to-use ideas, explore more guides here at DKM Homeschool Resource. You don’t have to figure this out alone, we’re here to help every step of the way.

Spring-Themed Writing Prompts for Young Homeschoolers

Spring is the perfect season to refresh your homeschool routine, and yes, spring-themed writing prompts are one of the easiest ways to spark creativity in young learners. They help kids connect learning to the world around them while building confidence in writing.

What Are The Best Homeschool Planners Or Systems?

The best homeschool planners or systems are the ones that keep things simple, flexible, and easy to maintain. Many parents succeed with a mix of a weekly planner, a daily checklist, and a loose routine rather than a rigid schedule. Systems that allow room for creativity, like journaling and writing prompts, work especially well for younger kids.

When it comes to incorporating writing into your homeschool day, planning matters, but it doesn’t have to be complicated. In fact, writing prompts are one of the easiest tools to plug into any system.

Here are a few planning approaches that work well with writing prompts:

  • Loop scheduling: Rotate writing prompts every few days instead of doing them daily 
  • Morning basket: Include one short writing prompt as part of your morning routine 
  • Themed weeks: Focus on spring topics like weather, animals, or gardening 
  • Flexible journaling: Let kids write when they feel inspired, not forced 

Quick tip: Keep a notebook labeled “Spring Writing Journal” and let your child decorate it. This small step increases buy-in immediately.

Why Spring Writing Prompts Work So Well For Homeschoolers

Spring naturally invites curiosity. Kids notice the weather changing, animals appearing, and plants growing. This makes it one of the easiest seasons to inspire writing without forcing it.

Instead of staring at a blank page, kids can look outside and connect their ideas to real-life experiences. That connection is powerful, especially for younger learners who struggle with abstract thinking.

Spring writing prompts also help you:

Most importantly, they make writing feel less like “school” and more like expression.

You don’t need a full language arts overhaul to see results. Just adding 10–15 minutes of writing a few times a week can make a noticeable difference.

25 Spring-Themed Writing Prompts Your Kids Will Love

Here’s where things get fun. These prompts are designed to be simple, engaging, and adaptable for different ages.

You can have your child write a sentence, a paragraph, or even just draw and dictate, whatever fits their level.

Nature & Outdoors Prompts

  • Describe what you see on a spring walk 
  • What is your favorite flower and why? 
  • Write about a rainy day adventure 
  • Imagine you are a butterfly, what do you do all day? 
  • What sounds do you hear in spring? 

Imagination Prompts

  • If you could plant anything, what would grow? 
  • Write a story about a talking tree 
  • What if animals could talk in spring? 
  • Imagine a garden that grants wishes 
  • You find a hidden door in a tree, what’s inside? 

Seasonal Life Prompts

  • What do you like most about spring? 
  • Describe your perfect spring day 
  • What changes happen from winter to spring? 
  • Write about playing outside with friends 
  • What would you do on a warm sunny day? 

Fun & Silly Prompts

  • A frog invites you to a party, what happens? 
  • What if it rained flowers instead of water? 
  • Write about a mischievous bunny 
  • If you could shrink to the size of an ant, what would spring look like? 
  • You discover a rainbow you can walk on, where does it lead? 
Spring-Themed Writing Prompts Your Kids Will Love

Simple Starter Prompts (Great for Beginners)

  • I see… 
  • I hear… 
  • I feel… 
  • Spring is… 
  • My favorite part of today is… 

Quick tip: Let your child choose the prompt whenever possible. Choice increases motivation more than anything else.

How To Actually Use These Prompts (Without Overwhelm)

Here’s where many homeschool parents get stuck, they have great ideas but no system to follow through.

Let’s simplify it.

Step-by-step plan for this week:

  1. Pick 3 prompts from the list 
  2. Assign them to 3 days (example: Monday, Wednesday, Friday) 
  3. Set a timer for 10–15 minutes 
  4. Let your child write without correction during that time 
  5. Praise effort, not perfection 

That’s it. No grading. No pressure.

Helpful structure options:

  • Younger kids: Draw + dictate sentence 
  • Early writers: 2–3 sentences 
  • Older kids: Short paragraph 

Low-cost resource ideas:

  • Dollar store notebooks 
  • Printable writing pages (free online) 
  • Nature journals 
  • Clipboards for outdoor writing 

The goal is consistency, not complexity.

Common Mistakes Parents Make With Writing Prompts

Even with something simple like writing prompts, there are a few pitfalls that can turn a good idea into frustration.

Avoid these common mistakes:

  • Overcorrecting: Fixing every grammar mistake kills confidence 
  • Forcing writing daily: Leads to burnout (2–3 times per week is enough) 
  • Giving prompts that are too hard: Keep it age-appropriate 
  • Not modeling writing: Kids learn by seeing you write too 
  • Skipping encouragement: Positive feedback matters more than technical skill early on 

Quick tip: Focus on ideas first, mechanics later. You can always revisit spelling and grammar when your child is ready.

Homeschooling writing isn’t about producing perfect essays, it’s about building confidence and expression.

Making Writing Part Of Your Spring Homeschool Rhythm

Spring has a way of shifting energy in your home. Kids want to be outside more, attention spans change, and routines loosen a bit. Instead of fighting that shift, you can lean into it by making writing feel like a natural extension of the season rather than another structured task.

One of the easiest ways to do this is to bring writing outdoors. A simple clipboard, a pencil, and a blanket in the yard can transform writing time into something your child actually looks forward to. When kids associate writing with fresh air and freedom instead of sitting at a desk, resistance drops quickly and creativity tends to show up on its own.

You might also notice that your child starts talking more about what they see and experience during spring. That’s a perfect opportunity to turn those conversations into writing. If they’re excited about a bird they spotted or a puddle they jumped in, invite them to write about it later in the day. This keeps writing relevant and personal instead of forced and disconnected.

Another helpful shift is letting go of the idea that writing has to look the same every day. Some days might be full sentences, other days might be lists, drawings, or even just a few words. Progress in writing often happens in small, uneven steps, especially with younger homeschoolers, and that’s completely normal.

Over time, these small, flexible habits build something much bigger: a child who sees writing as a tool for expression rather than a chore. That mindset is far more valuable than any perfectly structured lesson plan.

Spring Homeschool FAQs

FAQ: What are easy spring writing activities for homeschoolers?
Simple activities include nature journaling, creative writing prompts, drawing and labeling spring scenes, and short daily reflections. These homeschool writing ideas keep kids engaged while building foundational writing skills without overwhelm.

FAQ: How often should my child do writing prompts?
Most young homeschoolers benefit from writing 2–3 times per week. This keeps consistency without burnout and fits well into flexible homeschool schedules while still improving writing confidence and skills.

FAQ: Are writing prompts good for reluctant writers?
Yes, especially seasonal prompts like spring writing prompts. They give kids a starting point, reduce pressure, and make writing feel fun and relevant, helping reluctant writers build confidence over time.

Making Homeschool Enjoyable

Spring is a fresh start, and your homeschool can feel that way too. Adding simple writing prompts is one of the easiest ways to bring creativity, structure, and joy back into your routine without overwhelming yourself or your child.

Remember, you don’t need a perfect system to raise confident writers. You just need consistency, encouragement, and a willingness to keep things simple.

If you found this helpful, explore more guides, tools, and real-life homeschool strategies right here at DKM Homeschool Resource. We’re here to help you make homeschooling feel doable, and even enjoyable, every step of the way.

How to Encourage Independent Reading in Your Homeschool

Homeschooling gives you a unique opportunity to raise a reader who wants to read, not one who reads because they have to. The key to encouraging independent reading is creating the right environment, habits, and expectations so your child naturally chooses books on their own.

How Much Free Time Should Homeschool Kids Have?

One of the most common concerns parents have is whether their child has too much free time, or not enough. When it comes to reading, free time is actually one of your greatest tools.

A good rule of thumb is to allow 2–4 hours of flexible, unstructured time per day, depending on your child’s age. This includes play, hobbies, and yes, independent reading.

Here’s why this matters:

  • Kids don’t choose reading when every minute is scheduled 
  • Downtime creates space for curiosity 
  • Reading becomes a choice, not an assignment 

If your homeschool day feels packed, independent reading will feel like “just another task.” But when there’s breathing room, books become a natural option.

Quick Tip:
If your child says “I’m bored,” resist the urge to fix it immediately. Boredom often leads straight to books, if they’re accessible.

Build A Reading Environment That Invites Independence

If you want kids to read on their own, the environment matters more than any curriculum.

Start simple. Look around your home and ask: Does this space make reading easy and inviting?

Here are a few ways to set it up:

  • Create a cozy reading corner (pillows, blanket, good lighting) 
  • Keep books within reach, not stored away 
  • Rotate books regularly to keep things fresh 
  • Include different formats (graphic novels, magazines, audiobooks) 

Example:
A 9-year-old who resists reading at the table may happily read for 30 minutes curled up in a bean bag with a comic-style history book.

Low-cost resource ideas:

  • Library weekly visits (let your child choose freely) 
  • Thrift stores for inexpensive books 
  • Free eBook apps like Libby or Hoopla 

The goal is simple: remove friction. The easier it is to grab a book, the more likely your child will do it.

Let Kids Choose What They Read (Even If It’s Not “Perfect”)

This is where many parents accidentally shut down independent reading.

You might want your child reading classics, but they may be drawn to graphic novels, joke books, or Minecraft guides. That’s okay.

Choice builds ownership.

When kids feel in control of what they read, they’re far more likely to keep reading.

Here’s what to do:

  • Offer a wide range of options 
  • Avoid over-correcting their choices 
  • Gently guide, but don’t force 

Common mistake to avoid:
Only allowing “educational” books.

Yes, educational content matters, but so does building the habit of reading. A child who reads fun books today is far more likely to read complex books later.

Simple strategy:
Try the “freedom within limits” approach:

  • You choose the reading time 
  • They choose the book 
Person sits on a blanket, legs folded, reading a book by window light with a globe, mugs, and a stack of books nearby.

Create Simple, Consistent Reading Routines

Independent reading doesn’t happen by accident. It grows through consistency.

You don’t need an elaborate system, just a predictable rhythm.

Start with something like:

  1. 20–30 minutes of quiet reading time daily 
  2. Same time each day (after lunch works well for many families) 
  3. No screens, minimal distractions 

That’s it.

Over time, this becomes part of your homeschool culture.

Example routine:

  • Morning: Core subjects 
  • Afternoon: Quiet reading time 
  • Late afternoon: Free play or activities 

Pro tip:
Call it something inviting like “quiet time” or “reading break” instead of “independent reading.” Words matter.

There’s a subtle shift that happens when reading becomes part of the daily rhythm instead of a task to check off. Children begin to expect it, and eventually, they seek it out on their own. This transition doesn’t happen overnight, but consistency creates familiarity, and familiarity builds comfort. Over time, what once required reminders becomes something they initiate without prompting.

Parents often worry that their child isn’t reading “enough,” but focusing too much on quantity can backfire. What matters more is the relationship your child is building with books. If reading feels calm, enjoyable, and pressure-free, it lays a stronger foundation than forcing longer sessions that feel like a chore.

It’s also important to remember that independence looks different at each stage. A younger child flipping through picture books quietly is building just as valuable a habit as an older child reading chapter books independently. The goal isn’t perfection, it’s progress and consistency.

Model What Independent Reading Looks Like

Kids notice what you do far more than what you say.

If they never see you reading, it sends a quiet message: reading isn’t important.

But when they regularly see you with a book, it changes everything.

Easy ways to model reading:

  • Read during their quiet reading time 
  • Talk casually about what you’re reading 
  • Share interesting or funny parts 

You don’t need to make it a big lesson. Just let it be normal.

Example:
Instead of saying “You should read more,” try:
“I couldn’t put this book down last night, it was so good.”

That kind of modeling is powerful.

There’s also a deeper layer to modeling that often goes unnoticed. When children see adults choosing reading over screens, even occasionally, it reshapes their understanding of how free time can be spent. It quietly communicates that reading is not just for school, it’s something people genuinely enjoy.

This doesn’t mean you need to become an avid reader overnight. Even small moments matter, like flipping through a magazine, reading a devotional, or browsing a nonfiction book. These moments add up and create a culture where reading feels natural instead of forced.

Children are incredibly perceptive. If reading feels like a punishment to them but a pleasure to you, they’ll eventually gravitate toward your example. Over time, this can be one of the most effective ways to encourage independent reading without direct instruction.

Remove Pressure And Avoid These Common Mistakes

Sometimes the biggest barrier to independent reading is unintentional pressure.

Here are a few common pitfalls:

  • Over-correcting reading choices 
  • Interrupting reading to quiz comprehension 
  • Setting unrealistic reading time expectations 
  • Using reading as punishment (“Go read instead”) 

These approaches can turn reading into something stressful.

Instead, aim for:

  • Encouragement over correction 
  • Curiosity over testing 
  • Progress over perfection 

Better alternatives:

  • Ask: “What did you enjoy about that book?” 
  • Let them stop a book they don’t like 
  • Celebrate small wins 

Simple steps you can take this week:

  1. Set a daily 20-minute reading time 
  2. Visit the library and let your child choose freely 
  3. Create a cozy reading spot 
  4. Read alongside your child at least twice this week 

That’s enough to start building momentum.

Another overlooked factor is emotional readiness. If a child feels behind or struggles with reading, they may avoid it entirely. In these cases, independent reading isn’t just about habit, it’s about confidence. Choosing easier or more engaging books can help rebuild that confidence without making it obvious.

It’s also helpful to remember that reading ability develops unevenly. Some children become fluent readers early, while others take more time. Pushing too hard during slower phases can create resistance, while patience often leads to breakthroughs. The long-term goal is not just skill, but willingness.

When you remove pressure and allow space for growth, reading becomes something your child feels capable of doing. That confidence is what ultimately leads to independence.

Homeschool FAQs

FAQ: How do I get my child to read independently without forcing it?
Start by creating a consistent reading routine and offering books your child actually enjoys. Independent reading grows when children feel ownership and no pressure. Use simple homeschool reading strategies like daily quiet time and modeling reading yourself to make it feel natural.

FAQ: What if my child refuses to read alone?
This often means they need more support or confidence. Try sitting nearby and reading your own book while they read, or start with shorter sessions. Encouraging independent reading in homeschool settings takes time, especially for reluctant readers.

FAQ: Are audiobooks considered independent reading?
Yes, audiobooks absolutely support independent reading skills. They build vocabulary, comprehension, and listening skills while fostering a love for stories. Many homeschool reading tips include audiobooks as a valuable and flexible resource.

Explore More Articles

Encouraging independent reading doesn’t require complicated systems or expensive programs. It’s built through small, consistent choices, creating space, offering freedom, and modeling the habit yourself.

Some days will go smoothly, and others won’t. That’s completely normal. What matters most is staying consistent and keeping the experience positive so your child continues to see reading as something enjoyable.

If you’re looking for more practical homeschool strategies, encouragement, and real-life solutions, explore more articles here at DKM Homeschool Resource. You’re not alone on this journey, and with the right tools, you can build a homeschool environment where learning (and reading) truly thrives.

How to Use Picture Books to Teach Critical Thinking

Picture books are one of the simplest and most effective tools for teaching critical thinking in your homeschool. They naturally invite discussion, observation, and curiosity—without the need for worksheets. With the right approach, even a short story can become a powerful thinking lesson.

Can Reading Comprehension Be Taught Without Worksheets?

Absolutely. In fact, some of the strongest reading comprehension skills develop through conversation, not paper.

Worksheets often focus on “right answers,” but real understanding comes from thinking, questioning, and connecting ideas. Picture books create the perfect opportunity for this because they combine visuals and text, making it easier for children to interpret meaning.

Here’s what this looks like in real life:

  • You pause mid-story and ask, “What do you think will happen next?” 
  • Your child notices something in the illustration you didn’t see 
  • You discuss why a character made a certain choice 
  • You connect the story to real life 

No pencils required.

When kids feel like they’re part of the story instead of being tested on it, they engage more—and learn more.

Why Picture Books Are Powerful For Critical Thinking

Picture books might seem “too simple,” especially for older kids, but they’re actually layered with meaning.

The combination of words and images forces children to:

  • Interpret visual clues 
  • Infer meaning beyond the text 
  • Notice details 
  • Make predictions 
  • Evaluate decisions 

This is critical thinking in action.

Here’s something many parents don’t realize: shorter texts often require more thinking. There’s less spelled out, which means your child has to fill in the gaps.

For example:

  • A character’s expression may tell a different story than the text 
  • Background details might hint at future events 
  • Illustrations may contradict or expand the narrative 

These moments are gold for learning.

Simple Strategies To Turn Any Picture Book Into A Thinking Lesson

You don’t need a curriculum overhaul. You just need a few intentional habits.

1. Ask better questions

Skip yes/no questions. Instead, try:

  • “Why do you think the character did that?” 
  • “What would you have done differently?” 
  • “What do you notice in this picture?” 
  • “How do you think this story will end?” 

2. Pause more often

Reading straight through is fine—but stopping to think is where the magic happens.

Quick pauses can:

  • Encourage predictions 
  • Spark curiosity 
  • Build confidence 

3. Let your child lead

If your child points something out, follow that thread.

Even if it seems off-topic, it’s actually building:

  • Observation skills 
  • Confidence 
  • Independent thinking 

4. Re-read intentionally

The second (or third) read is where deeper thinking happens.

Try focusing on:

  • Character emotions 
  • Hidden details in illustrations 
  • Cause-and-effect relationships 

5. Connect to real life

This is one of the most powerful tools.

Ask:

  • “Does this remind you of anything?” 
  • “Have you ever felt like this character?” 
  • “What would happen if this happened to us?” 

These connections make learning stick.

There was a season in our homeschool where everything felt like it needed a worksheet to “count.” If it wasn’t written down, it didn’t feel like learning. But over time, we noticed something surprising. The days with the richest conversations—those deep, unexpected discussions during storytime—were the days our kids remembered the most. They weren’t just recalling facts; they were thinking, analyzing, and forming opinions.

Picture books became our secret weapon during that shift. Instead of rushing through stories, we slowed down. We lingered on pages, noticed tiny details, and asked questions that didn’t have obvious answers. What started as a simple read-aloud turned into meaningful learning moments that didn’t feel like school at all.

Two children, a girl and a boy, sit on a rug in a cozy living room, looking at an open book while the girl points at the pages and the boy stacks colorful blocks.

Real-Life Homeschool Examples (What This Actually Looks Like)

Let’s make this practical.

Example 1: Preschool or early elementary

Book: A simple story about sharing

You ask:

  • “Why didn’t the character want to share?” 
  • “How did the other character feel?” 
  • “What could they have done differently?” 

Result: Your child begins understanding emotions and choices.

Example 2: Elementary age

Book: A story with a problem or conflict

You ask:

  • “What is the problem in this story?” 
  • “What are some possible solutions?” 
  • “Which one would work best?” 

Result: Problem-solving skills develop naturally.

Example 3: Older child (yes, picture books still work!)

Book: A more complex or symbolic picture book

You ask:

  • “What do you think the message of this story is?” 
  • “Why do you think the author wrote it this way?” 
  • “What does this picture add to the story?” 

Result: Deeper analysis and abstract thinking.

Common Mistakes Parents Make (And How To Avoid Them)

Even with good intentions, it’s easy to miss the mark.

Mistake #1: Asking too many questions

It can start to feel like an interrogation.

Fix:
Pick 2–3 meaningful questions instead of 10 quick ones.

Mistake #2: Rushing through the book

When you’re busy, it’s tempting to “just finish.”

Fix:
Even one thoughtful pause is better than none.

Mistake #3: Correcting every answer

If your child feels judged, they’ll stop sharing.

Fix:
Respond with curiosity:

  • “That’s interesting—what made you think that?” 

Mistake #4: Thinking it has to be perfect

You don’t need a scripted plan.

Fix:
Start simple. One question per book is enough.

There’s also a mindset shift that happens when you move away from worksheets. You start to trust the process more. Instead of looking for visible proof of learning, you begin to notice it in your child’s words, questions, and ideas. It shows up when they make connections on their own or bring up a story later in an unrelated moment. That’s when you realize real comprehension is happening beneath the surface.

And honestly, it takes pressure off you too. You don’t have to prepare elaborate lessons or print endless pages. You just need to show up, read together, and stay curious. That’s something even the busiest homeschool parent can manage.

Easy Steps You Can Start This Week

If you’re feeling overwhelmed, start here:

Day 1–2:

  • Choose one picture book 
  • Ask just ONE open-ended question 

Day 3–4:

  • Pause once during reading 
  • Let your child predict what happens next 

Day 5:

  • Re-read the same book 
  • Focus on illustrations this time 

Day 6:

  • Connect the story to real life 

Day 7:

  • Let your child “teach” the story back to you 

That’s it. No prep. No worksheets. Real learning.

Budget-Friendly Resources To Support This Approach

You don’t need to spend a lot to do this well.

Free options:

  • Local library (rotate books weekly) 
  • Library storytime for inspiration 
  • Free read-aloud videos (use selectively) 

Low-cost ideas:

Bonus tip:

Choose books with:

  • Strong illustrations 
  • Emotional depth 
  • Open-ended themes 

These naturally spark better conversations.

We’ve seen parents completely transform their homeschool rhythm just by changing how they approach reading. What used to feel like another box to check becomes something everyone looks forward to. Kids start asking their own questions, noticing details you didn’t point out, and even requesting certain books again—not because they have to, but because they’re curious.

That curiosity is the goal. Critical thinking isn’t about having the right answers; it’s about asking better questions. And picture books give your child a safe, simple place to practice that skill every day.

Making Homeschool Better For Parents And Children

You don’t need complicated systems to raise thoughtful, curious learners. Picture books, a little intentionality, and meaningful conversation go a long way.

Start small. Stay consistent. Trust the process.

If you’re looking for more practical homeschool tips, simple strategies, and encouragement for your journey, keep exploring DKM Homeschool Resource. We’re here to make homeschooling feel doable—and even enjoyable—one step at a time.

FAQs

FAQ: How do picture books help with critical thinking skills?
Picture books combine visuals and text, encouraging children to analyze, infer, and interpret meaning. This makes them ideal for developing critical thinking skills in homeschooling, especially when paired with open-ended discussion. They help children practice reasoning without the pressure of worksheets.

FAQ: At what age should I start teaching critical thinking with books?
You can start as early as preschool. Even young children can answer simple questions about stories and pictures. Teaching reading comprehension without worksheets works especially well in early years because it builds natural thinking habits from the beginning.

FAQ: Do I need a curriculum to teach reading comprehension effectively?
No, you don’t need a formal curriculum to build strong reading comprehension skills. Consistent read-aloud time, thoughtful questions, and discussion are often more effective. Many homeschool parents find that picture books and conversation-based learning outperform traditional worksheet-heavy approaches.

Spring Art Projects Inspired by Flowers and Nature

Spring art projects inspired by flowers and nature are one of the easiest ways to bring creativity into your homeschool day. You don’t need expensive supplies or a perfect plan—just a willingness to explore, observe, and let your child create freely.

How Can Parents Encourage Progress Instead Of Perfection?

Encouraging progress instead of perfection starts with shifting your mindset as a parent. Your child doesn’t need to produce a “Pinterest-perfect” masterpiece to learn and grow—they need space to try, experiment, and even mess up a little.

Here are practical ways to make that shift happen:

  • Praise effort, not results
    Say: “I love how you tried different colors” instead of “That looks perfect.” 
  • Normalize mistakes
    Share your own imperfect drawings or projects. Let them see that learning is messy. 
  • Set time limits, not outcome goals
    “Let’s create for 20 minutes” instead of “Let’s make something beautiful.” 
  • Display all work equally
    Hang up their scribbles next to their “best” pieces to show all effort matters. 
  • Ask open-ended questions
    “Tell me about your artwork” instead of “What is it supposed to be?” 

When kids feel safe to create without pressure, they naturally improve over time. That’s where real learning happens.

Easy Spring Art Projects Using Flowers And Nature

You don’t need a full art curriculum to make meaningful projects. Nature gives you everything you need.

Here are simple, low-prep ideas you can start this week:

1. Flower Press Art

  • Collect flowers and leaves during a nature walk 
  • Press them between books for a few days 
  • Glue them onto paper to create designs or bookmarks 

2. Nature Collage

  • Use sticks, petals, grass, and leaves 
  • Glue onto cardboard or construction paper 
  • Let your child design freely (no template needed!) 

3. Painted Flower Prints

  • Dip flowers or leaves in paint 
  • Press onto paper for unique patterns 
  • Experiment with colors and layering 

4. Outdoor Sketching

  • Sit outside with a notebook 
  • Draw what you see—trees, flowers, insects 
  • No pressure for accuracy—just observation 

5. Mud Painting (Yes, really!)

  • Mix dirt and water 
  • Paint on cardboard or paper 
  • Add small natural elements for texture 

Quick tip: Keep a small “nature basket” at home where kids can store their collected items for future projects.

Child with blonde hair paints a circular floral mandala on a wooden board, colorful jars of paint nearby, as a woman watches in the background.

Making Art Part Of Your Homeschool Routine

Many parents feel like art has to be a separate subject—but it doesn’t. The easiest way to stay consistent is to weave it into what you’re already doing.

Try this:

  • Science + Art
    Draw plant life cycles or label flower parts 
  • Reading + Art
    Illustrate scenes from books set in spring 
  • Writing + Art
    Create nature journals with drawings and short descriptions 
  • Math + Art
    Count petals, measure leaves, or create patterns 

You don’t need extra hours in your day—just a little creativity in how you use the time you already have.

Spring has a way of slowing things down just enough for families to reconnect with simple routines. When you step outside with your child, even for a few minutes, learning starts to feel natural instead of forced. The colors, textures, and smells of the season invite curiosity without you having to plan every detail.

One of the biggest mindset shifts we encourage at DKM Homeschool Resource is letting go of control during creative time. When parents loosen their expectations, children often surprise them with ideas they would have never planned themselves. That freedom builds confidence much faster than strict instruction ever could.

It’s also worth remembering that creativity develops over time. The child who scribbles today may be sketching detailed flowers in a few months—not because they were pushed, but because they were given room to grow. Progress in art, just like any homeschool subject, happens quietly and gradually.

Common Mistakes Parents Make (And How To Avoid Them)

Even with the best intentions, it’s easy to fall into habits that limit creativity.

Here are a few to watch for:

Mistake 1: Over-directing the project

Fix: Give general guidance, then step back.

Mistake 2: Comparing siblings or other kids

Fix: Focus only on your child’s growth.

Mistake 3: Expecting finished-looking results

Fix: Embrace unfinished, messy, or abstract work.

Mistake 4: Doing the project for them

Fix: Let their work look like theirs, not yours.

Mistake 5: Skipping art because it feels “extra”

Fix: Treat art as part of learning, not a bonus activity.

Simple rule to remember: If your child is engaged and experimenting, the project is successful.

Simple Weekly Plan You Can Start Right Now

If you’re overwhelmed, start small. Here’s a realistic plan that fits into a busy homeschool schedule:

Day 1: Nature Walk + Collect Items

Keep it short—15–20 minutes is enough.

Day 2: Observation Drawing

Draw what you collected (no pressure for detail).

Day 3: Creative Project

Use items for collage, printing, or painting.

Day 4: Journal Reflection

Write or dictate a few sentences about what they made.

Day 5: Display + Share

Hang artwork or share with family.

This structure keeps things simple while building consistency.

There’s something powerful about repetition in a gentle routine like this. Kids begin to expect creative time, and instead of resisting it, they start looking forward to it. That anticipation is a sign you’re building something sustainable, not just checking a box for the week.

Parents often tell us they feel pressure to do more, add more, or improve faster. But what we’ve seen time and time again is that consistency beats intensity. A few small, meaningful art sessions each week will have a bigger impact than an occasional, overplanned project that leaves everyone exhausted.

When you keep things simple, you also create space for connection. These moments—painting together, laughing at messy hands, talking about what you see outside—are often the parts of homeschooling your child will remember most.

Low-Cost Supplies And Resource Ideas

You don’t need to spend much to create a rich art experience.

Here are budget-friendly options:

  • Dollar store paints, brushes, and paper 
  • Recycled materials (cardboard, egg cartons, newspaper) 
  • Old magazines for collages 
  • Backyard or park nature finds 
  • Free printable nature journals online 

Helpful tip: Create a small “art bin” so supplies are easy to grab anytime.

FAQs About Spring Art Projects

FAQ: What are the best spring art projects for homeschoolers?
Simple projects like flower pressing, nature collages, and outdoor sketching work best. These hands-on homeschool art activities are easy to set up, low-cost, and encourage creativity without pressure. They also tie naturally into seasonal learning.

FAQ: How do I teach art at home if I’m not creative?
You don’t need to be artistic to guide spring art projects. Focus on providing materials and encouragement rather than instruction. Let your child explore freely, and use nature as inspiration—it takes the pressure off both of you.

FAQ: How often should we include art in our homeschool schedule?
Aim for 2–3 short sessions per week to keep things consistent without overwhelm. Regular exposure to homeschool art activities builds confidence and skills over time. Even 15–20 minutes makes a difference.

Simple Ideas You Can Actually Use

Spring art projects inspired by flowers and nature are about more than just creativity, they’re about building confidence, curiosity, and connection in your homeschool. When you focus on progress instead of perfection, you give your child the freedom to grow in ways that truly matter.

You don’t need complicated plans or expensive supplies to create meaningful learning experiences. Start small, stay consistent, and enjoy the process alongside your child.

If you’re looking for more practical homeschool tips, encouragement, and simple ideas you can actually use, keep exploring DKM Homeschool Resource. We’re here to make homeschooling feel doable, and even enjoyable, one step at a time.

7 Ways to Make History Come Alive for Homeschoolers

History doesn’t have to be dry, boring, or full of memorized dates. The best way to make history come alive for homeschoolers is to turn it into an experience, through storytelling, hands-on projects, real-life connections, and creative exploration.

What Is The Best Time Of Day For Homeschooling?

The best time of day for homeschooling depends on your child’s natural rhythm and your family’s schedule. Many families find mornings work best for focused subjects like math and reading, while afternoons are perfect for creative learning, like history, projects, and hands-on activities.

If your kids are energized after lunch, that’s your golden window for bringing history to life. The key is flexibility. Homeschooling allows you to tailor the day around when your children are most curious, engaged, and ready to explore.

1. Tell History Like A Story (Not A Lecture)

One of the biggest mistakes we see at DKM Homeschool Resource is teaching history like a list of facts instead of a story. Kids don’t connect with dates, but they do connect with people, struggles, and drama.

Try this simple shift:

  • Instead of: “The Civil War started in 1861” 
  • Say: “Imagine waking up one day and your country is divided, families on opposite sides…” 

Practical ways to do this:

  • Read historical fiction or narrative-style books 
  • Use audiobooks or podcasts during car rides 
  • Pause and ask: “What would YOU do in this situation?” 

Quick Tip: You don’t need to be a great storyteller, just be curious and conversational.

2. Use Hands-On Projects (Even Simple Ones)

History sticks when kids do something with it. You don’t need Pinterest-level perfection, simple wins here.

Easy project ideas you can try this week:

  • Build a Roman road using cardboard and rocks 
  • Create a “shoebox diorama” of a historical event 
  • Cook a meal from a different time period 
  • Make a timeline on your wall with drawings 

Example:
If you’re studying ancient Egypt, have your child:

  • Write their name in hieroglyphics 
  • Build a mini pyramid 
  • Learn about mummification (kids LOVE this one) 

Common Mistake to Avoid:
Don’t overcomplicate projects. If it takes you 3 hours to prep, it’s not sustainable.

What Is The Best Time Of Day For Homeschooling

3. Bring History Into Real Life

History shouldn’t stay in a book. The more you connect it to your child’s world, the more meaningful it becomes.

Simple ways to connect history to everyday life:

  • Watch historical movies together (then discuss what’s real vs. not) 
  • Visit local museums or historical sites 
  • Look up what was happening in your town 100 years ago 
  • Tie holidays to their historical roots 

A homeschool parent once told us their child became fascinated with history simply by asking, “What was happening in the world on my birthday, but 200 years ago?” That one question turned into weeks of curiosity-driven learning.

There’s something powerful that happens when children begin to see history as real people living real lives instead of distant names in a book. They start asking deeper questions, forming opinions, and even comparing past events to what they see in the world today. That’s when learning shifts from memorization to understanding. As homeschool parents, we’re not just teaching facts, we’re helping our kids develop perspective, empathy, and critical thinking.

4. Use Living Books Instead Of Dry Textbooks

If your current history curriculum feels like pulling teeth… it’s probably not the right fit.

“Living books” are written in a narrative, engaging style that pulls kids in.

Examples of living book approaches:

  • Biographies written like stories 
  • First-person accounts (diaries, letters) 
  • Narrative history series 

Why this works:

  • Kids remember stories far longer than facts 
  • It builds comprehension naturally 
  • It sparks curiosity instead of resistance 

Action Step:
Swap ONE textbook lesson this week for a story-based book and see how your child responds.

5. Act It Out And Get Silly

Yes, this can feel awkward at first. Do it anyway.

Kids LOVE role-playing, and it’s one of the fastest ways to make history stick.

Try this:

  • Reenact a historical debate at the dinner table 
  • Dress up as historical figures (even simple costumes work) 
  • Pretend you’re reporters interviewing someone from the past 

Example:
Studying the American Revolution?

  • One child = colonist 
  • One child = British soldier 
  • You = moderator asking questions 

You’ll be amazed at how much they remember later.

There’s a moment in many homeschool days where things feel a little chaotic, kids talking over each other, laughing, maybe even arguing about who gets to be which historical figure. That moment might not look like “school” in the traditional sense, but it’s often where the deepest learning happens. When children are emotionally engaged, they remember far more than when they’re quietly filling out worksheets. Sometimes the best learning looks messy, loud, and a little unpredictable, and that’s okay.

6. Use Technology (Without Overusing It)

Technology can be a powerful tool, but it shouldn’t replace real interaction.

Smart ways to use it:

  • Watch short documentaries 
  • Use interactive history apps 
  • Take virtual museum tours 
  • Listen to history podcasts 

Balance is key:

  • Pair videos with discussion 
  • Follow up with hands-on work 
  • Avoid passive binge-watching 

Quick Rule:
If your child isn’t talking about what they watched afterward, it probably didn’t stick.

7. Let Your Child Lead Sometimes

This might be the most overlooked strategy, and one of the most powerful.

When kids choose what they learn about, engagement skyrockets.

Try this simple method:

  1. Give 2–3 history topic options 
  2. Let your child pick one 
  3. Build your week around that topic 

Example Choices:

  • “Do you want to learn about pirates, ancient Rome, or World War II?” 

Once they choose, let them:

  • Ask questions 
  • Pick a project 
  • Share what they learned 

Common Mistake:
Trying to control every detail. You’ll get better results by guiding, not micromanaging.

When children feel ownership over their learning, everything changes. They move from passive listeners to active participants, and their questions become deeper and more thoughtful. You may even find yourself learning alongside them, discovering new perspectives you hadn’t considered before. Homeschooling becomes less about “getting through the material” and more about exploring together. That shift alone can transform your entire homeschool experience.

Simple Plan You Can Start This Week

If you’re feeling overwhelmed, don’t try to do all seven ideas at once.

Start here:

  • Pick ONE history topic 
  • Add ONE hands-on activity 
  • Read ONE engaging story 
  • Have ONE discussion 

That’s it. Keep it simple and build from there.

FAQs 

FAQ: How do I make homeschool history more engaging for reluctant learners?
Focus on hands-on activities, storytelling, and letting your child choose topics. Many reluctant learners respond better to interactive homeschool history ideas than traditional textbooks. Try shorter lessons, real-life connections, and creative projects to spark interest.

FAQ: What are the best resources for teaching history at home?
Look for living books, audiobooks, documentaries, and local museums. Many homeschooling history resources are free or low-cost, including library books and online virtual tours. Mixing formats keeps learning fresh and engaging.

FAQ: How often should I teach history in a homeschool schedule?
Most families teach history 2–4 times per week, depending on their homeschool schedule. The key is consistency, not daily repetition. Focus on meaningful, engaging lessons rather than frequency to help your child retain what they learn.

Keep Learning With DKM Homeschool Resource

History doesn’t have to feel overwhelming, for you or your kids. With a few simple shifts, it can become one of the most enjoyable parts of your homeschool day. Focus on connection, creativity, and curiosity, and you’ll start seeing real engagement (and real retention).

You’re doing something incredible by homeschooling, even on the days it doesn’t feel like it.

If you want more practical tips, encouragement, and easy-to-use homeschool ideas, keep exploring the DKM Homeschool Resource blog. We’re here to help you every step of the way.

Fun and Educational Spring STEM Projects for Kids

Spring is one of the best times to make STEM learning feel exciting, hands-on, and natural. The good news? You don’t need expensive kits or a science degree to make it happen. With everyday items and a little creativity, you can turn your home into a powerful learning space.

How Do You Teach STEM At Home Without Special Supplies?

Teaching STEM at home doesn’t require fancy equipment, it requires curiosity and intention. Most STEM concepts can be introduced using things you already have in your kitchen, backyard, or recycling bin.

Here’s what actually works:

  • Use real-life situations (cooking, gardening, building) 
  • Encourage questions instead of giving answers 
  • Let kids experiment and make mistakes 
  • Focus on process over perfection 

For example, instead of buying a science kit, try asking:
“Why do you think this plant grows better in sunlight?”
That one question turns into biology, observation, and critical thinking.

Quick Tip:
If your child asks “why,” don’t rush to answer, turn it back into a mini investigation.

Why Spring Is The Perfect Time For STEM Learning

Spring naturally invites exploration. Everything is growing, changing, and moving, which makes it the ideal season for hands-on STEM.

You don’t have to force learning this time of year. It’s already happening all around you.

Think about what your child is already noticing:

  • Bugs appearing again 
  • Flowers blooming 
  • Rain and puddles forming 
  • Warmer temperatures 

Each of these is a built-in STEM lesson.

Instead of structured lessons, try this shift:
Observe first → Ask questions → Explore together

This approach removes pressure from you and makes learning feel exciting instead of overwhelming.

Spring also helps kids stay engaged longer. Fresh air and movement improve focus, which is especially helpful if you’ve struggled with attention during indoor lessons.

Easy Spring STEM Projects Using Household Items

You can start meaningful STEM learning this week with simple, low-cost projects. These are realistic, doable, and don’t require prep stress.

1. DIY Rain Gauge (Weather Science)

What you need:

  • Empty plastic bottle 
  • Ruler 
  • Marker 

What to do:

  1. Cut the top off the bottle 
  2. Place it upside down inside (like a funnel) 
  3. Mark measurement lines 
  4. Leave it outside to collect rain 

What kids learn:

  • Measurement 
  • Data tracking 
  • Weather patterns 

2. Nature Color Hunt (Observation + Classification)

Take a walk and challenge your child to find:

  • 3 shades of green 
  • 2 different textures 
  • 5 unique plant types 

Learning focus:

  • Classification 
  • Observation skills 
  • Early biology 

3. Build a Bird Feeder (Engineering)

What you need:

  • Toilet paper roll 
  • Peanut butter (or alternative) 
  • Bird seed 

Steps:

  1. Spread peanut butter 
  2. Roll in seeds 
  3. Hang outside 

What this teaches:

  • Simple engineering 
  • Animal behavior 
  • Cause and effect 

4. Sink or Float Challenge (Physics)

Fill a bowl with water and test different objects:

  • Spoon 
  • Leaf 
  • Rock 
  • Plastic toy 

Ask:

  • “Why do you think this sank?” 
  • “What do these objects have in common?” 

5. Backyard Measurement Project (Math + Movement)

Give your child a simple challenge:

  • Measure how far they can jump 
  • Compare distances 
  • Track improvement 

This turns math into something active and fun.

Woman and girl gardening together, filling a wooden vertical planter with soil outdoors, smiling and wearing gloves and aprons.

A Real-Life Homeschool Moment (What This Actually Looks Like)

One of the biggest mistakes parents make is thinking STEM has to look structured or impressive. In reality, the most powerful learning moments are often the simplest.

Picture this: your child is outside after it rains, poking a stick into the mud and watching water move through a small trench they created. It might look like play, but this is early engineering and physics in action. They are learning about water flow, resistance, and cause and effect without a worksheet in sight.

Instead of interrupting or redirecting, this is your moment to lean in. You might ask, “What happens if you make the path deeper?” or “Why is the water moving faster here?” These small prompts turn ordinary play into meaningful STEM exploration without pressure.

The beauty of homeschooling is that you can recognize these moments and expand them naturally. You don’t need to plan every detail. Sometimes your role is simply to notice, encourage, and guide the curiosity that is already there.

Common Mistakes Parents Make With STEM At Home

Let’s make this easier by avoiding what doesn’t work.

Mistake #1: Overcomplicating It

You do NOT need:

  • Expensive kits 
  • Perfect lesson plans 
  • Pinterest-level setups 

Simple always wins.

Mistake #2: Talking Too Much

It’s tempting to explain everything, but kids learn best by discovering.

Try this instead:

  • Ask questions 
  • Pause 
  • Let them think 

Mistake #3: Expecting Immediate Results

STEM builds skills over time. It’s not about one perfect activity.

Consistency matters more than perfection.

Mistake #4: Stopping When It Gets Messy

Mess = learning.

If your child is experimenting, testing, and even failing, that’s success.

Simple Steps To Start This Week

If you’re feeling overwhelmed, don’t try to do everything. Start small and build momentum.

Your 5-Step Plan:

  1. Pick ONE activity from this post 
  2. Set aside 20–30 minutes 
  3. Gather simple materials (no buying needed) 
  4. Focus on questions, not teaching 
  5. Reflect together afterward 

Example Weekly Rhythm:

  • Monday: Nature walk + observations 
  • Wednesday: Simple experiment 
  • Friday: Build or create something 

That’s it. No complicated curriculum required.

How STEM Builds Confidence In Kids Over Time

One of the most overlooked benefits of STEM learning is confidence. When children are allowed to explore, test ideas, and solve problems on their own, they begin to trust their thinking. This kind of confidence doesn’t come from memorizing facts, it comes from doing.

You may notice your child becoming more willing to try new things, even outside of STEM. That’s because they’ve experienced success through effort, not just correct answers. They learn that mistakes aren’t failures, they’re part of the process.

Over time, this mindset becomes incredibly valuable. It affects how they approach challenges, how they handle frustration, and how they see themselves as learners. STEM, when done in a relaxed and supportive way, becomes much more than academics, it becomes a foundation for lifelong resilience.

Free And Low-Cost STEM Resource Ideas

You don’t need to spend money to give your child a rich STEM education.

Here are some easy resource ideas:

  • Local library (books, activity kits, free programs) 
  • YouTube experiments (search simple science for kids) 
  • Pinterest (used wisely) for inspiration, not perfection 
  • Nature itself (your backyard is a lab) 

Pro Tip:
Choose 1–2 resources max. Too many options = overwhelm.

FAQs

FAQ: What are the best STEM activities for beginners at home?
Start with simple, hands-on activities like sink-or-float experiments, nature walks, or building with household items. These are ideal beginner STEM activities because they require no prep and introduce core concepts naturally. Focus on curiosity and exploration rather than structured lessons.

FAQ: How often should I include STEM in my homeschool routine?
You don’t need to do STEM every day. Two to three times per week is enough for most families. Consistency matters more than frequency, especially when using hands-on STEM projects that encourage deeper engagement and learning.

FAQ: Can STEM replace a traditional homeschool science curriculum?
STEM activities can absolutely support or even replace parts of a traditional homeschool science curriculum, especially in younger grades. However, many parents choose to combine hands-on STEM learning with structured lessons to ensure full topic coverage.

Keep Learning With DKM Homeschooling Tips

STEM doesn’t have to be complicated, expensive, or overwhelming. With a few simple materials and a willingness to explore alongside your child, you can create meaningful learning experiences every single week.

The key is to start small, stay consistent, and trust the process. Your child doesn’t need perfect lessons, they need opportunities to think, question, and discover.

If you’re looking for more practical homeschooling tips, encouragement, and real-life strategies, keep exploring the DKM Homeschool Resource blog. We’re here to help you build a homeschool that works for your family, one simple step at a time.