Montessori Math at Home: Tools and Techniques That Work

Montessori math at home works best when parents use hands-on tools, slow step-by-step lessons, and real-life practice instead of worksheets alone. You do not need a perfect shelf, expensive materials, or a teaching degree to begin. You need a clear starting point, a few practical tools, and permission to go at your child’s pace.

Montessori math at home uses hands-on materials to help children understand numbers, quantity, place value, operations, and problem-solving through concrete practice before abstract symbols. Start with simple counting, sorting, number rods, beads, or household objects, then move gradually toward written equations as your child shows readiness.

At DKM Homeschool Resource, we love Montessori math because it helps children see math before they are expected to memorize it. For many homeschool families, that is the difference between math tears and math confidence.

What age should you start Montessori math at home?

You can start Montessori math at home around ages 3–4 with gentle counting, sorting, matching, and number language. Formal Montessori math lessons often begin closer to ages 4–6, depending on the child’s readiness. The key is not the birthday. The key is whether your child is curious, able to focus for a few minutes, and ready to explore quantity in a hands-on way.

A three-year-old may not need “math lessons” in the way we usually picture school. They may simply count crackers, match socks, sort buttons by color, or line up toy animals from smallest to biggest. That still counts. Early Montessori math is not about rushing into equations; it is about building a deep sense of number through movement, touch, and real objects.

For a young child, math should feel like discovery. When a child carries three apples to the table, compares two towers of blocks, or notices that one cup has more water than another, they are already thinking mathematically. Montessori simply gives parents a beautiful way to organize those experiences so they become meaningful instead of random.

Here are signs your child may be ready for beginner Montessori math activities:

  • They enjoy counting objects out loud.
  • They notice “more,” “less,” “bigger,” or “smaller.”
  • They can match objects one-to-one, like one spoon per plate.
  • They can focus on a simple activity for 5–10 minutes.
  • They like touching, moving, stacking, pouring, or arranging items.
  • They ask questions like “How many?” or “Which one is bigger?”

Quick tip: If your child is under 6, keep lessons short and playful. Five focused minutes with beads or counters is better than thirty cranky minutes at the table.

For older homeschoolers, Montessori math can still work beautifully. A seven-, eight-, or nine-year-old who struggles with place value, regrouping, multiplication, or fractions may benefit from going back to concrete materials. That is not “behind.” That is rebuilding the foundation so the abstract work finally makes sense.

Montessori math tools you can use at home

You can buy official Montessori math materials, but you do not have to start there. Many families begin with low-cost or homemade tools and add more as they see what works for their child. The goal is not to recreate a perfect classroom. The goal is to help your child connect numbers to real quantities.

Some helpful Montessori math tools include:

  • Number rods
  • Sandpaper numbers
  • Spindle box
  • Golden beads or base-ten blocks
  • Bead stair
  • Ten boards and teen boards
  • Counting bears, buttons, beans, or pom-poms
  • Small trays or baskets
  • Dice and dominoes
  • Measuring cups and spoons
  • Play money
  • Fraction circles or paper fraction strips

If you are just getting started, choose three basic categories: counting tools, number-symbol tools, and place-value tools. Counting tools can be beans, buttons, blocks, or pasta. Number-symbol tools can be sandpaper numbers, number cards, or handwritten cards. Place-value tools can be golden beads, base-ten blocks, craft sticks bundled in tens, or printable place-value mats.

One of our favorite beginner setups is wonderfully simple. Put a small basket of counters on a tray, add number cards from 1–10, and invite your child to place the right number of objects under each card. That one activity builds counting, one-to-one correspondence, number recognition, and concentration. Not bad for a handful of dried beans.

If your budget is tight, try these low-cost swaps:

  • Use craft sticks bundled with rubber bands for tens and hundreds.
  • Use pony beads on pipe cleaners for bead bars.
  • Use index cards for number cards.
  • Use egg cartons for sorting and counting.
  • Use LEGO bricks for addition and subtraction.
  • Use measuring spoons for fraction conversations.
  • Use coins for skip counting and place value practice.

Montessori materials are powerful because they isolate one concept at a time. A child can touch ten units, trade them for one ten, and physically experience why place value works. That is much more memorable than staring at a worksheet full of tiny columns and hoping the rule sticks.

Two kids at a living room table working with wooden letter tiles on a word puzzle board in a cozy home setting.

Techniques that make Montessori math actually work

Montessori math is not just about the tools. The technique matters just as much. A beautiful bead set will not magically teach math if the lesson is too long, too rushed, or too complicated.

The classic Montessori approach moves from concrete to representational to abstract. First, the child touches and moves real objects. Next, they connect those objects to pictures, cards, or written symbols. Finally, they solve problems with numbers alone.

A simple example looks like this:

  1. Concrete: Your child counts 4 red beads and 3 blue beads, then pushes them together.
  2. Representational: Your child draws 4 dots plus 3 dots.
  3. Abstract: Your child writes 4 + 3 = 7.

That progression is gold. Many math struggles happen because children are pushed to the abstract stage too quickly. Montessori slows things down so the brain has time to build understanding.

Use the three-period lesson for new math vocabulary:

  1. Name it: “This is five.”
  2. Recognize it: “Can you show me five?”
  3. Recall it: “What number is this?”

This works well for numbers, shapes, operation signs, place-value names, coins, fractions, and math vocabulary like greater than, less than, equal, odd, even, sum, and difference.

Another helpful technique is to demonstrate first, then talk less. This can feel strange at first because parents naturally want to explain everything. In Montessori-style teaching, the adult often shows the process slowly and clearly, then lets the child try.

For example, if you are showing how to match number cards to quantities, place the card down, count the objects carefully, and arrange them neatly. Use calm, simple words. Then pause. That pause gives your child room to think instead of just follow a stream of instructions.

Try these practical techniques this week:

  • Present one new idea at a time.
  • Keep materials organized on a tray.
  • Use slow, deliberate movements.
  • Let your child repeat activities.
  • Stop before your child is exhausted.
  • Observe instead of correcting every tiny mistake.
  • Save written practice until the concept is understood.
  • Use real-life math daily.

Quick example: During snack, say, “We have 8 crackers. You ate 3. How many are left?” Let your child move the crackers rather than answer from memory. That tiny moment is a Montessori math lesson hiding in plain sight.

A simple Montessori math routine for busy homeschool days

A realistic homeschool math routine does not need to be long. In fact, shorter is usually better, especially for younger children. A peaceful 20-minute routine can do more than a drawn-out hour full of frustration.

Here is a simple routine you can use:

  1. Warm up with counting or review.
    Spend 3–5 minutes counting beads, skip counting, identifying numbers, or reviewing a familiar activity.
  2. Present one focused lesson.
    Choose one concept, such as matching quantities to numerals, making ten, exchanging ten units for one ten, or building teen numbers.
  3. Let your child practice hands-on.
    Give your child time to repeat the activity without rushing. Repetition is not wasted time. It is how children build confidence.
  4. Connect it to real life.
    Use the concept during cooking, chores, shopping, setting the table, or reading a calendar.
  5. End with success.
    Stop while your child still feels capable. Ending on a win makes tomorrow’s lesson easier.

A beginner homeschool day might look like this: Your kindergartener matches numbers 1–10 with counters in the morning. Later, while folding laundry, they sort socks into pairs. At lunch, they count apple slices and compare who has more. No fancy lecture, no pressure, just math woven naturally into the day.

For an older child, the routine may look different. You might use base-ten blocks to model 34 + 18, then write the equation after they build it. You might use fraction strips to compare 1/2 and 1/3 before asking them to solve problems on paper. The material comes first, and the pencil follows.

This rhythm is especially helpful for children who say they are “bad at math.” When children can physically build a problem, they often relax. They stop guessing and start noticing patterns. That little shift can rebuild trust in their own thinking.

Common mistakes to avoid with Montessori math at home

The biggest mistake is trying to do too much too soon. Montessori math is beautifully layered, but it is not a race. If your child does not understand quantity, jumping into written addition will probably create confusion.

Another common mistake is buying too many materials at once. We know, the wooden trays and bead sets are adorable. But a crowded shelf can overwhelm both you and your child. Start simple, learn how to use a few tools well, and add more only when there is a clear need.

Watch out for these common homeschool math mistakes:

  • Skipping hands-on practice too quickly
  • Turning every activity into a test
  • Correcting constantly instead of observing
  • Using materials without a clear purpose
  • Comparing your child to other children
  • Expecting mastery after one lesson
  • Keeping lessons going after your child is tired
  • Treating worksheets as the main proof of learning

A good rule of thumb: If your child can explain or build the concept with materials, they are probably ready for more written work. If they can only guess the answer or memorize a procedure, stay with the concrete stage longer.

Parents sometimes worry that hands-on math looks too easy. But easy-looking work can still be deep work. A child who quietly builds 10 in five different ways is absorbing number combinations that will later support addition, subtraction, mental math, and algebraic thinking.

Simple steps you can take this week:

  • Pick one math concept your child needs to strengthen.
  • Choose one hands-on material for that concept.
  • Practice for 10–15 minutes a day.
  • Use the same concept in one real-life situation.
  • Write down what your child understood and where they got stuck.
  • Repeat before moving on.

Free and low-cost resource ideas:

  • Printable number cards
  • Library books about counting and shapes
  • DIY bead bars
  • Craft-stick place-value bundles
  • Homemade fraction strips
  • Dice games
  • Card games like War for comparing numbers
  • Grocery store math challenges
  • Measuring activities during baking
  • Skip counting with coins

FAQ: Is Montessori math good for homeschool beginners?
Yes, Montessori math is a great fit for homeschool beginners because it gives parents a clear, hands-on way to teach number sense before worksheets. You can start with simple Montessori math activities like counting beans, matching number cards, sorting objects, and using base-ten blocks. The method feels less intimidating when you remember that the goal is understanding, not a perfect classroom setup.

FAQ: Do I need official Montessori materials to teach math at home?
No, you can teach Montessori math at home with homemade or low-cost materials. Official Montessori materials are lovely and often very effective, but household items like buttons, craft sticks, beads, coins, measuring cups, and index cards can support hands-on math learning. Start with what you have, then invest later if a material would truly help your homeschool routine.

FAQ: How long should a Montessori math lesson be?
For young children, a Montessori math lesson may only need 10–20 minutes. Older children may work longer, especially when using hands-on math tools for place value, multiplication, or fractions. The best lesson length is the one that allows your child to focus, practice, and stop before frustration takes over.

Keep Learning With DKM Homeschool Resource

Montessori math at home works because it makes numbers visible, touchable, and meaningful. When children build quantities, compare objects, trade units for tens, and discover patterns with their hands, math becomes less mysterious. You do not have to do everything perfectly to give your child a strong start.

Begin small this week. Choose one tool, one concept, and one short daily rhythm. Celebrate the little moments when your child says, “Oh, I get it now,” because those moments are the real magic of homeschooling.

At DKM Homeschool Resource, we are here to help you make homeschool feel doable, encouraging, and practical. Keep exploring our blog for more homeschool advice, learning strategies, curriculum ideas, and resources that support your family one simple step at a time.

How Waldorf Uses Art to Teach Academic Subjects

Waldorf education uses art as a central teaching tool by blending creativity with core academics like math, reading, and science. Instead of separating subjects, it integrates drawing, painting, storytelling, and movement to deepen understanding and retention in a natural, engaging way.

Why Is Curiosity Important For Learning?

Curiosity is the engine that drives real learning. When your child wants to know something, everything changes, attention improves, frustration drops, and retention skyrockets.

In Waldorf education, curiosity isn’t just encouraged, it’s protected.

Instead of rushing through textbooks, Waldorf methods slow things down so kids can explore ideas deeply. That exploration naturally sparks questions, and those questions lead to learning that sticks.

Here’s why curiosity matters so much:

  • It turns learning from a chore into discovery 
  • It improves long-term memory 
  • It builds problem-solving skills 
  • It encourages independent thinking 

Quick example:
Instead of memorizing multiplication tables right away, a Waldorf-inspired approach might start with rhythmic clapping, drawing patterns, or storytelling. Suddenly, math isn’t abstract, it’s something your child experiences.

Try this this week:

  • Ask “What do you notice?” instead of “What’s the answer?” 
  • Let your child explore topics before explaining them 
  • Follow their interests for at least one lesson per day 

How Waldorf Blends Art With Core Subjects

One of the biggest shifts for parents new to Waldorf is realizing that art isn’t “extra,” it’s the method.

In a traditional setting, subjects are separated:

  • Math = numbers 
  • Reading = books 
  • Science = facts 

In Waldorf, everything overlaps.

Here’s what that looks like in practice:

Reading & Writing Through Art

  • Children illustrate stories before writing them 
  • They copy beautifully written text to develop handwriting 
  • Storytelling replaces early worksheets 

Math Through Movement & Drawing

  • Skip counting with rhythm and movement 
  • Geometry introduced through drawing shapes 
  • Patterns explored through art 

Science Through Observation & Sketching

  • Nature journaling replaces memorization 
  • Kids draw plants, animals, and weather patterns 
  • Experiments are recorded through pictures and narration 

Waldorf learning feels slower at first, but it actually builds stronger foundations over time. Children aren’t just memorizing, they’re forming connections between ideas, which makes learning more flexible and long-lasting. Parents often notice their children asking deeper questions and remembering concepts without needing constant review.

Another key difference is how lessons feel emotionally. When art is involved, learning becomes enjoyable rather than stressful. This lowers resistance, especially for children who struggle with traditional academics. Over time, this positive association with learning can make a huge difference in your homeschool experience.

Simple Ways To Use Art In Your Homeschool

Simple Ways To Use Art In Your Homeschool (Without Overcomplicating It)

You do not need to be artistic to use Waldorf methods.

Let’s keep this practical and doable.

Start Small (This Week)

Pick one subject and add a creative layer:

Reading:

  • Have your child draw a scene from the story 
  • Ask them to retell it in their own words 

Math:

  • Use colored pencils to draw patterns 
  • Turn multiplication into rhythmic movement 

Science:

  • Start a simple nature journal 
  • Draw what you observe outside 

Use What You Already Have

You don’t need fancy supplies. Start with:

  • Colored pencils or crayons 
  • Plain notebooks 
  • Watercolors (optional but great) 

Keep It Short

Art doesn’t need to take hours.

  • 10–15 minutes per lesson is enough 
  • Focus on consistency, not perfection 

Many parents worry they’re “doing it wrong” if their child’s drawings aren’t perfect or lessons feel messy. That’s actually part of the process. Waldorf learning values expression over precision, especially in the early years. The goal isn’t to create polished artwork, it’s to help your child engage with what they’re learning in a meaningful way.

It’s also normal for this approach to feel unfamiliar at first. If you were educated traditionally, it might take time to trust a slower, more creative method. But as you begin to see your child connect ideas naturally and enjoy learning more, that confidence grows quickly.

Real-Life Homeschool Examples (So You Can Picture It)

Sometimes it helps to see what this actually looks like in a real home.

Example 1: Teaching Fractions

Instead of worksheets:

  • Your child paints a circle 
  • Divides it into sections 
  • Colors different parts 

Now fractions are visual and tangible.

Example 2: History Lesson

Instead of memorizing dates:

  • Read a short story about a historical figure 
  • Have your child draw the scene 
  • Let them narrate what happened 

This builds comprehension and storytelling skills at the same time.

Example 3: Spelling Practice

Instead of repetitive writing:

  • Write words in colorful chalk 
  • Draw pictures representing each word 
  • Use movement to spell (jumping letters, clapping syllables) 

Common Mistakes To Avoid (This Will Save You Frustration)

Waldorf-inspired homeschooling works beautifully, but only if you avoid a few common traps.

1. Overcomplicating Everything

You don’t need elaborate lesson plans.

Better approach:
Start simple and build gradually.

2. Trying to Do It “Perfectly”

Perfection kills progress.

Better approach:
Focus on connection, not Pinterest-level lessons.

3. Skipping Structure Entirely

Creativity still needs rhythm.

Better approach:
Create a daily flow:

  • Main lesson 
  • Creative activity 
  • Practice 

4. Expecting Immediate Results

Waldorf methods build long-term understanding.

Better approach:
Give it a few weeks before judging effectiveness.

A Simple Weekly Plan You Can Try Right Away

If you’re thinking, “This sounds great, but how do I actually start?” here’s a simple framework.

Day-by-Day Starter Plan

Day 1 (Reading Focus):

  • Read a short story 
  • Draw a favorite scene 
  • Narrate the story 

Day 2 (Math Focus):

  • Practice skip counting with movement 
  • Draw number patterns 

Day 3 (Science Focus):

  • Go outside 
  • Observe something in nature 
  • Draw and describe it 

Day 4 (Writing Focus):

  • Copy a short passage 
  • Illustrate it 

Day 5 (Review Day):

  • Look back at drawings 
  • Discuss what was learned 

This type of rhythm helps children feel secure while still allowing creativity to flourish. Over time, you can expand each lesson, but starting simple keeps things manageable and sustainable for busy parents.

Where Growth Happens

You don’t have to overhaul your entire homeschool overnight to start using Waldorf-inspired methods. Even small changes, like adding drawing to a lesson or encouraging storytelling, can make a big difference in how your child experiences learning.

What matters most is creating an environment where curiosity is welcomed, creativity is encouraged, and learning feels alive instead of forced. That’s where real growth happens.

If you’re looking for more practical homeschool strategies, encouragement, and step-by-step ideas you can actually use, keep exploring DKM Homeschool Resource. We’re here to help you simplify the process and build a homeschool that works for your family, not someone else’s checklist.

FAQs About Art In Waldorf

FAQ: What is Waldorf homeschooling and how is it different?
Waldorf homeschooling is a creative, holistic approach that blends academics with art, storytelling, and movement. Unlike traditional homeschool methods, it focuses on curiosity, imagination, and hands-on learning instead of worksheets and memorization.

FAQ: Can I use Waldorf methods without following the full curriculum?
Yes, many families use Waldorf-inspired homeschooling without committing to the full method. You can simply add art, storytelling, and hands-on activities to your existing homeschool routine to make lessons more engaging and effective.

FAQ: Is Waldorf homeschooling effective for teaching math and reading?
Waldorf methods can be very effective because they teach concepts through experience rather than memorization. By using drawing, rhythm, and storytelling, children often develop a deeper understanding of math and reading skills over time.

Montessori Activities That Teach Independence

Montessori activities are one of the most powerful ways to teach independence at home. When children are given the chance to do real tasks on their own, they naturally grow in confidence, focus, and responsibility.

Children can begin creative writing as early as age 4 or 5 by telling stories, drawing pictures, and dictating ideas to a parent. At this stage, creativity matters more than structure. As independence grows through Montessori-style learning, kids naturally transition into writing their own stories with confidence and enthusiasm.

Why Montessori Activities Build Real Independence

One of the biggest shifts parents experience when they begin using Montessori methods is realizing that independence doesn’t come later—it starts right now. Even very young children are capable of far more than we often expect, especially when we slow down and let them try.

When a child pours their own drink, cleans up a spill, or chooses their own activity, something important is happening internally. They are learning that they are capable. That belief becomes the foundation for everything else—academics, decision-making, and even emotional resilience.

In a homeschool setting, this matters even more. You’re not just helping your child complete worksheets or lessons—you’re shaping how they approach learning itself. A child who believes they can figure things out is far more likely to stay motivated and engaged.

It’s also worth noting that independence reduces stress for both parent and child. When children rely less on constant direction, your homeschool day becomes smoother, calmer, and far more enjoyable.

Simple Montessori Activities You Can Start This Week

The good news is that you don’t need to buy expensive materials or completely overhaul your home. Most Montessori activities are simple, practical, and easy to implement using everyday items.

Here are some beginner-friendly activities you can start right away:

1. Practical Life Skills (Perfect for Ages 2–6)

  • Pouring water between cups or pitchers 
  • Scooping rice or beans with a spoon 
  • Folding washcloths or small towels 
  • Washing fruits and vegetables 

2. Self-Care Activities

  • Getting dressed independently 
  • Brushing teeth with minimal help 
  • Packing their own snacks 

3. Cleaning and Care Tasks

  • Wiping tables with a small cloth 
  • Sweeping with a child-sized broom 
  • Putting toys back in designated bins 

4. Encouraging Independent Learning

  • Letting your child choose between two activities 
  • Giving uninterrupted time to focus 
  • Asking guiding questions instead of giving answers 

Quick Tip:
If your child struggles, simplify the activity rather than stepping in to complete it. Independence grows through practice, not perfection.

Boy pouring water into a row of small glasses on a wooden tray at home.

How To Set Up Your Home For Independence

Creating a Montessori-friendly home doesn’t require a full renovation. Instead, it’s about making small, intentional changes that allow your child to access what they need without constant help.

When children can reach their belongings, they’re far more likely to take responsibility for them. This simple shift can make a huge difference in daily routines.

Start by observing your home from your child’s perspective. Are everyday items within reach? Can your child complete basic tasks without asking for help every time?

Here are some simple ways to adjust your space:

  • Use low shelves for toys and learning materials 
  • Keep only a few items available at once to reduce overwhelm 
  • Store clothes in easy-to-access drawers or baskets 
  • Place step stools in the kitchen and bathroom 
  • Create simple stations (snack area, art space, reading corner) 

A well-prepared environment quietly encourages independence. You’ll start noticing your child taking initiative in ways that feel natural rather than forced.

Common Mistakes Parents Make (And How To Avoid Them)

Even with the best intentions, it’s easy to accidentally limit a child’s independence. Recognizing these common mistakes can help you adjust quickly and see better results.

Mistake #1: Doing Everything for Your Child
It may save time in the moment, but it prevents your child from learning essential skills.

Solution:
Build extra time into your routine so your child can try tasks independently.

Mistake #2: Expecting Perfect Results
Children are learning, and mistakes are part of the process.

Solution:
Focus on effort and progress instead of perfection.

Mistake #3: Offering Too Many Choices
While choice is important, too many options can overwhelm children.

Solution:
Limit choices to two or three options at a time.

Mistake #4: Interrupting Focused Work
When children are deeply engaged, interruptions can break concentration.

Solution:
Observe quietly and step in only when necessary.

Mistake #5: Choosing Activities That Are Too Advanced
If a task is too difficult, children may become frustrated and give up.

Solution:
Adjust activities to match your child’s current ability level.

Montessori + Homeschooling: A Natural Fit

When Montessori principles are combined with homeschooling, the results can be transformative. Instead of constantly directing your child, you begin to guide them. Instead of pushing motivation, you allow it to grow naturally.

This shift often leads to a calmer and more cooperative learning environment. Children who feel capable are less likely to resist and more likely to engage with their work. They develop a sense of ownership over their learning, which makes a lasting difference.

Another benefit is flexibility. Montessori works beautifully with mixed-age families, allowing younger children to learn by observing and older children to reinforce their knowledge by helping others. This dynamic creates a supportive and collaborative homeschool atmosphere.

Parents often find that their role becomes less about control and more about support. You’re still involved, but in a way that empowers rather than directs every step.

A Simple Weekly Plan To Build Independence

If you’re feeling overwhelmed, start small. You don’t need to implement everything at once to see progress.

Here’s a simple four-week plan to get started:

Week 1: Introduce One New Skill

  • Choose a simple activity like pouring or folding 
  • Demonstrate slowly and clearly 
  • Allow your child to practice daily 

Week 2: Add Responsibility

  • Assign a consistent daily task 
  • Keep expectations simple and achievable 

Week 3: Encourage Decision-Making

  • Offer limited choices throughout the day 
  • Allow your child to take ownership of small decisions 

Week 4: Step Back and Observe

  • Reduce how often you step in 
  • Let your child problem-solve independently 

Helpful Low-Cost Resource Ideas:

  • Dollar store trays, bowls, and containers 
  • Mason jars for pouring activities 
  • Old towels or cloths for folding practice 
  • Library books for inspiration and guidance 
  • Free printable Montessori activities available online 

Building Independence

Building independence in your child doesn’t require perfection, it requires consistency and patience. The small moments matter most. Each time your child tries something on their own, they’re building confidence that will carry into every area of life.

Montessori activities are not just about teaching tasks. They’re about shaping a mindset. A child who learns independence early becomes a learner who is curious, capable, and motivated from within.

If you’re just beginning your homeschool journey, start simple. Choose one activity this week and focus on it. Watch how your child responds, and build from there. Progress doesn’t have to be fast to be meaningful.

At DKM Homeschool Resource, we’re here to support you with practical strategies, encouragement, and real-life solutions that fit into your busy day. Be sure to explore more of our blog for ideas that make homeschooling easier and more effective.

FAQs About Montessori Homeschool

FAQ: What are the easiest Montessori activities to start with at home?
The easiest Montessori activities include pouring, sorting, folding, and simple cleaning tasks. These activities require minimal materials and help children build independence through everyday routines. They are ideal for beginners and fit naturally into a homeschool environment.

FAQ: How do Montessori activities improve independence in children?
Montessori activities encourage children to complete tasks on their own, which builds confidence and problem-solving skills. Over time, this independence carries into learning, helping children stay focused and motivated in a homeschool setting.

FAQ: Are Montessori methods effective for older homeschool children?
Yes, Montessori methods work for all ages by promoting independence and responsibility. For older children, this includes managing their time, setting goals, and taking ownership of their learning. These skills are essential for long-term homeschool success.

The Benefits of Unstructured Learning for Homeschool Kids

Unstructured learning gives homeschool kids the freedom to explore, create, and think independently. It builds creativity, problem-solving skills, and a genuine love of learning by allowing children to follow their interests without rigid schedules or constant direction.

How Does Art Help Children’s Creativity?

Art is one of the clearest examples of unstructured learning in action. When kids draw, paint, sculpt, or build, they’re making decisions without a “right” answer—and that’s where creativity grows.

Here’s what art does for your homeschool child:

  • Encourages original thinking 
  • Builds confidence in self-expression 
  • Strengthens problem-solving skills 
  • Helps process emotions in a healthy way 
  • Develops patience and focus 

For example, if your child decides to paint a “blue tree,” there’s no correction needed. That freedom tells them their ideas matter. Over time, this builds a mindset where they’re willing to take risks—not just in art, but in writing, science experiments, and even social situations.

Quick tip: Set out simple supplies (paper, crayons, glue, recycled materials) and let your child create without instructions. Resist the urge to guide unless they ask.

What Is Unstructured Learning (And Why It Matters)?

Unstructured learning is exactly what it sounds like—learning without a strict plan, curriculum, or outcome. It’s not about doing nothing; it’s about allowing curiosity to lead the way.

Instead of:

  • “Today we will complete pages 12–15 in math,” 

It might look like:

  • Building a ramp to test how fast toy cars go 
  • Writing a comic book just for fun 
  • Spending an hour figuring out how something works 

This kind of learning matters because real-world thinking doesn’t come from worksheets alone. It comes from asking questions, experimenting, and sometimes even failing.

Common mistake to avoid:
Thinking unstructured learning means no learning is happening. In reality, your child is developing skills like:

  • Decision-making 
  • Creativity 
  • Persistence 
  • Independent thinking 

Those are lifelong skills that no textbook can fully teach.

The Hidden Benefits Most Parents Don’t Expect

When parents first hear about unstructured learning, they often think of creativity—but there’s so much more happening beneath the surface.

  • Stronger intrinsic motivation: Kids learn because they want to, not because they have to. 
  • Better focus over time: When children choose activities, they tend to stick with them longer. 
  • Improved emotional regulation: Free play helps kids process stress and emotions. 
  • More resilience: Trial-and-error builds perseverance naturally. 

Let’s say your child spends 45 minutes trying to build a LEGO bridge that keeps collapsing. That’s engineering, problem-solving, and persistence—all rolled into one.

Simple step you can try this week:

  1. Block off 30–60 minutes each day 
  2. Remove screens (unless used intentionally) 
  3. Let your child choose the activity 
  4. Observe without interrupting 

You’ll be surprised what happens.

Children often surprise us when we give them space. A child who seems uninterested in traditional lessons might suddenly spend hours designing a paper city or writing stories when given freedom. This shift can feel uncomfortable at first because it’s less predictable, but it reveals how naturally curious kids really are. When learning is self-directed, it becomes something they own rather than something they endure. Over time, this ownership builds confidence that carries into every subject.

Parents sometimes worry they’re “falling behind” if they aren’t constantly directing learning. But stepping back doesn’t mean stepping away—it means trusting the process. You’re still guiding the environment, offering resources, and being available for support. The difference is that your child is leading the exploration, which often leads to deeper understanding.

Outdoor learning scene with a young girl and adult examining nature items on a wooden table: magnifying glass, rocks, leaves, a bird nest with eggs, and open books nearby.

How To Add Unstructured Learning To Your Homeschool Day

You don’t need to overhaul your entire homeschool schedule. Small changes can make a big difference.

Here are practical ways to get started:

1. Create a “Yes Space”
Set up an area where your child can explore freely—art supplies, building materials, books, puzzles.

2. Schedule Open Time
Even 30 minutes a day of unstructured time can have a big impact.

3. Follow Their Interests
If your child loves animals, let that guide reading, drawing, and research.

4. Ask, Don’t Tell
Instead of giving answers, ask questions like:

  • “What do you think will happen?” 
  • “How could you try that differently?” 

5. Limit Over-Scheduling
Too many structured activities can crowd out creativity.

Helpful low-cost resources:

  • Library books and activity kits 
  • Nature walks (free and powerful!) 
  • Recycled materials for building 
  • Free online tutorials (art, coding, crafts) 

Real-Life Homeschool Examples That Actually Work

One homeschool mom we worked with noticed her son resisted writing assignments daily. But when she gave him unstructured time, he started creating comic books—pages and pages of them. Without pressure, he practiced storytelling, spelling, and sequencing naturally.

Another parent shared that her daughter struggled with math worksheets but loved baking. By letting her experiment in the kitchen, she began using measurements, fractions, and timing without even realizing it.

These moments aren’t accidents—they’re the result of giving kids space to learn in ways that connect with them.

Common mistake to avoid:

  • Jumping in too quickly to “teach” during these moments
    Let the learning unfold. You can always connect it back later. 

Unstructured learning also helps restore balance in your homeschool day. When everything is planned and outcome-driven, both parents and kids can feel pressure building. That pressure often leads to resistance, frustration, and burnout. Adding in open-ended time creates breathing room, which makes the structured parts of your day smoother and more enjoyable.

You might notice fewer power struggles and more cooperation simply because your child feels heard and trusted. That emotional shift is just as important as academic progress. When kids feel safe to explore and make mistakes, they become more willing to try new things—even the harder subjects.

Simple Weekly Plan To Get Started

If you’re wondering how to actually implement this, here’s a simple structure you can try:

Monday–Friday:

  • Morning: Core subjects (math, reading, writing) 
  • Midday: Break / outdoor time 
  • Afternoon: 30–60 minutes of unstructured learning 

Weekly focus idea:

  • Monday: Art or building 
  • Tuesday: Nature exploration 
  • Wednesday: Creative writing or storytelling 
  • Thursday: STEM tinkering 
  • Friday: Free choice 

Keep it flexible—the goal is freedom, not another rigid schedule.

FAQs Of Unstructured Learning

FAQ: What is unstructured learning in homeschooling?
Unstructured learning in homeschooling allows children to explore topics freely without strict lesson plans. It encourages creativity, independence, and curiosity, making it a key part of many effective homeschool strategies.

FAQ: How much unstructured learning time should homeschool kids have?
Most families start with 30–60 minutes daily, but it depends on your child’s needs. Even small amounts of unstructured learning can improve creativity and engagement in your homeschool routine.

FAQ: Does unstructured learning replace a homeschool curriculum?
No, it complements your homeschool curriculum. Structured lessons build foundational skills, while unstructured learning helps children apply those skills creatively and develop critical thinking.

Keep Learning Along With Your Child

Unstructured learning isn’t about doing less—it’s about learning differently. By giving your child space to explore, create, and think independently, you’re helping them build skills that last far beyond the homeschool years.

Start small this week. Try one block of unstructured time and simply observe what happens. You might discover new interests, hidden strengths, and a renewed love of learning in your child.

At DKM Homeschool Resource, we’re here to support you every step of the way. Explore more of our blog for practical homeschool tips, encouragement, and real-life strategies that actually work for busy families like yours.

A Day in a Waldorf Homeschool

A Waldorf homeschool day is less about rigid schedules and more about rhythm, creativity, and connection. Families typically blend storytelling, hands-on learning, and nature into their routine, creating a gentle but effective learning flow.

What Grades Are Best For Waldorf Homeschooling?

Waldorf homeschooling is especially well-suited for early childhood through middle school (roughly preschool through 8th grade). These years align beautifully with Waldorf’s emphasis on imagination, storytelling, movement, and hands-on discovery.

Here’s a simple breakdown:

  • Ages 0–7 (Early Childhood): Best fit
    Focus on play, rhythm, imitation, and practical life skills. 
  • Ages 7–14 (Grades 1–8): Ideal range
    Strong use of storytelling, main lesson blocks, and artistic learning. 
  • High School (Grades 9–12): Possible but more complex
    Requires adapting Waldorf methods to meet academic expectations. 

Quick takeaway:
If you’re just starting, Waldorf shines brightest in the younger years. That’s where it feels the most natural and easiest to implement at home.

What A Typical Waldorf Homeschool Day Looks Like

A Waldorf homeschool day flows in a predictable rhythm, not a strict schedule. That’s a big difference, and a huge relief for many parents.

Here’s a simple structure you can try right away:

1. Morning Rhythm (Main Lesson Time)

This is your most focused learning block (1.5–2 hours max).

  • Opening verse, song, or quiet moment 
  • Main lesson (math, reading, history, etc.) 
  • Storytelling or reading aloud 
  • Writing or drawing to process learning 

2. Midday Movement + Practical Life

Kids need to move and do, not just sit.

  • Outdoor play or nature walk 
  • Cooking, baking, or cleaning 
  • Gardening or simple chores 

3. Afternoon Creativity

This is where Waldorf really shines.

  • Painting, drawing, or handwork (knitting, sewing) 
  • Music or movement 
  • Free play 

4. Evening Wind-Down

Keep things calm and predictable.

Quick Tip:
Don’t try to “fill every hour.” Waldorf thrives on breathing space.

The Magic Behind Waldorf Rhythm

The Magic Behind Waldorf Rhythm (And Why It Works)

One of the biggest shifts parents notice is how calming a rhythm can be. Instead of constantly wondering “What’s next?” your child begins to feel the flow of the day. That sense of predictability builds security, especially for younger kids who thrive on knowing what to expect.

When you repeat a daily rhythm, morning lesson, outdoor time, creative work, learning becomes almost effortless. Children settle into it without resistance because it feels natural, not forced. This is especially helpful if you’ve struggled with burnout or pushback in your homeschool before.

The beauty is that rhythm doesn’t require perfection. Some days will run smoothly, and others will feel messy, but the overall pattern still holds. Over time, that steady structure creates a peaceful learning environment where both parent and child can actually enjoy the process.

How To Start A Waldorf Homeschool This Week (Simple Steps)

You don’t need expensive materials or a complete curriculum to begin. Start small and build from there.

Step-by-step to begin:

  1. Create a simple daily rhythm
    • Pick 3 anchors: morning lesson, outdoor time, creative activity 
  2. Choose one main subject
    • Focus on reading OR math, not everything at once 
  3. Add storytelling
    • Read aloud or tell stories from memory 
  4. Include hands-on work
    • Cooking, drawing, or simple crafts 
  5. Go outside daily
    • Even 20–30 minutes makes a difference 

Low-cost resource ideas:

  • Library books (fairy tales, nature, history) 
  • Beeswax crayons or colored pencils 
  • Watercolor paints (basic set) 
  • Nature items (sticks, leaves, stones) 

Common Mistakes Parents Make (And How To Avoid Them)

Starting Waldorf can feel exciting, but also overwhelming if you try to do too much too fast.

Mistake #1: Overcomplicating everything

Waldorf doesn’t require perfection. You don’t need elaborate crafts or a Pinterest-worthy setup.

Fix: Keep it simple. Rhythm matters more than materials.

Mistake #2: Skipping rhythm entirely

Without rhythm, the day can feel chaotic, and kids notice.

Fix: Stick to consistent anchors like:

  • Morning lesson 
  • Outdoor time 
  • Creative work 

Mistake #3: Expecting instant results

Waldorf is a slow, gentle approach. It builds over time.

Fix: Give it a few weeks before judging if it’s “working.”

Mistake #4: Trying to replicate a classroom

Waldorf homeschool is NOT school at home.

Fix: Focus on:

  • Connection 
  • Creativity 
  • Hands-on learning 

A Real-Life Example Of A Waldorf Homeschool Day

Let’s say you’re homeschooling a 7-year-old.

Your morning starts quietly with a simple verse and a song. You move into a math lesson using a story about a baker dividing loaves of bread, and your child draws a picture to match the story. Instead of worksheets, learning feels like play with purpose.

After that, you head outside. Maybe it’s just your backyard, but your child climbs, explores, and burns off energy. Later, you bake muffins together, naturally practicing measuring and counting without forcing it. The learning continues, but it doesn’t feel like “school.”

In the afternoon, your child paints or works on a simple craft while you read aloud. The day ends calmly, without stress or rushing. Nothing was complicated, but everything was meaningful. That’s the heart of a Waldorf homeschool day.

How To Adapt Waldorf For Busy Or Overwhelmed Parents

You don’t need hours of prep time or a perfectly structured plan to make Waldorf work. In fact, trying to do too much is one of the fastest ways to burn out. The key is simplifying the method so it fits your real life, not an idealized version of it.

Start by focusing on just a few core elements: rhythm, storytelling, and hands-on learning. Even if your day feels busy, you can still read a story, take a short walk outside, and include one creative activity. These small pieces add up and create a meaningful learning experience without overwhelming you.

It’s also okay if every day looks a little different. Waldorf is flexible at home, and that’s a strength. Some days will be more structured, others more relaxed, but both still count. What matters most is consistency over time, not perfection in the moment.

FAQs About Waldorf Homeschool

FAQ: Is Waldorf homeschooling good for beginners?
Yes, Waldorf homeschooling can be very beginner-friendly because it focuses on rhythm and simple routines instead of rigid schedules. Many parents new to homeschooling find it less stressful than traditional methods. Starting small with a Waldorf-inspired homeschool routine makes it easier to build confidence over time.

FAQ: Do I need a Waldorf curriculum to homeschool this way?
No, you don’t need a formal Waldorf curriculum to get started. Many families use library books, storytelling, and simple hands-on activities instead. A Waldorf homeschool approach is more about how you teach than what you buy, making it a flexible and low-cost option.

FAQ: Can Waldorf homeschooling work with multiple kids?
Yes, Waldorf homeschooling works well with multiple ages because of its storytelling and group-based learning style. You can teach one main lesson and adjust expectations for each child. This makes it a practical homeschooling method for families with several children.

Explore The DKM Homeschool Resource Blog

Waldorf homeschooling doesn’t have to be complicated to be meaningful. By focusing on rhythm, connection, and simple daily practices, you can create a homeschool environment that feels calm, creative, and sustainable, even on busy days.

Remember, you’re not trying to recreate a perfect system. You’re building something that works for your family, one step at a time. Give yourself permission to start small, adjust as you go, and enjoy the process along the way.

If you’re looking for more practical homeschool tips, encouragement, and real-life strategies, keep exploring the DKM Homeschool Resource blog. There’s plenty here to help you feel confident and supported on your homeschooling journey.

Why Curiosity Is More Important Than Curriculum

Curiosity matters more than curriculum because it fuels lifelong learning, deeper understanding, and genuine engagement. When children are curious, they naturally seek knowledge, ask better questions, and retain what they learn, far beyond what any structured program can guarantee.

If you’ve ever felt overwhelmed trying to pick the “perfect” homeschool curriculum, take a breath. The truth is, your child’s natural curiosity is a more powerful learning tool than any workbook, schedule, or boxed program.

What Curriculum Is Best For Inquisitive Kids?

The best “curriculum” for inquisitive kids is one that flexes around their curiosity, not one that restricts it.

That doesn’t mean throwing structure out the window. It means choosing tools and approaches that encourage exploration instead of shutting it down.

Here’s what works best for curious learners:

  • Interest-led learning materials (books, documentaries, hands-on kits) 
  • Open-ended subjects like science experiments, history stories, and creative writing 
  • Flexible programs that allow rabbit trails 
  • Real-world learning opportunities (cooking, budgeting, nature walks

Instead of asking, “What curriculum should I buy?” try asking:

  • What is my child naturally interested in right now? 
  • How can I build learning around that interest? 
  • What resources support exploration instead of rigid completion? 

Example:
If your child is obsessed with space, you don’t need a full science curriculum immediately. Start with:

  • Library books about planets 
  • YouTube documentaries 
  • Building a model solar system 
  • Stargazing apps 

That’s real, deep learning, and it sticks.

Why Curiosity Creates Better Long-Term Learning

When children are curious, learning stops being something they have to do and becomes something they want to do. That shift changes everything.

Curiosity activates critical thinking, problem-solving, and memory retention in ways that worksheets simply cannot replicate. Kids ask more questions, make more connections, and take ownership of their education. Over time, this builds confidence and independence, two traits no curriculum can guarantee on its own.

Parents often notice that when curiosity leads, children will spend hours focused on a topic without being told. That level of engagement is what traditional schooling tries (and often fails) to create artificially. In homeschooling, you have the unique advantage of letting that natural motivation guide your child’s learning path.

Another powerful benefit is adaptability. Curious learners are not dependent on being told what to do next. They develop the ability to research, explore, and figure things out on their own. This becomes incredibly valuable as they grow older and face more complex subjects or real-world challenges.

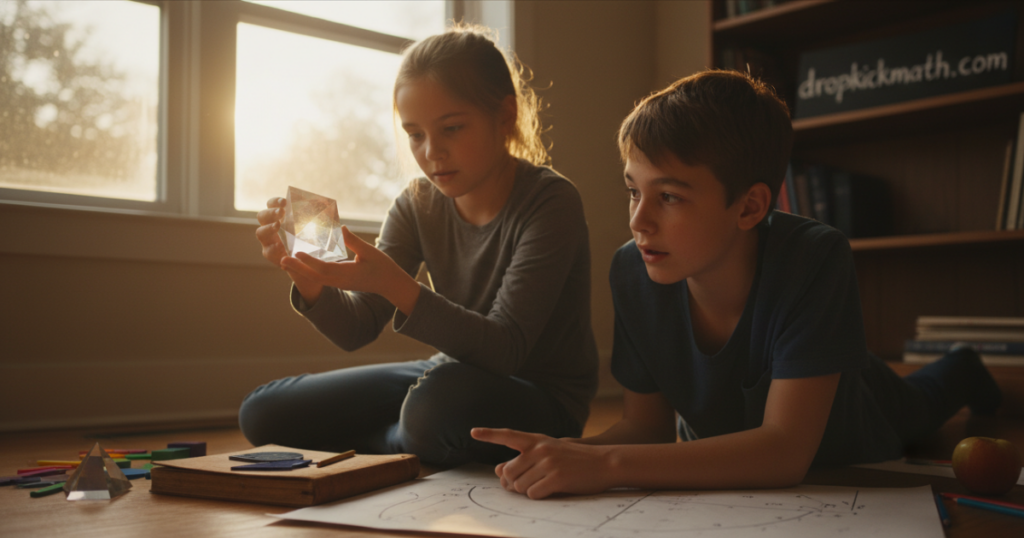
Two children sit on a sunlit floor, examining a transparent geometric prism they hold between them while crafting on the floor.

Common Mistakes Parents Make (And How To Avoid Them)

It’s easy to accidentally squash curiosity, even with the best intentions.

Here are some of the most common mistakes we see:

1. Overloading with curriculum

Parents often feel like they need to “cover everything.”

What happens:
Kids become overwhelmed, bored, or resistant.

Fix:
Start small. Focus on core subjects and leave room for exploration.

2. Interrupting curiosity with schedules

A child is deeply engaged in building something… but it’s time for math.

What happens:
You break concentration and kill momentum.

Fix:
Allow flexibility. Math can wait 30 minutes.

3. Prioritizing completion over understanding

Checking boxes becomes the goal instead of real learning.

What happens:
Kids rush through material without absorbing it.

Fix:
Slow down. Depth matters more than speed.

4. Ignoring “random” interests

Kids jump from dinosaurs to baking to bugs.

What happens:
Parents see it as distraction.

Fix:
See it as exploration. That variety builds broad knowledge.

Quick tip:
If your child is excited, lean into it, even if it wasn’t in your lesson plan.

Simple Ways To Nurture Curiosity In Your Homeschool

You don’t need a complete overhaul to start encouraging curiosity. Small changes make a big difference.

Try these this week:

1. Follow one rabbit trail per day
If your child asks a question, pause and explore it together.

2. Create a “wonder list”
Keep a notebook of questions your child asks.

3. Swap one worksheet for a hands-on activity
Example: bake instead of reading about measurements.

4. Use the library more
Free, flexible, and perfect for curiosity-driven learning.

5. Ask more questions instead of giving answers

  • “What do you think will happen?” 
  • “Why do you think that?” 

Easy resource ideas (low-cost or free)

  • Local library programs 
  • Nature centers or parks 
  • Educational YouTube channels 
  • Free printables for experiments 
  • Thrift store science kits or books 

Real-life example

Your child asks: “Why do leaves change color?”

Instead of:

  • Giving a quick answer 
  • Moving on 

Try:

  • Look it up together 
  • Watch a short video 
  • Collect leaves outside 
  • Create a mini science project 

That one question can turn into a full learning experience.

How To Balance Curiosity With Structure (Without Losing Your Mind)

Let’s be honest, completely unstructured homeschooling can feel chaotic. You still need a plan, especially if you’re juggling multiple kids or responsibilities.

The key is balance, not extremes.

You don’t have to choose between:

  • Total freedom 
  • Strict curriculum 

You can combine both.

Here’s a simple framework that works for many families:

The “Anchor + Explore” approach

Anchor (structured time):

  • Math 
  • Basic reading/writing 
  • Core skills 

Explore (flexible time):

  • Interests 
  • Projects 
  • Creative learning 

Sample daily rhythm

  • Morning: Core subjects (1–2 hours) 
  • Midday: Hands-on or interest-led learning 
  • Afternoon: Free exploration or outdoor time 

This gives you:

  • Structure where needed 
  • Freedom where it matters 

And it keeps both you and your child from burning out.

What This Looks Like In Real Homeschool Life

There’s a moment most homeschooling parents experience when they realize learning is happening, even when it doesn’t look like “school.” It might be during a messy kitchen science experiment or a long conversation sparked by a simple question. These moments can feel unstructured, but they are often where the deepest learning takes place.

One parent shared how her child became fascinated with weather after a storm. That curiosity led to weeks of learning, tracking forecasts, building a homemade rain gauge, and reading books about climate. None of it came from a formal curriculum, yet the depth of understanding far exceeded what a textbook lesson might have provided.

Another family noticed their child’s interest in animals turn into a full-blown study of ecosystems. They visited local parks, watched documentaries, and even started a small backyard habitat project. Over time, subjects like science, geography, and writing naturally blended together through that one interest.

These experiences remind us that learning doesn’t always follow a straight path. When curiosity leads, education becomes more connected, meaningful, and memorable for both the child and the parent.

Steps You Can Take This Week

If you’re feeling stuck or unsure where to start, keep it simple.

Your 5-step plan:

  1. Observe your child
    • What are they naturally drawn to? 
  2. Pick one interest
    • Focus on it for a few days 
  3. Gather simple resources
    • Books, videos, supplies 
  4. Create one hands-on activity
    • Keep it easy and fun 
  5. Reflect together
    • Ask what they learned and enjoyed 

What will change?

  • Less resistance 
  • More engagement 
  • Better retention 
  • A calmer homeschool environment 

And honestly? More joy for you too.

Keep Learning With DKM Homeschool Resource

Curiosity is not something you need to create, it’s already there. Your job isn’t to replace it with curriculum, but to protect it, guide it, and build learning around it.

When you shift your focus from “What should we finish today?” to “What is my child curious about?” everything starts to feel lighter. Homeschooling becomes less about pressure and more about partnership. You’re not just teaching, you’re exploring alongside your child.

If you’re navigating this journey and want more practical tips, encouragement, and real-life homeschool strategies, keep exploring the DKM Homeschool Resource blog. We’re here to help you simplify, gain confidence, and build a homeschool experience that actually works for your family.

FAQs

FAQ: Is curiosity-led homeschooling enough for academic success?
Yes, when balanced with core skills like math and reading, curiosity-led homeschooling can be highly effective. It promotes deeper understanding and long-term retention. Many successful homeschool strategies combine structured basics with interest-led learning for the best results.

FAQ: How do I choose a homeschool curriculum without feeling overwhelmed?
Start small and focus on flexibility. Look for programs that allow customization and don’t require rigid pacing. The best homeschool curriculum supports your child’s interests while covering essential skills, rather than forcing a one-size-fits-all approach.

FAQ: What if my child doesn’t seem curious about anything?
Curiosity often grows when kids feel less pressure. Try introducing new experiences, nature walks, hands-on projects, or library visits. Limiting screens and allowing boredom can also spark curiosity, which is a key part of effective homeschooling for beginners.

The Rise of Micro-Schools: What They Are And How They Work

Micro-schools are small, flexible learning environments that blend homeschooling, private education, and personalized instruction. They typically serve 5–15 students and focus on individualized learning, community, and real-world skills. For many families, they offer a middle ground between traditional school and full-time homeschooling.

Are Micro-Schools Good For Every Age?

Micro-schools can work for a wide range of ages, but they’re not one-size-fits-all.

For younger children (ages 5–10), micro-schools can feel like an extension of homeschooling:

  • Smaller groups = more attention 
  • Flexible schedules = less burnout 
  • Play-based and hands-on learning fits naturally 

For middle schoolers, micro-schools often shine:

  • Social interaction without overwhelming environments 
  • Project-based learning keeps engagement high 
  • More independence, but still guided 

For high schoolers, it depends more on structure:

  • Some micro-schools offer strong academic planning 
  • Others lean heavily into life skills and entrepreneurship 
  • You may need to supplement for transcripts or college prep 

Quick takeaway:
Micro-schools can work at any age, but the older your child, the more you’ll want to evaluate academic structure, long-term goals, and accountability.

What Exactly Is A Micro-School (And How Is It Different From Homeschooling)?

If you’re picturing a tiny classroom with a handful of kids, that’s actually pretty close.

Micro-schools sit somewhere between:

  • Homeschooling 
  • Private schooling 
  • Learning pods or co-ops 

Here’s what makes them different:

Typical micro-school features:

  • 5–15 students total 
  • Multi-age classrooms 
  • Flexible daily schedules 
  • Focus on projects and real-world learning 
  • Often run by a teacher, parent, or small team 

Compared to homeschooling:

  • You’re not doing everything alone 
  • There’s shared teaching responsibility 
  • Built-in social interaction 

Compared to traditional school:

  • Less rigid structure 
  • More customization 
  • Fewer standardized tests 

A simple example:

Instead of 25 kids learning the same math lesson at the same pace, a micro-school might have 8 kids all working at their own level, with one adult guiding, coaching, and supporting.

This flexibility is exactly why so many homeschool families are exploring micro-schools right now.

How Micro-Schools Actually Work Day-To-Day

How Micro-Schools Actually Work Day-To-Day

Every micro-school looks a little different, but most follow a similar rhythm.

A typical day might include:

  • Morning meeting or check-in 
  • Individual learning time (math, reading, writing) 
  • Group project or discussion 
  • Outdoor time or physical activity 
  • Skill-building (life skills, art, tech, etc.) 

Some micro-schools meet:

  • 2–3 days per week (hybrid model) 
  • 5 days per week (full-time alternative) 
  • Just a few hours per day 

Common learning approaches:

  • Project-based learning 
  • Montessori-style independence 
  • Classical education 
  • Interest-led or child-directed learning 

Quick tip for parents:
Ask this one question when evaluating a micro-school:

👉 “How do you handle different learning levels in the same group?”

The answer will tell you a LOT about how effective the program really is.

This is where many families feel a huge sense of relief. Instead of juggling every subject alone, you’re sharing the responsibility while still staying deeply involved in your child’s education. It creates breathing room without completely handing over control, which is something many homeschool parents crave after a year or two of doing everything themselves.

At the same time, it can feel a little uncomfortable at first. You may wonder if you’re “doing enough” or if your child is learning the right things. That tension is normal, especially if you’re transitioning from full-time homeschooling. The key is remembering that learning doesn’t have to look like a traditional classroom to be effective.

Pros And Cons Of Micro-Schools For Homeschool Families

Let’s break this down clearly so you can make a confident decision.

Pros

  • More support for parents
    You’re not teaching everything yourself 
  • Built-in social interaction
    Kids form meaningful friendships in small groups 
  • Flexible learning pace
    No pressure to “keep up” with a rigid system 
  • Personalized attention
    Teachers actually know your child 
  • Creative, engaging learning
    Less worksheet-heavy, more hands-on 

Cons

  • Cost can vary
    Some are affordable, others feel like private school 
  • Quality is inconsistent
    No universal standards 
  • Less structure (sometimes)
    Not ideal for every child 
  • Limited availability
    Not every area has good options 

Common mistake to avoid

Many parents assume all micro-schools are similar.

They are not.

Two micro-schools in the same city can be completely different in:

Always visit in person if possible.

How To Start Or Join A Micro-School (Even This Week)

You don’t have to wait months to explore this option.

Here are simple steps you can take right away:

1. Look locally first

Search for:

  • “micro-school near me” 
  • homeschool co-ops 
  • learning pods 
  • hybrid homeschool programs 

Check:

  • Facebook groups 
  • local homeschool associations 
  • community centers 

2. Ask the right questions

When you find one, ask:

  • How many students are enrolled? 
  • What does a typical day look like? 
  • How is progress tracked? 
  • What’s expected from parents? 

3. Try before committing

If possible:

  • Attend a trial day 
  • Start part-time 
  • Observe interactions 

4. Consider starting your own

Yes, this is more common than you think.

You can begin with:

  • 2–3 families 
  • Shared teaching responsibilities 
  • Meeting 2–3 days per week 

Low-cost setup idea:

  • Rotate homes or use a community space 
  • Use free curriculum resources (Khan Academy, library materials, etc.) 
  • Focus on core subjects + group projects 

One of the biggest mindset shifts parents experience is realizing they don’t have to choose between “doing it all alone” and “sending their child back to traditional school.” Micro-schools open up a third path that feels more balanced. You can still guide your child’s education while leaning on a small, supportive community.

This middle ground is especially helpful during seasons of burnout or transition. If you’ve ever felt stretched thin trying to manage lessons, housework, and everything else, a micro-school can lighten that load without sacrificing your values. It gives both you and your child a chance to reset and re-engage with learning in a healthier way.

Is A Micro-School Right For Your Family?

This is the question that really matters.

Instead of asking, “Are micro-schools good?” ask:

👉 “Are micro-schools a good fit for MY child and MY season?”

Micro-schools tend to work well if:

  • Your child thrives in small groups 
  • You want more flexibility than traditional school 
  • You’re feeling overwhelmed with full-time homeschooling 
  • You value community and collaboration 

They may not be the best fit if:

  • Your child needs very structured, traditional instruction 
  • You want strict grade-level pacing 
  • You prefer full control over every subject 

A quick decision framework

Think through:

  1. Your child’s personality 
  2. Your current stress level 
  3. Your long-term goals (college, trades, entrepreneurship) 
  4. Your available time 

If a micro-school solves more problems than it creates, it’s worth trying.

FAQs About Micro-Schools

FAQ: What is the difference between a micro-school and a homeschool co-op?
A micro-school usually has consistent leadership and a structured daily routine, while a homeschool co-op often meets weekly and shares teaching among parents. Micro-schools feel more like a small school, while co-ops are typically more casual and supplemental.

FAQ: Are micro-schools considered homeschooling?
In many cases, yes. Depending on your state laws, your child may still be classified as homeschooled while attending a micro-school. Always check local homeschool regulations to make sure you’re meeting legal requirements.

FAQ: How much do micro-schools cost?
Costs vary widely. Some micro-schools operate like affordable homeschool pods, while others charge private school-level tuition. Many families find lower-cost options by joining or creating small learning groups within their homeschool community.

We Are Here To Help!

Micro-schools are opening up new possibilities for families who want something more flexible, more personal, and more supportive than traditional education. Whether you’re fully homeschooling, feeling burned out, or just exploring options, this model can be a powerful tool when used thoughtfully.

The best part? You don’t have to figure it all out at once. Start small, ask questions, and take one step at a time.

If this topic sparked ideas or questions for your family, keep going. At DKM Homeschool Resource, we’re here to help you build a homeschool life that actually works, practically, realistically, and with confidence.

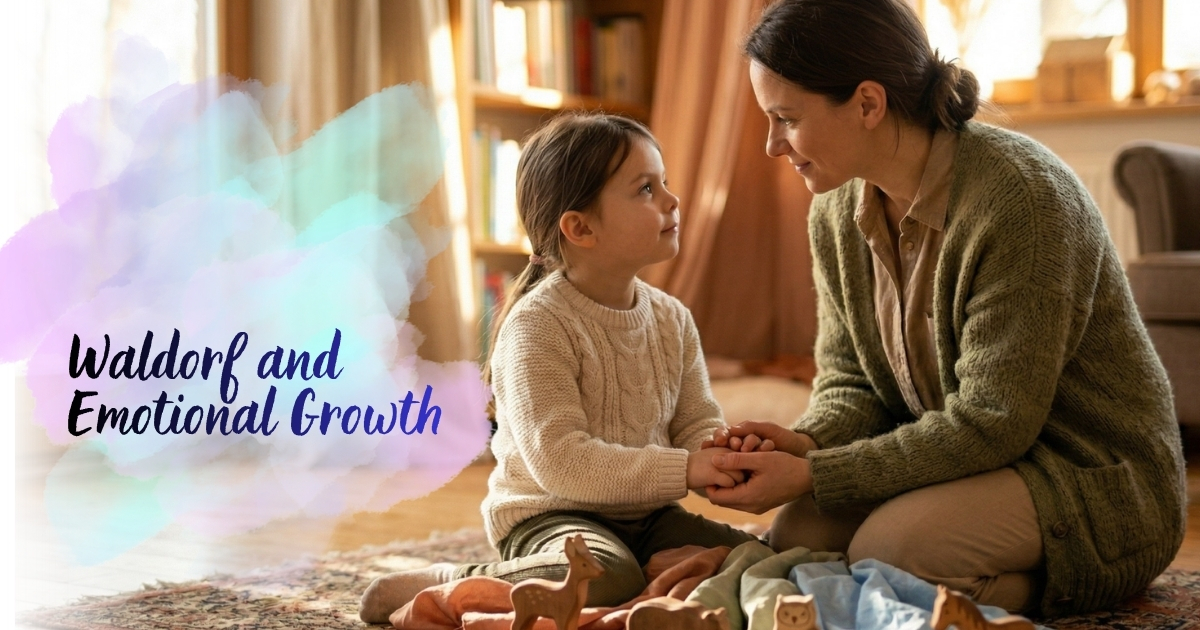
How Waldorf Supports Emotional Development

Waldorf homeschooling supports emotional development by focusing on creativity, imagination, routine, and meaningful human connection. Instead of pushing early academics, it prioritizes emotional maturity, resilience, empathy, and a strong sense of self. For many families, this approach creates calmer homes, happier learners, and children who feel secure exploring the world.

Parents often come to us at DKM Homeschool Resource feeling overwhelmed by the many homeschool philosophies available. Waldorf stands out because it recognizes something many parents instinctively know: emotional development is just as important as academic progress.

Let’s walk through how Waldorf homeschooling nurtures emotional growth and which children tend to thrive most in this learning style.

What Types Of Kids Are Best In Waldorf Homeschooling?

Waldorf homeschooling tends to work beautifully for children who thrive in creative, hands-on environments and who benefit from slower, emotionally grounded learning. Kids who enjoy storytelling, art, nature, movement, and imaginative play often flourish in Waldorf settings.

Children who typically do well in Waldorf homeschooling include:

This doesn’t mean only certain children can succeed in Waldorf. Many families adapt the approach to meet different learning needs.

However, the Waldorf philosophy shines particularly bright for children who:

One parent recently shared with us that her son struggled in traditional schooling because worksheets drained his motivation. Once she introduced Waldorf storytelling and hands-on lessons, his confidence blossomed almost immediately.

Sometimes the difference is simply giving a child the emotional space to grow.

Why Emotional Development Is The Heart Of Waldorf Education

Waldorf education begins with a simple belief: children learn best when they feel emotionally secure.

Many traditional academic systems emphasize memorization and performance early. Waldorf takes a different approach. It focuses on emotional foundations first so children can develop curiosity, confidence, and resilience naturally.

In the early years, Waldorf homeschooling emphasizes:

  • Imaginative play
  • Storytelling
  • Creative expression
  • Daily rhythm and routine
  • Connection with nature

These elements work together to support emotional growth.

For example, storytelling isn’t just entertainment in Waldorf education. Stories help children process emotions, understand relationships, and explore moral ideas safely.

Through stories, children experience:

  • courage
  • kindness
  • perseverance
  • empathy

Those lessons stay with them far longer than worksheets.

Parents often tell us they notice emotional changes quickly once they begin using Waldorf-inspired methods at home. Children who previously resisted learning become curious again when lessons involve movement, art, and imagination instead of rigid structure. Emotional safety creates the mental space kids need to explore and take risks.

When children feel pressured or anxious, their brains shift into survival mode. Learning becomes much harder. Waldorf homeschooling gently removes that pressure and replaces it with rhythm, creativity, and connection.

The result is often calmer learning environments where both parent and child feel more relaxed.

Simple Waldorf Practices That Build Emotional Intelligence

Simple Waldorf Practices That Build Emotional Intelligence

The beauty of Waldorf homeschooling is that parents can begin incorporating it immediately. You don’t need expensive curriculum or complicated schedules.

Here are simple practices that support emotional development right away.

1. Establish a daily rhythm

Children feel emotionally secure when their days have predictable patterns.

A simple Waldorf-inspired rhythm might look like:

Morning rhythm example:

  1. Breakfast together
  2. Morning walk outside
  3. Storytime or read-aloud
  4. Main lesson activity
  5. Creative play

The goal isn’t strict scheduling. The goal is creating a gentle flow children can rely on.

2. Replace lectures with storytelling

Instead of explaining concepts academically, introduce ideas through stories.

Examples:

  • History → tell historical stories
  • Science → nature observation stories
  • Character lessons → fairy tales or fables

Stories speak directly to a child’s emotions.

3. Encourage open-ended creativity

Creative activities help children process feelings and build confidence.

Great Waldorf-style options include:

  • watercolor painting
  • beeswax modeling
  • drawing nature journals
  • simple crafts

You don’t need fancy materials.

Low-cost supplies include:

  • basic watercolor sets
  • colored pencils
  • recycled craft materials
  • homemade play dough

4. Spend time in nature every day

Nature play helps children regulate emotions naturally.

Try:

  • forest walks
  • backyard gardening
  • nature scavenger hunts
  • outdoor journaling

Even 20 minutes outdoors can reset a child’s mood and attention.

Common Mistakes Parents Make When Trying Waldorf Homeschooling

When parents first discover Waldorf education, it’s easy to overcomplicate things.

We see several common mistakes among new homeschool families.

Mistake 1: Trying to recreate a classroom

Waldorf homeschooling is meant to feel natural and home-centered.

You don’t need:

  • desks in rows
  • rigid schedules
  • formal grading

Instead focus on connection and rhythm.

Mistake 2: Buying too many expensive materials

Social media sometimes makes Waldorf look expensive.

But many authentic Waldorf activities use:

  • natural materials
  • handmade items
  • simple supplies

A nature walk and a sketchbook can teach more than a $200 curriculum kit.

Mistake 3: Pushing academics too early

Waldorf delays formal academics intentionally.

Young children benefit more from:

  • movement
  • storytelling
  • imaginative play

Academic learning becomes easier later when emotional readiness is strong.

Mistake 4: Ignoring emotional signals

If a child is overwhelmed, pause the lesson.

Waldorf homeschooling encourages parents to observe their child closely and adjust learning accordingly.

Many parents discover that Waldorf homeschooling transforms their relationship with their children. When learning shifts from performance to connection, children often feel more understood and supported. Instead of battles over worksheets, families begin sharing stories, creative projects, and outdoor adventures together.

This emotional shift can ripple through the entire household. Parents frequently report that their homes feel calmer and more cooperative once they adopt a rhythm-based approach to learning. Emotional development becomes something the whole family experiences together.

Homeschooling suddenly feels less like managing schoolwork and more like living and learning as a family.

Practical Steps To Try Waldorf Homeschooling This Week

If you’re curious about Waldorf but unsure where to start, try these simple steps this week.

Step 1: Introduce a morning story

Choose a simple fairy tale or folk story and read it aloud each morning.

Recommended free resources:

  • local library fairy tale collections
  • Project Gutenberg folk tales
  • classic Grimm stories

Repeat the same story for several days. Children love repetition.

Step 2: Start a nature observation habit

Take a short daily walk and ask your child:

  • What do you notice today?
  • What changed since yesterday?

Encourage drawing observations afterward.

Step 3: Create a simple weekly rhythm

Example beginner rhythm:

  • Monday → nature walk
  • Tuesday → watercolor painting
  • Wednesday → baking together
  • Thursday → storytelling & drawing
  • Friday → outdoor exploration

Consistency helps children feel secure.

Step 4: Reduce unnecessary pressure

If a lesson isn’t working, take a break.

Try:

  • going outside
  • reading together
  • doing a hands-on activity

Learning will still happen.

Step 5: Keep lessons short

Especially for younger children.

Helpful rule of thumb:

  • Ages 6–8 → 20–30 minutes
  • Ages 9–12 → 30–45 minutes

After that, movement and play help reset focus.

Waldorf FAQs 

FAQ: What age works best for Waldorf homeschooling?
Waldorf homeschooling is especially popular for preschool and elementary years because emotional development and imagination are emphasized. Many families begin using Waldorf-inspired homeschooling methods between ages 3–10. However, the philosophy can adapt well to middle school homeschool and even high school homeschool planning.

FAQ: Is Waldorf homeschooling good for sensitive or anxious children?
Yes. Waldorf homeschooling often works extremely well for sensitive children because it reduces academic pressure and focuses on emotional development, creativity, and rhythm. Many homeschool parents find Waldorf methods help anxious learners feel calmer, more confident, and more connected to learning.

FAQ: Do children still learn strong academics with Waldorf homeschooling?
Absolutely. Waldorf homeschooling simply delays formal academics slightly to prioritize emotional readiness. Once children are developmentally ready, academic skills often develop quickly and deeply. Many Waldorf homeschool families find their children retain knowledge better because learning is connected to stories, art, and hands-on experiences.

One Beautiful Path

Every homeschool family’s journey looks a little different, and that’s okay. Waldorf homeschooling is simply one beautiful path that helps nurture emotionally strong, curious, and creative children.

At DKM Homeschool Resource, we believe homeschooling should feel encouraging rather than overwhelming. Small shifts—like adding storytelling, daily rhythm, or nature exploration—can transform the emotional atmosphere of learning in your home.

If you’re exploring Waldorf education or just looking for practical homeschooling tips, we invite you to continue exploring our blog. You’ll find step-by-step guides, creative homeschool ideas, and real-life encouragement from families walking the same path.

Homeschooling doesn’t have to be perfect to be powerful.

And sometimes, the most meaningful learning happens in the quiet moments between lessons.

Around the World Unit Study: Geography, Culture, and Food Activities for Homeschool

What if your homeschool could travel the world without ever leaving the kitchen table?

An Around the World unit study is one of the most exciting ways to explore geography, culture, and global traditions together as a family. Instead of simply reading about different countries, children can experience them through maps, food, music, crafts, and storytelling.

This type of learning turns geography into an adventure. One week your homeschool might explore the bustling cities of Japan. The next week you could discover the colourful traditions of Mexico or the historic landmarks of Italy. Each destination brings new opportunities to learn.

For homeschool families, unit studies are especially powerful because they naturally combine multiple subjects into one engaging theme. Geography, history, reading, writing, art, and even math can all connect through the exploration of different countries and cultures.

Children also develop something just as important as academic knowledge: global awareness. Learning about how people live around the world helps kids build curiosity, empathy, and a deeper understanding of cultures beyond their own.

Best of all, these lessons can be incredibly hands-on. Families can cook traditional meals, learn greetings in new languages, create cultural crafts, and track their travels on a world map.

In this guide, you will learn how to create an Around the World unit study in your homeschool, including ideas for geography activities, cultural exploration, and simple international foods your children will love.

Get ready to pack your (imaginary) bags. Your homeschool journey around the globe is about to begin. 

How to Create a Unit Study for Homeschool

Creating a homeschool unit study might sound complicated at first, but it can actually be one of the simplest and most flexible ways to teach multiple subjects at once. The key is choosing a central theme and building different learning activities around it.

For an Around the World unit study, the theme is clear: exploring countries, cultures, and traditions from different parts of the globe.

Start by selecting one country or region to focus on each week (or every few days depending on your schedule). This helps children dive deeper into the culture instead of rushing through many places too quickly.

Next, think about the subjects you want to include. Unit studies work well because they naturally blend different areas of learning together.

You might include activities like:

  • Geography: Locate the country on a map or globe and explore nearby regions.
  • History: Learn about important events, landmarks, or famous people from that country.
  • Culture: Explore traditions, clothing, holidays, or daily life.
  • Food: Cook or taste a simple traditional recipe together.
  • Music and Art: Listen to traditional music or create crafts inspired by the culture.
  • Language: Practice a few basic greetings or words from the local language.

It can also help to create a simple structure for each country you study so children know what to expect each week.

For example, many homeschool families use a pattern like:

  • Day 1: Geography and introduction to the country
  • Day 2: Culture, traditions, and daily life
  • Day 3: Food or cooking activity
  • Day 4: Art, music, or creative project
  • Day 5: Review, storytelling, or presentation

The beauty of homeschool unit studies is flexibility. You can spend more time on the topics that spark your child’s curiosity and adjust activities based on their age and interests.

Choosing Countries and Themes for Your Around the World Unit Study

Choosing Countries and Themes for Your Around the World Unit Study

Once you understand how a unit study works, the next step is deciding which countries or regions to explore. This is where the learning really becomes exciting for homeschool families.

A good approach is to choose places that offer variety in culture, geography, and traditions. When children explore different foods, music, languages, and environments, they gain a much broader understanding of the world.

You might start by selecting one country per week or one region per month, depending on how in-depth you want the study to be. Some families like to follow a map and move across continents, while others choose countries based on interest.

For example, if your child enjoys animals, you might explore countries known for unique wildlife. If they enjoy cooking, you might focus on places with interesting cuisine.

Here are some simple ways to organize your country choices:

1. Travel by Continent

This approach helps children understand world geography in a logical order.

  • Africa
  • Europe
  • Asia
  • North America
  • South America
  • Australia and Oceania
  • Antarctica (for a science-focused mini unit)

2. Travel by Theme

Instead of continents, you can organize countries by interesting cultural connections.

  • Countries known for famous landmarks
  • Countries with unique traditional foods
  • Countries known for music and dance
  • Countries with fascinating wildlife

3. Let Kids Help Choose

One of the best parts of homeschooling is flexibility. Allowing children to help select countries often increases engagement and curiosity.

You might:

  • Let them pick a country from a globe
  • Draw country names from a jar
  • Choose places related to books or movies they enjoy

When children feel involved in the planning, they are much more likely to become excited about the learning process.

The goal is not to study every country in the world, but to help children build curiosity about different cultures, places, and traditions. Even exploring 10–15 countries in depth can create meaningful global awareness.

Bringing Geography to Life in Your Around the World Unit Study

Geography is the foundation of any Around the World homeschool unit study. Before children can truly understand cultures and traditions, they first need to know where a country is located and what the land looks like.

Instead of relying only on worksheets or textbooks, try to make geography interactive and visual. When children can see, touch, and explore maps, the learning becomes much more memorable.

Start by using a world map or globe during every lesson. Each time you introduce a new country, locate it together and talk about the surrounding areas.

You might discuss questions such as:

  • What continent is the country on?
  • What countries border it?
  • Is it close to oceans, mountains, or deserts?
  • How far is it from where you live?

These simple discussions help children develop map-reading skills and spatial awareness.

Hands-on geography activities can also make lessons more engaging.

Some homeschool-friendly ideas include:

  • Map pinning: Add a pin or sticker to every country you study.
  • Create a travel passport: Stamp or mark each location your child “visits.”
  • Salt dough maps: Build raised maps that show mountains and rivers.
  • Label the continents: Practice identifying continents and major oceans.

You can also explore how geography affects daily life in each country. For example, mountainous regions may influence architecture, transportation, and food traditions.

Children might discover that:

  • Coastal regions often feature seafood-based dishes.
  • Desert climates require different building styles.
  • Cold climates influence clothing and seasonal traditions.

These connections help children understand that geography is not just about maps. It plays a major role in how people live around the world.

create their own world travel notebook

To make learning even more immersive, you can encourage children to create their own world travel notebook. Each time you study a country, they can add:

  • A small map or drawing
  • The country’s flag
  • Interesting geography facts
  • Notes about climate or landscape

Over time, this notebook becomes a personalized record of their global journey.

Cooking Around the World: Food as a Cultural Adventure

One of the most engaging ways to explore different countries in a homeschool unit study is through food. Cooking traditional dishes lets children experience a culture with all their senses—taste, smell, sight, and even touch.

Food activities naturally tie into multiple learning areas. Measuring ingredients reinforces math skills, following a recipe improves reading and comprehension, and preparing dishes together encourages teamwork and problem-solving. Beyond academics, children gain cultural awareness, learning why certain foods are important in different regions.

Here are some ways to make cooking part of your Around the World unit study:

  • Simple Recipes: Choose easy, age-appropriate recipes that children can help prepare.
  • Ingredient Exploration: Introduce new spices, fruits, or grains and discuss their origins.
  • Cultural Stories: Talk about when and why a dish is traditionally eaten, such as during festivals or holidays.
  • Hands-On Practice: Let children mix, knead, or shape dough, roll sushi, or assemble tacos—activities that also improve fine motor skills.
  • Food Journals: Encourage children to record recipes, write about the taste, and note what they learned about the culture.

Examples of dishes to try by region:

  • Italy: Pasta with simple sauces or focaccia bread
  • Japan: Rice dishes, sushi rolls, or miso soup
  • Mexico: Tacos, quesadillas, or guacamole
  • India: Vegetable curry or flatbreads
  • France: Crepes or baguettes

Food activities also provide natural opportunities for conversation and reflection. Ask children which flavors were new or surprising, what they liked best, and how the food connects to the country’s culture and geography.

When cooking becomes part of your unit study, lessons are no longer just academic—they’re memorable, fun, and immersive. Children leave with a stronger understanding of the country, hands-on skills, and, of course, a satisfied appetite.

Creating a Weekly Travel Plan for Your Unit Study

A well-structured weekly plan keeps your Around the World unit study organized, balanced, and engaging. It helps children know what to expect while making sure geography, culture, and food activities all get time and attention.

Using a weekly schedule or “travel plan” also makes it easier to track progress and ensures that no part of the unit is rushed. A clear plan gives structure while leaving room for creativity and flexibility.

Here’s an example of how a weekly travel plan might look:

DayFocusExample Activities
MondayGeographyLocate country on a map, identify landmarks, explore climate
TuesdayCultureLearn about traditions, clothing, music, or festivals
WednesdayLanguagePractice greetings or simple words from the local language
ThursdayFoodCook or prepare a traditional recipe
FridayReflection & Creative ProjectsJournal about what was learned, create crafts, or present findings

This chart can be adapted based on your homeschool schedule. For younger children, keep sessions short and hands-on. Older children might enjoy more in-depth research or longer cooking projects.

Tips for using the weekly plan effectively:

  • Mix high-energy and calm activities: Combine active learning like dance or movement with quieter tasks such as journaling or map labeling.
  • Adjust to interest: If a child shows excitement about a certain country, spend extra time exploring its culture or cooking additional dishes.
  • Document progress: Use a travel notebook, passport, or checklist so children can see what they’ve accomplished.

Having a weekly plan transforms your Around the World unit study from a series of random activities into a cohesive learning journey. It ensures that children are exposed to geography, culture, and food in a way that’s memorable, structured, and fun.

Integrating Art, Music, and Language

To make an Around the World unit study truly immersive, it’s important to include art, music, and language alongside geography, culture, and food. These elements bring each country to life, allowing children to experience its traditions in a multi-sensory way.

Art activities can include drawing or painting traditional patterns, creating crafts inspired by local customs, or designing flags and landmarks. For example, children might paint Japanese cherry blossoms, make Mexican papel picado, or craft African masks. These projects strengthen fine motor skills while reinforcing cultural knowledge.

Music is another engaging way to explore culture. Listening to traditional songs, drumming patterns, or folk instruments helps children understand rhythm, expression, and storytelling in different countries. You can even combine music with movement, letting children dance or create choreography inspired by the culture.

Language activities can be simple yet impactful. Learning greetings, common phrases, or song lyrics in the local language enhances memory, listening skills, and pronunciation. For older children, you can introduce short stories, poems, or basic reading exercises in the native language.

Tips for integrating these elements:

  • Connect art projects to the country being studied that week.
  • Play traditional music during cooking, movement, or craft activities.
  • Encourage children to say new words or phrases aloud while completing tasks.
  • Incorporate reflection by asking children how the art, music, or language connects to the culture.

By combining art, music, and language with geography and food, children gain a well-rounded understanding of each country. Lessons become memorable and interactive, offering multiple ways to engage with the material.

Reflection and Travel Journals

Reflection is a key part of an Around the World unit study. It helps children process what they’ve learned, make connections between geography, culture, and food, and develop critical thinking skills. A travel journal is an ideal tool for this purpose.

Each time a country is studied, children can add entries to their journal. They might include:

  • Maps and Flags: Draw the country or add a printed map and flag.
  • Cultural Notes: Record interesting facts about traditions, holidays, or daily life.
  • Food Experiences: Write about dishes they cooked or tasted, favorite flavors, and what they learned about local ingredients.
  • Language Practice: Note greetings, words, or song lyrics they learned.
  • Creative Projects: Attach sketches, crafts, or photos from art and music activities.

Journals encourage children to reflect on their learning rather than just moving from activity to activity. After each session, ask open-ended questions like:

  • What did you enjoy most about this country?
  • What surprised you about its culture or food?
  • How is life there different from where we live?

This practice also develops writing, observation, and analytical skills. Children see their progress over time and gain a sense of accomplishment as the journal fills up with entries from multiple countries.

For younger children, travel journals can be mostly visual, with drawings, stickers, and simple labels. Older children can include longer reflections, comparisons between cultures, and more detailed notes.

By combining reflection with a travel journal, you create a personalized record of your child’s global journey. It turns learning into a keepsake, reinforces memory retention, and motivates children to continue exploring the world.

Hosting an Around the World Celebration

An Around the World celebration is a fun and meaningful way to wrap up your homeschool unit study. It gives children a chance to share what they’ve learned, show off their skills, and celebrate the cultures they’ve explored.

Start by inviting family members or close friends to join. This creates an audience for children to present their work, boosting confidence and motivation. The celebration can include a mix of activities from the unit study, such as:

  • Food Tasting: Prepare small dishes from each country studied and let guests sample them. Children can explain the recipe and its cultural significance.
  • Cultural Displays: Showcase crafts, artwork, or posters highlighting traditions, festivals, and landmarks.
  • Music and Dance: Perform songs, dances, or rhythms learned during the unit. Even simple group performances can be exciting and educational.
  • Language Demonstrations: Children can teach greetings, short phrases, or songs in the native language of each country.

You can also incorporate a “passport ceremony” where children receive stickers or stamps for each country they explored, giving them a tangible sense of accomplishment.

Celebrations provide a natural opportunity for reflection and discussion. Ask children questions like:

  • Which country did you enjoy learning about the most?
  • What new food or tradition surprised you?
  • How did geography or climate affect daily life in each country?

Hosting a celebration reinforces everything children learned throughout the unit and makes the experience memorable. It also encourages them to take pride in their hard work and see learning as a joyful, shared experience.

Encouraging Lifelong Curiosity and Global Awareness

One of the most valuable outcomes of an Around the World unit study is fostering lifelong curiosity about different cultures, people, and places. When children explore geography, traditions, food, music, and language, they begin to see the world as a connected and fascinating place.

Encouraging global awareness can be as simple as building on the interests sparked during the unit study. For example, if a child loved learning about Japanese culture, they might explore Japanese art, literature, or festivals further. If they were excited by Mexican cuisine, they might research other Latin American countries or try new recipes at home.

Practical ways to cultivate curiosity include:

  • Cultural Festivals: Attend local international festivals or cultural events.
  • Global Literature: Read books, folktales, or biographies from around the world.
  • International Pen Pals: Connect with children from other countries through safe, age-appropriate pen pal programs.
  • Travel and Virtual Tours: Explore museums, landmarks, and cities online or in person when possible.
  • Cooking Adventures: Continue experimenting with recipes from different countries.

It’s also important to discuss empathy and understanding during these activities. Ask children questions like:

  • How is life similar or different from ours?
  • What can we learn from the way people live in other countries?
  • How can understanding different cultures help us in our own community?

By consistently connecting lessons to curiosity, exploration, and empathy, children develop skills and perspectives that extend far beyond the homeschool classroom. They learn that learning about the world is not just academic—it’s a lifelong adventure that inspires respect, understanding, and a sense of global citizenship.

Exploring the World From Home

An Around the World unit study transforms homeschool into an adventure. By combining geography, culture, food, art, music, and language, children experience learning that is hands-on, engaging, and memorable. Each country explored becomes a doorway to understanding the world, its people, and their traditions.

From cooking international dishes to mapping countries, creating crafts, and learning new words, children develop skills in multiple subjects while building curiosity, empathy, and global awareness. With thoughtful planning, reflection, and family participation, your homeschool can travel the globe without ever leaving home—turning learning into a lifelong journey of discovery.

How to Teach Place Value the Montessori Way

Teaching place value the Montessori way means helping your child see and touch how numbers are built using hands-on materials like golden beads, number cards, and real-life counting experiences. Instead of memorizing that “10 ones equals 1 ten,” children physically exchange units for tens and truly understand how our base-ten system works.

If you’ve ever watched your child stare blankly at a worksheet full of regrouping problems, you’re not alone. Many homeschool parents feel stuck when math suddenly shifts from simple counting to bigger numbers. The good news? Montessori place value activities make this transition smooth, visual, and even fun.

Let’s walk through exactly how to do it — step by step — without overwhelming yourself.

What Are The 4 C’s Of Montessori?

The 4 C’s of Montessori are commonly described as:

  • Concentration
  • Coordination
  • Confidence
  • Competence

These four pillars show up beautifully when teaching place value.

When a child carefully counts 10 unit beads and exchanges them for a ten bar, they develop concentration. As they physically move and organize materials, coordination improves. When they successfully build 1,245 using concrete materials, confidence grows. And as understanding deepens, true mathematical competence develops.

Montessori education is not about rushing ahead. It’s about building a strong foundation that lasts.

When parents approach place value using this philosophy, the focus shifts from “getting through the lesson” to helping a child truly grasp how numbers work. And that shift changes everything.

Why Montessori Place Value Works So Well

Traditional math instruction often jumps too quickly into abstraction. Children are expected to understand that the digit “3” means 300 in one place and 3 in another — without physically experiencing what that means.

Montessori slows this down intentionally.

Children first handle real quantities. They:

  • Count individual unit beads (ones)
  • Bundle or exchange into ten bars
  • Stack ten bars into hundred squares
  • Combine hundred squares into thousand cubes

Instead of memorizing rules, they discover them.

Imagine your child physically building the number 2,347:

  • 2 thousand cubes
  • 3 hundred squares
  • 4 ten bars
  • 7 unit beads

That visual and tactile experience creates deep number sense that worksheets alone can’t provide.

Another reason this method works? It respects developmental stages. Young learners think concretely first. Montessori math honors that reality.

How To Teach Place Value The Montessori Way (Step-By-Step)

How To Teach Place Value The Montessori Way

Here’s the practical part — what you can actually do this week.

You don’t need a full Montessori classroom. You just need a few simple tools.

Step 1: Gather or Create Materials

If you can invest in materials, look for:

  • Montessori golden bead material (complete set)
  • Large number cards (1–9, 10–90, 100–900, 1000–9000)

On a budget? Try this:

  • Use dried beans or small objects for ones
  • Bundle popsicle sticks with rubber bands for tens
  • Tape together 10 bundled sticks for hundreds
  • Use small boxes to represent thousands

Low-cost Montessori homeschooling is absolutely possible.

Step 2: Introduce Quantities Before Symbols

Start with quantity only.

Let your child:

  • Count 10 units
  • Exchange them for one ten
  • Repeat the process multiple times

Don’t rush to the written number. Let the pattern emerge naturally.

Step 3: Introduce Number Cards

Once your child understands quantities, match them to number symbols.

Lay out:

  • 1,000 card
  • 200 card
  • 40 card
  • 7 card

Stack them to form 1,247.

This layering shows how numbers are composed — not just written.

Step 4: Practice the “Bank Game”

This is a Montessori favorite.

You act as the banker. Your child requests numbers like:

  • “Can I have 3 tens?”
  • “I need 2 hundreds.”

Then switch roles.

It builds:

  • Vocabulary
  • Understanding
  • Confidence
  • Fun

And yes — it works incredibly well in a homeschool math setting.

One of the biggest shifts parents experience when teaching place value the Montessori way is realizing that slowing down actually speeds learning up. When children physically exchange materials, they aren’t just performing steps. They are internalizing how our number system functions. That understanding prevents frustration later during subtraction with regrouping and long division.

In our experience at DKM Homeschool Resource, parents often say this is the moment math “clicks” for their child. And once it clicks, momentum builds naturally.

Common Mistakes To Avoid When Teaching Place Value

Even well-meaning homeschool parents sometimes run into roadblocks. Here’s what to watch for.

1. Moving to Worksheets Too Quickly

If your child hasn’t physically exchanged units for tens multiple times, they’re not ready for regrouping problems.

Stay concrete longer than you think you need to.

2. Skipping the Exchange Process

The exchange (10 ones = 1 ten) is the heart of place value.

Don’t just tell them — let them do it repeatedly.

3. Overcomplicating the Setup

You don’t need a Pinterest-perfect math shelf.

A simple basket with materials works beautifully.

4. Teaching Digit Names Without Context

Instead of saying, “This is the hundreds place,” show 3 hundred squares. Let them feel the weight difference between 3 hundreds and 3 tens.

That sensory experience matters.

Simple Montessori Place Value Activities You Can Try This Week

Ready for action steps? Here are easy wins.

Activity 1: Build the Year

Have your child build the current year using materials.

Example:
2,026 = 2 thousand cubes, 0 hundreds, 2 tens, 6 ones.

This makes numbers relevant.

Activity 2: Number Hunt Around the House

Find numbers on:

  • Mail
  • Cereal boxes
  • License plates

Then build those numbers with materials.

Activity 3: Exchange Challenge

Give your child:

  • 23 units
    Ask them to exchange properly.

Watch carefully — do they instinctively trade 10 units for 1 ten?

Activity 4: Montessori Addition with Place Value

Build two numbers physically.

Combine them.

Exchange when needed.

Now regrouping suddenly makes sense.

Place value isn’t just a math skill; it’s a foundational understanding that supports every advanced operation your child will encounter. When children truly grasp that 10 ones consistently become 1 ten, they begin to see patterns everywhere. Math stops feeling random and starts feeling logical.

This confidence carries over into multiplication, division, and even fractions later on. That’s why investing time here pays off in the long run.

How To Adapt Montessori Place Value For Different Ages

Not every child starts at the same point.

Here’s a simple breakdown:

Ages 4–5 (Early Introduction)

  • Focus only on quantities
  • Count to 10 repeatedly
  • Introduce exchanging slowly

Keep lessons 10–15 minutes.

Ages 6–7 (Full Place Value Work)

  • Introduce full golden bead system
  • Build 4-digit numbers
  • Begin simple addition with materials

Ages 8+ (Catch-Up or Reinforcement)

If your older child struggles with regrouping:

  • Go back to concrete materials
  • Rebuild understanding
  • Remove shame — this is common

Montessori math works at any age when introduced properly.

Another powerful aspect of Montessori homeschooling is that it removes pressure from the learning process. When children can manipulate materials freely, they experiment. They make mistakes. They correct themselves. That cycle builds independence and resilience — two traits that matter far beyond math lessons.

As homeschool parents, we often feel responsible for every outcome. Montessori reminds us that the environment does much of the teaching. Our job is to guide, observe, and step back at the right moments.

Montessori FAQs

FAQ: What age should I start teaching place value using Montessori methods?
Most children are ready around ages 4–6, depending on their number readiness. Begin with counting and simple exchanges before introducing the full golden bead material. In Montessori math, hands-on experience comes first, and abstraction follows naturally.

FAQ: Do I need official Montessori materials to teach place value at home?
No. While golden beads are helpful, you can use beans, sticks, or DIY bundles for effective Montessori homeschooling. The key is physically representing ones, tens, hundreds, and thousands so children understand the base-ten system.

FAQ: How long should we spend on place value activities each day?
Keep homeschool math lessons short and focused — typically 15–30 minutes. Montessori education emphasizes quality over quantity. If your child is engaged and understanding, you’re doing enough.

Keep Exploring Our Blogs

Teaching place value the Montessori way doesn’t require perfection. It requires patience, consistency, and a willingness to slow down. When you prioritize understanding over speed, your child builds true number sense that lasts for years.

Start small this week. Gather simple materials. Practice exchanges. Play the bank game. Watch for that lightbulb moment.

And remember — you don’t have to figure out homeschooling alone. At DKM Homeschool Resource, we’re here to offer practical homeschool advice, encouragement, and realistic strategies that fit real family life.

Keep exploring our blog for more Montessori math tips, Charlotte Mason ideas, and simple routines that help your homeschool thrive.