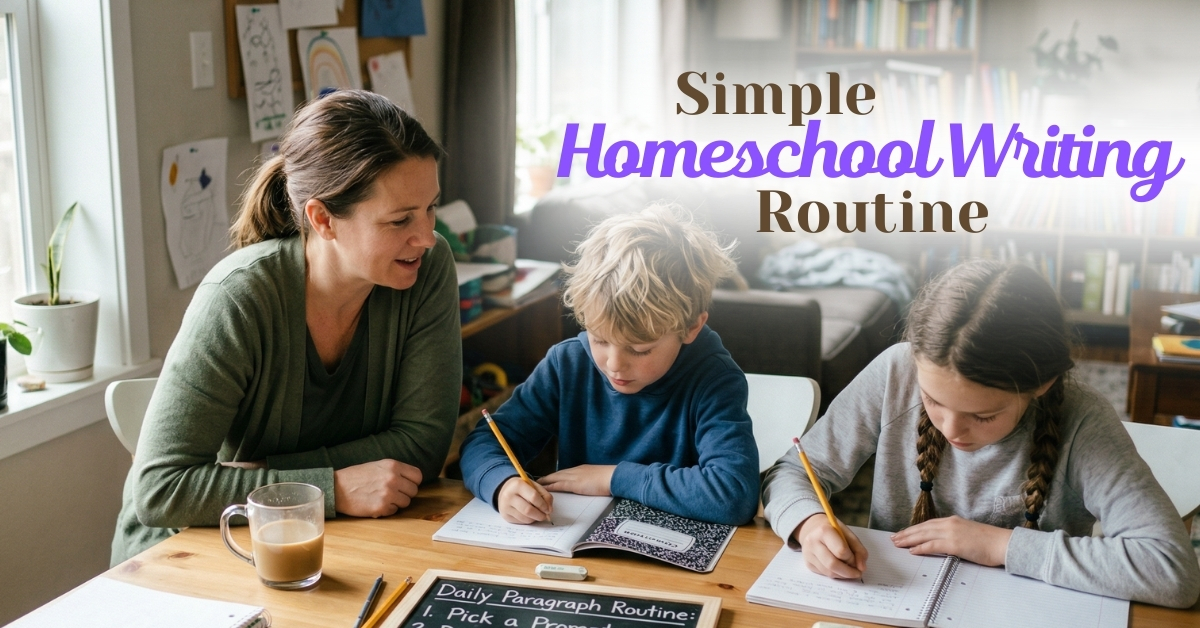
Homeschool Writing Schedule for Elementary: A Simple Daily Paragraph Routine

Homeschool writing does not have to feel complicated or intimidating. A simple daily paragraph routine is one of the easiest ways to build strong writing skills in elementary students without overwhelming you or your child. At DKM Homeschool Resource, we’ve found that consistency beats complexity every time.

A homeschool writing schedule for elementary works best when you dedicate 15–30 minutes daily to one focused paragraph. Students brainstorm, draft, revise lightly, and share. Over time, this simple daily paragraph routine builds confidence, structure, grammar awareness, and writing stamina without requiring lengthy assignments or complicated curriculum.

Let’s break this down step by step so you can start this week.

How To Structure A Homeschool Day?

The best homeschool day structure includes 3–5 core subjects in short, focused blocks, starting with high-priority skills like reading and writing. Keep writing time consistent, brief (15–30 minutes), and predictable. Add breaks, hands-on learning, and flexibility to reduce burnout while maintaining steady academic progress.

When parents ask us how to create a homeschool schedule that works, we always recommend anchoring the day around the basics:

  • Reading
  • Writing
  • Math

Everything else can rotate or flex.

For elementary students, here’s a simple example structure:

  1. Morning Warm-Up (10–15 minutes)
    • Read aloud or independent reading
    • Quick discussion
  2. Writing Block (15–30 minutes)
    • Daily paragraph routine
  3. Math (20–40 minutes)
    • Lesson + practice
  4. Break / Movement (15 minutes)
  5. Science or Social Studies (20–30 minutes)
  6. Creative Time (Art, Music, Projects)

That’s it. No 7-hour school day required.

Consistency matters more than length. If your writing block happens at 9:15 every day, your child’s brain starts expecting it. That predictability lowers resistance dramatically.

Why A Daily Paragraph Routine Works For Elementary Students

Why A Daily Paragraph Routine Works For Elementary Students

One of the biggest mistakes we see new homeschool parents make is assigning long writing projects too early. A five-paragraph essay might work in middle school, but it’s often too much for a second or third grader.

Elementary students thrive on:

  • Clear structure
  • Short tasks
  • Frequent repetition
  • Immediate feedback

A single paragraph is manageable. It’s long enough to teach structure but short enough to avoid frustration.

Think of it like strength training. You don’t start with heavy weights. You build slowly and consistently. Writing works the same way.

Over time, the daily paragraph routine naturally teaches:

  • Topic sentences
  • Supporting details
  • Logical order
  • Basic transitions
  • Editing awareness

Without the drama.

What A Simple Daily Paragraph Routine Looks Like

Here’s the practical part you can implement immediately.

Step 1: Choose a Focus (5 minutes)

Each day has a purpose. Rotate through simple paragraph types:

  • Monday: Personal narrative
  • Tuesday: Descriptive paragraph
  • Wednesday: Opinion paragraph
  • Thursday: Informational paragraph
  • Friday: Creative or fun prompt

You can pull prompts from:

  • Library books
  • Science lessons
  • Family events
  • Free printable writing prompts online
  • Journal prompt cards

Keep it simple.

Step 2: Brainstorm Together (3–5 minutes)

Ask guiding questions:

  • What is this paragraph about?
  • What are three things we want to say?
  • What should the reader understand?

Write down 3–4 bullet points before drafting.

Step 3: Draft (10–15 minutes)

Use this basic structure:

  1. Topic sentence
  2. Detail #1
  3. Detail #2
  4. Detail #3
  5. Closing sentence

Younger students may only write 3–4 sentences at first. That’s fine.

Step 4: Light Edit (5 minutes)

Keep editing gentle. Focus on:

  • Capital letters
  • Periods
  • Spelling of common words
  • Clear sentences

Don’t overwhelm them with grammar corrections.

Step 5: Share

Have them read it aloud. Reading aloud helps children catch mistakes naturally and builds confidence.

That’s your entire homeschool writing schedule for elementary.

A Week-Long Example You Can Copy

Here’s what this could look like in a real homeschool.

Monday – Personal Narrative
Prompt: “Describe your favorite family tradition.”
Focus: Writing about personal experience.

Tuesday – Descriptive Paragraph
Prompt: “Describe your dream backyard.”
Focus: Sensory details.

Wednesday – Opinion Paragraph
Prompt: “Should kids have chores?”
Focus: Stating an opinion and giving reasons.

Thursday – Informational Paragraph
Prompt: “Explain how plants grow.”
Focus: Clear explanation.

Friday – Creative Writing
Prompt: “If you found a hidden door in your house…”
Focus: Imagination and flow.

Parents often tell us that by week three, their child stops complaining about writing. Why? Because they know exactly what’s expected.

Common Mistakes To Avoid

Let’s save you some frustration.

Mistake #1: Making Writing Too Long
If your child melts down every writing day, shorten it. A strong 4-sentence paragraph beats a miserable 2-page essay.

Mistake #2: Over-Correcting
Marking every grammar mistake in red can crush confidence. Choose 1–2 focus areas per week.

Mistake #3: Inconsistent Scheduling
If writing happens randomly, it feels optional. Keep it at the same time daily.

Mistake #4: Skipping Brainstorming
Students stare at blank paper because they don’t know what to say. Teach them to outline first.

When you simplify the homeschool writing curriculum, everything improves.

How To Adapt For Different Elementary Ages

How To Adapt For Different Elementary Ages

This is where many parents get stuck. They worry they’re either expecting too much or not enough.

A first grader’s paragraph might look like:

  • 3 sentences
  • Simple vocabulary
  • Parent-assisted spelling

A fourth grader’s paragraph might include:

  • 6–8 sentences
  • Stronger vocabulary
  • Basic transitions (“also,” “because,” “for example”)

The structure stays the same. The depth increases naturally over time.

You do not need separate writing curriculum for each grade if you understand this principle. The routine remains steady while expectations grow gently.

One of the most freeing realizations for homeschool parents is that progress happens quietly. You may not notice dramatic improvement week to week, but over months the change is remarkable. Students who once resisted writing begin volunteering longer answers. Their sentences become clearer, their ideas more organized, and their confidence more visible. The key isn’t pushing harder; it’s showing up consistently with manageable expectations.

Another powerful benefit of a daily paragraph routine is that it integrates beautifully with other subjects. If you are studying animals in science, write informational paragraphs about habitats. If you’re reading historical fiction, write opinion paragraphs about a character’s choices. Writing stops being a separate, intimidating subject and becomes a tool for thinking. This cross-subject integration strengthens comprehension far beyond grammar alone.

How To Make Writing Enjoyable (Yes, Really)

Let’s be honest. Not every child wakes up excited to write.

Here are ways to make it lighter:

  • Use fun notebooks or special writing pens
  • Let them type once a week
  • Occasionally write side-by-side with them
  • Allow silly prompts on Fridays
  • Turn one paragraph into a comic strip

You can also add small motivation boosts:

  • “Author of the Week” wall
  • Sharing with grandparents
  • Creating a family writing binder

When children see their writing valued, effort increases naturally.

One thing we remind parents often at DKM Homeschool Resource is this: your attitude sets the tone. If writing feels like a dreaded chore, your child will mirror that energy. If you treat it as a normal, manageable part of the day—like brushing teeth—it becomes routine instead of resistance. Calm consistency beats emotional pressure every time.

It’s also important to remember that some children need more processing time. Silence during brainstorming does not mean failure. It may mean they’re thinking deeply. Give space. Offer gentle prompts. Resist the urge to jump in too quickly and supply all the ideas for them.

Simple Steps You Can Take This Week

If you’re feeling overwhelmed, start here:

  1. Choose a 20-minute daily writing time.
  2. Print or write 5 simple prompts.
  3. Teach the 5-sentence paragraph structure.
  4. Keep corrections minimal.
  5. Celebrate completion, not perfection.

That’s it.

Free and low-cost resources you can use:

  • Library writing prompt books
  • Printable graphic organizers
  • Free homeschool blogs (like ours!)
  • Composition notebooks from the dollar store
  • Basic grammar workbooks for support

You do not need expensive curriculum to teach strong writing skills.

When families stick with this routine for 8–12 weeks, they often report improved reading comprehension, clearer verbal communication, and better overall academic confidence. Writing strengthens thinking. Thinking strengthens learning.

FAQ: How long should elementary homeschool writing lessons be?
For most elementary students, 15–30 minutes is ideal. A focused daily paragraph routine works better than occasional long sessions. Short, consistent homeschool writing lessons build stamina without burnout and fit naturally into a balanced homeschool schedule.

FAQ: Do I need a full homeschool writing curriculum for elementary?
Not necessarily. Many families succeed with a simple structured paragraph routine combined with reading and light grammar support. A homeschool writing curriculum can help with guidance, but daily practice matters more than expensive materials.

FAQ: What if my child hates writing during homeschooling?
Start smaller. Reduce to 3–4 sentences, use fun prompts, and write together occasionally. Making homeschool writing predictable and short reduces anxiety. Often resistance fades once children realize the assignment is manageable and consistent.

You Don’t Have To Figure It Out Alone!

A homeschool writing schedule for elementary does not have to be complicated. A simple daily paragraph routine builds structure, confidence, and real skills without overwhelming your family. Keep it short. Keep it consistent. Keep it encouraging.

At DKM Homeschool Resource, we believe homeschooling should feel doable, not draining. If this helped you, explore more of our practical homeschool advice, simple scheduling tips, and real-life encouragement for busy parents. You don’t have to figure this out alone — and you absolutely can do this.
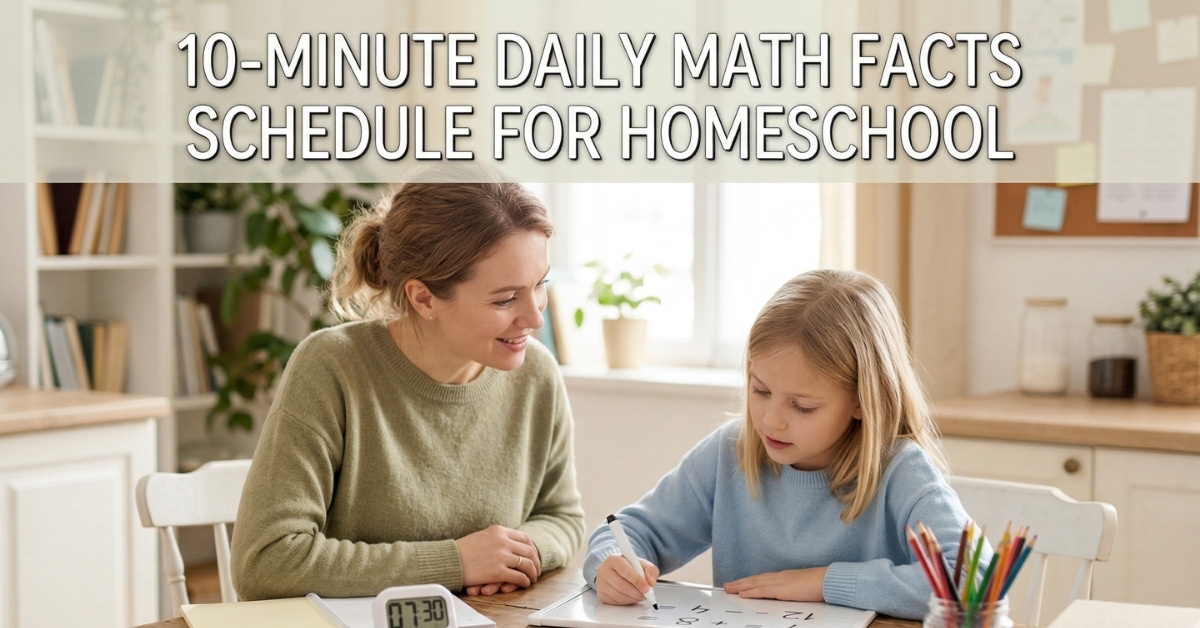

10-Minute Daily Math Facts Schedule for Homeschool

Yes, you really can build strong math fact fluency in just 10 minutes a day. The key isn’t longer lessons — it’s consistency, structure, and a simple routine that works with your homeschool rhythm instead of against it.

Many parents think math facts require endless drills or expensive programs. They don’t. With a focused daily plan, your child can gain confidence, speed, and accuracy without tears (yours or theirs).

How To Build Math Fact Fluency At Home?

Building math fact fluency at home doesn’t require a full curriculum overhaul. It requires small, focused practice every day. When math facts become automatic, your child frees up brain space for higher-level problem-solving.

Here’s the simple truth: fluency is built through short, repeated exposure — not marathon math sessions.

A practical 10-minute structure looks like this:

  1. 2–3 minutes: Warm-up review
    • Oral practice of previously mastered facts
    • Flashcards (fast-paced, no pressure)
    • Skip counting together
  2. 3–4 minutes: Focus practice
    • One fact family at a time
    • Small set (like +6 facts only)
    • Write or say answers quickly
  3. 2–3 minutes: Fun reinforcement
    • Math facts card game
    • Timed “beat your own score” challenge
    • Whiteboard race
    • Dice or domino practice

That’s it. Ten minutes. Done.

The most important part? Daily consistency.

If you do 10 minutes five days a week, you’ll see more progress than one long 45-minute session once a week.

Now let’s make it even more practical.

The Simple 10-Minute Daily Schedule (Step-By-Step)

Busy homeschool parents need clarity. Here’s exactly what you can start this week.

Step 1: Pick One Operation at a Time

Don’t mix addition, subtraction, multiplication, and division all at once.

Focus like this:

  • Addition until fluent
  • Then subtraction
  • Then multiplication
  • Then division

If your child struggles, narrow it even more:

  • Only +5 facts for one week
  • Only x7 facts for several days

Narrow focus builds faster confidence.

Step 2: Use the “Mastery Loop”

Here’s how the loop works:

  • Introduce 5–10 new facts.
  • Practice daily.
  • When accuracy hits about 90%, move them to review.
  • Add a new small set.

Keep cycling old facts back in.

This prevents the classic homeschool frustration:

“They knew this last month… what happened?”

What happened is simple — no spaced repetition. The loop fixes that.

Step 3: Keep It Light (Avoid the Drill Trap)

Many parents accidentally turn math facts into a battle.

Here’s what to avoid:

  • Forcing speed too early
  • Long timed tests
  • Shaming slow answers
  • Practicing 30 minutes “until you get it right”

Fluency grows from confidence. Confidence grows from manageable success.

If your child melts down during timed drills, remove the timer for a week. Bring it back later as a personal challenge — not a threat.

Why 10 Minutes Works Better Than 30

Why 10 Minutes Works Better Than 30

Parents often assume longer equals better. In reality, longer often equals burnout.

Children’s brains love:

  • Short bursts
  • Predictable routines
  • Quick wins

A 10-minute block feels doable. It doesn’t overwhelm the day. It doesn’t derail the schedule.

And because it’s short, parents actually stick with it.

Consistency beats intensity every time.

When math fact practice becomes a calm daily rhythm rather than a dreaded event, children begin to approach math differently. They stop bracing for frustration. They begin expecting success. Over time, that emotional shift becomes just as important as the academic gains, especially in early elementary years.

You might even notice something surprising: your child starts answering facts casually throughout the day. In the car. At the grocery store. During board games. That’s fluency taking root.

Real-Life Homeschool Examples

Let’s make this practical.

Example 1: Second Grader Learning Addition

Sarah, age 7:

Within three weeks, +8 facts were automatic.

Example 2: Fourth Grader Struggling with Multiplication

Daniel, age 9:

  • Week 1–2: x3 facts only
  • Used a whiteboard speed race
  • Friday: “Beat your score” challenge

After narrowing focus, frustration dropped dramatically.

Example 3: Large Family Homeschool

Mom with four kids:

  • 10-minute math block after breakfast
  • Each child rotates independently
  • Older kids self-time

Math facts no longer dragged across the morning.

The key pattern in every example?
Short. Focused. Repeatable.

Common Mistakes Homeschool Parents Make

Common Mistakes Homeschool Parents Make

Let’s gently fix these.

Mistake #1: Waiting Too Long to Start

Even kindergarteners can begin:

  • Counting
  • Skip counting
  • Simple addition facts

Early exposure makes later fluency easier.

Mistake #2: Mixing Too Many Facts

When everything is practiced at once, nothing sticks.

Small batches = stronger retention.

Mistake #3: Only Practicing on “Math Days”

Math facts are foundational. They should happen most homeschool days — even during light weeks.

Mistake #4: Assuming Memorization Is “Bad”

Some parents fear rote memory.

Here’s the reality:
Automatic recall frees up working memory. It doesn’t replace understanding — it supports it.

When a child doesn’t have to think about 7 + 8, they can focus on solving multi-step problems later.

Building math fact fluency is less about finding the perfect homeschool math curriculum and more about building a repeatable habit. Parents often search for the magic workbook or subscription program, but in truth, fluency comes from consistent exposure. Even simple tools like index cards or a free printable can be powerful when used daily.

Children also respond strongly to predictable routines. If math facts always happen right after breakfast or right before lunch, resistance decreases over time. The brain begins to expect that short effort window, and because it’s brief, it rarely feels overwhelming. This predictability is especially helpful for new homeschool families trying to establish structure.

Easy Resources (Free And Low-Cost)

You do NOT need to overspend.

Here are simple options:

Free

  • Printable math fact worksheets online
  • Printable flashcards
  • DIY index card flashcards
  • Skip counting songs on YouTube

Low-Cost

  • Math fact card games
  • Dice sets
  • Dry-erase boards
  • Basic timer

Simple Games to Try

  • War (using flashcards)
  • Roll two dice and multiply
  • “Around the World” with siblings
  • Speed write on a whiteboard

You can rotate games weekly to keep it fresh.

Simple Action Plan For This Week

Let’s keep this practical.

Here’s what you can do in the next 7 days:

  1. Choose one operation.
  2. Pick one small fact group.
  3. Print or write flashcards.
  4. Schedule 10 minutes after breakfast.
  5. Track progress for one week.

That’s it.

Don’t overcomplicate it.

After one week, assess:

  • Is accuracy improving?
  • Is resistance decreasing?
  • Is confidence growing?

If yes — keep going.

If no — reduce the batch size.

Small wins build momentum in homeschool math faster than dramatic changes.

Sometimes parents feel discouraged because progress feels slow. Remember, math fact fluency builds like layers of paint. Each day adds a thin coat. You may not see dramatic change after three days, but after three weeks, the transformation becomes obvious.

Your homeschool doesn’t need to look like a classroom. It can look like a kitchen table, a couch, or even five minutes on the floor with flashcards. What matters most is the rhythm you create. Ten focused minutes a day compounds into real mastery over time.

Got Questions? We Have Answers!

FAQ: How long does it take to build math fact fluency?
Most children show noticeable improvement within 3–6 weeks of consistent daily practice. Full mastery of an operation can take 2–3 months depending on the child and the operation. A structured homeschool math schedule with spaced repetition accelerates progress.

FAQ: Should I use timed tests in our homeschool math routine?
Timed tests can help build speed, but they should be introduced gently. Start without pressure and focus on accuracy first. In a healthy homeschool math routine, timers are tools for growth — not stress triggers.

FAQ: What’s the best homeschool math curriculum for teaching math facts?
No single homeschool math curriculum guarantees fluency. Even the best program works better when paired with short daily math facts practice. Consistency and repetition matter more than brand names.

Providing Practical Quidance

Building math fact fluency doesn’t require stress, tears, or complicated systems. It requires consistency, focus, and a manageable plan that fits your homeschool life.

Ten minutes a day may feel small — but it’s powerful. Over weeks and months, those minutes add up to confidence, speed, and real academic growth.

If you’re feeling overwhelmed in your homeschool journey, you’re not alone. At DKM Homeschool Resource, we’re here to provide practical guidance, encouragement, and realistic solutions that actually work for busy families.

Explore more of our homeschool advice, planning tips, and curriculum support articles to keep building a homeschool routine that feels calm, confident, and sustainable.

An Easter Theme Homeschool Plan of Reading, Writing, Math, and Crafts

An Easter theme homeschool plan makes learning feel fresh, meaningful, and fun without adding more to your plate. By weaving Easter-themed reading, writing, math, and crafts into your regular routine, you can cover core subjects while keeping kids engaged.

If you’re feeling overwhelmed, take a deep breath. You do not need Pinterest-level perfection. You just need a simple structure and a few intentional activities.

How To Structure A Homeschool Day?

The best way to structure a homeschool day is to start with core subjects in short, focused blocks, add one themed activity for engagement, and keep the schedule flexible. Prioritize reading, writing, and math first, then layer in hands-on projects like crafts or themed lessons to reinforce learning naturally.

When building your Easter homeschool plan, think in terms of:

  1. Morning Focus (Core Skills)
    • Reading
    • Writing
    • Math
  2. Midday Creativity
    • Crafts
    • Science tie-ins
    • Cooking or baking
  3. Afternoon Flex Time

Keep lessons between 15–30 minutes per subject for younger kids. Older elementary students may handle 30–45 minutes. The key is momentum, not marathon sessions.

Common mistake to avoid: trying to cram every cute Easter idea into one week. Pick 1–2 activities per subject and do them well.

Now let’s break it down into a practical Easter theme homeschool plan you can start this week.

Easter-Themed Reading Activities

Reading is the easiest subject to theme. You simply swap in seasonal books while practicing the same skills: fluency, comprehension, vocabulary, and narration.

Book Ideas (Library-Friendly & Affordable):

  • The Story of the Easter Bunny by Katherine Tegen
  • The Berenstain Bears and the Easter Story by Mike Berenstain
  • The Tale of Peter Rabbit by Beatrix Potter
  • The Country Bunny and the Little Gold Shoes by DuBose Heyward
  • Bible accounts from Matthew, Mark, Luke, or John (for Christian families)

If you’re not religious, focus on spring themes like new life, gardens, and animals.

Easter-Themed Reading Activities

Simple Reading Plan for the Week:

  • Monday: Read aloud + narration (child retells the story)
  • Tuesday: Vocabulary hunt (find 5 spring-themed words)
  • Wednesday: Character traits discussion
  • Thursday: Compare two Easter stories
  • Friday: Independent reading + drawing favorite scene

For early readers:

  • Practice sight words using Easter word cards (egg, hop, lamb, spring, basket).
  • Create a simple “Easter Emergent Reader” booklet.

For upper elementary:

One of our DKM moms once told us she dreaded read-aloud time because her kids squirmed and argued. When she added a simple “color while listening” basket with crayons and spring printables, everything changed. The kids stayed engaged, listened longer, and actually remembered the story details. Sometimes the solution isn’t complicated. It’s just meeting your kids where they are developmentally and giving their hands something to do.

Free or low-cost tip: Check your local library’s seasonal display. Many libraries also offer free printable discussion guides online.

Easter Writing Prompts And Creative Assignments

Writing can feel intimidating in homeschool settings. Easter themes make it lighter and more creative.

Start with short, manageable tasks.

K–2 Writing Ideas:

  • “If I were the Easter Bunny for a day…”
  • Label parts of a bunny.
  • Write 3 sentences about spring.
  • Create a thank-you note for a family member.

3–5 Writing Ideas:

  • Explain the meaning of Easter (religious or cultural).
  • Compare Easter traditions in two countries.
  • Write a fictional story about a runaway Easter egg.
  • Create instructions: “How to Host an Easter Egg Hunt.”

To structure writing time:

  1. Brainstorm together (5–10 minutes).
  2. Write independently (15–20 minutes).
  3. Edit one thing only (capital letters, punctuation, or spelling).

Common mistake: over-correcting everything. If you mark every single error, writing becomes discouraging. Pick one focus area per assignment.

You can also combine writing with art:

  • Write a short poem inside a paper egg.
  • Create a mini Easter book with folded printer paper.
  • Make scripture copywork pages for handwriting practice.

One of the biggest mindset shifts for new homeschooling parents is realizing that writing doesn’t have to happen at a desk with perfect posture and silence. Some of the best writing sessions happen at the kitchen table while muffins bake, or outside under a tree with a clipboard. When writing feels connected to real life instead of “school,” children produce more thoughtful work and resist less. The theme simply gives them something concrete to imagine and describe.

This week, try just one creative writing prompt and keep it short. Momentum builds confidence.

Easter Math Activities That Feel Like Play

Math is where themes really shine. You can sneak in review while kids think they’re just having fun.

Here are practical Easter math ideas you can implement immediately:

1. Easter Egg Addition & Subtraction (K–2)

  • Write math problems on plastic eggs.
  • Hide them.
  • Child solves each problem before collecting the egg.

2. Fractions with Jelly Beans (2–4)

  • Sort by color.
  • Create fraction problems (¼ are pink, ½ are yellow).
  • Graph the results.

3. Budget an Easter Basket (3–5)

  • Give a pretend budget of $25.
  • Look at store flyers.
  • Add prices and stay under budget.

4. Measurement Practice

  • Measure plastic eggs using rulers.
  • Compare lengths.
  • Weigh candy on a kitchen scale.

5. Multiplication with Egg Cartons

  • Use a 12-egg carton to model arrays.
  • Show 3 x 4 or 2 x 6 visually.

Quick structure tip:

  • 10 minutes review
  • 15 minutes themed activity
  • 5 minutes verbal explanation (child explains what they learned)

Common mistake: letting the theme completely replace skill practice. Make sure your child is actually solving math problems, not just sorting candy.

If you want a no-cost option, print free Easter math worksheets from reputable homeschool blogs or Teachers Pay Teachers (free section).

Math anxiety often melts away when it becomes tangible. A child who resists worksheets may eagerly divide jelly beans into equal groups. When they see math as a tool instead of a test, confidence grows. And confidence is half the battle in elementary math.

Easter Crafts That Reinforce Learning

Crafts are not “extra.” They can reinforce fine motor skills, creativity, and even academic concepts.

Keep it simple.

Easy Easter Crafts:

  • Paper plate bunny (cutting and gluing practice)
  • Watercolor Easter eggs (color mixing lesson)
  • Resurrection garden (science + symbolism)
  • Spring nature collage (outdoor scavenger hunt)

To avoid overwhelm:

  • Choose 2 crafts for the week.
  • Prep supplies Sunday night.
  • Store materials in one bin.

You can connect crafts directly to academics:

  • Write spelling words on egg cutouts.
  • Glue math facts inside eggs.
  • Create a timeline of Holy Week (upper elementary).

Another common mistake is overcomplicating crafts. If it requires a specialty item you must order online, skip it. Construction paper, glue, markers, and scissors are enough.

We’ve seen families transform their homeschool atmosphere simply by ending Fridays with a themed craft and hot chocolate. It becomes a ritual. Kids look forward to it all week. The craft doesn’t need to be museum-worthy. It just needs to signal celebration and creativity, which reinforces that homeschool is not just about checking boxes but building family culture.

More Seasonal Homeschooling Ideas

An Easter-themed homeschool plan works because it blends structure with joy. You’re still covering reading, writing, math, and fine motor skills. You’re just wrapping them in a seasonal package that captures attention.

Start small this week:

  • Choose one Easter book.
  • Assign one writing prompt.
  • Do one themed math activity.
  • Plan one simple craft.

That’s it.

You don’t need a perfectly color-coded homeschool planner. You need consistency, warmth, and a willingness to try.

At DKM Homeschool Resource, we believe homeschooling should feel doable. If this Easter homeschool plan helped you, explore our other practical homeschool routines, curriculum guides, and seasonal unit ideas designed for busy families just like yours.

You are capable of creating meaningful learning at home — even during busy seasons.

Answering Your Questions

FAQ: How long should an Easter homeschool unit last?
A simple Easter homeschool unit can last one week or stretch to two weeks depending on your child’s age. For younger students, 5 focused days are usually perfect. Keep your homeschool schedule balanced by covering core subjects daily while rotating themed activities.

FAQ: Can I use an Easter theme in a secular homeschool setting?
Absolutely. You can focus on spring themes like animals, gardening, and cultural traditions around the world. Many homeschool curriculum plans allow flexibility, so you can adapt the Easter theme to align with your family’s beliefs while still practicing reading, writing, and math skills.

FAQ: What if my child gets distracted during themed activities?
Structure is key. Start with core academics before crafts or games, and set clear time limits for each activity. A predictable homeschool routine helps children stay focused while still enjoying creative seasonal learning experiences.

The Best Coding Programs for Homeschoolers (K–5)

The best coding programs for homeschoolers (K–5) are hands-on, visual, and fun—like ScratchJr, Scratch, Code.org, and Tynker. These platforms teach logic and problem-solving without overwhelming young learners. For most homeschooled kids, starting with simple block-based coding around ages 5–7 works beautifully.

If you’re homeschooling (or thinking about it), adding coding to your routine might feel intimidating. We get it. You’re already juggling reading lessons, math practice, and trying to remember where you put the science kit. The good news? Coding at the elementary level is much simpler than it sounds—and it can be one of the most engaging parts of your homeschool week.

What Is The Best Age For A Child To Learn Coding?

The best age for a child to learn coding is typically between 5 and 7 years old, when they can follow multi-step directions and understand basic logic patterns. However, kids as young as 4 can start with simple coding games, and older beginners can jump in anytime without falling behind.

At DKM Homeschool Resource, we’ve seen children thrive when coding is introduced as a playful problem-solving activity—not a formal “computer class.” The key is readiness, not age. If your child can:

  • Recognize patterns
  • Follow step-by-step instructions
  • Enjoy puzzles or building things

…they’re ready to explore coding basics.

That said, don’t stress about starting “on time.” One of the greatest advantages of homeschooling is flexibility. A curious 9-year-old beginner will often move through K–5 coding concepts faster than a 6-year-old—and that’s completely normal.

Coding at this age isn’t about memorizing programming languages. It’s about building:

  • Logical thinking
  • Persistence
  • Creativity
  • Confidence with technology

Those skills transfer beautifully into math, science, and even writing.

Why Coding Is A Powerful Addition To Your Homeschool

Coding teaches more than computer skills. It teaches how to think.

When a child builds a simple animation or game, they learn that mistakes aren’t failures—they’re clues. Debugging becomes a puzzle. That mindset shift alone can transform how they approach difficult math problems or challenging reading assignments.

We’ve worked with families who were hesitant to add “one more subject” to their homeschool schedule. But once coding became part of their routine—even just 20 minutes twice a week—they noticed something surprising. Their children began approaching other subjects with more independence. They started saying things like, “Let me try to fix it first.”

That ownership is gold in a homeschool setting.

Coding also gives kids a creative outlet. Instead of just consuming technology, they create with it. That shift—from passive user to active builder—is one of the most empowering things we can offer our children in today’s digital world.

The Best Coding Programs For Homeschoolers (K–5)

Best Coding Programs For Homeschoolers

Here are our top picks for beginner-friendly coding programs that work especially well in homeschool environments.

1. ScratchJr (Ages 5–7)

Best for: Early elementary beginners

ScratchJr is a visual, drag-and-drop coding app designed for younger children. Kids snap together blocks to make characters move, jump, and tell stories.

Why homeschool families love it:

  • Completely free
  • No reading required (great for early readers)
  • Encourages storytelling + coding together
  • Works on tablets

Simple way to use it this week:
Have your child create a 3-scene story where a character moves across the screen and says something. Keep it playful.

2. Scratch (Ages 7–11)

Best for: Upper elementary students

Scratch builds on ScratchJr and introduces more advanced logic structures. Kids can create:

  • Games
  • Animations
  • Interactive stories
  • Simple simulations

It’s free and browser-based, making it perfect for homeschool flexibility.

Quick homeschool tip:
Let your child design a math quiz game related to what they’re learning. Coding + math reinforcement in one activity.

3. Code.org (Ages 5+)

Best for: Structured lessons with clear progression

Code.org offers free coding courses organized by grade level. It uses short, gamified lessons that build skills gradually.

Why it works for busy parents:

  • Step-by-step lesson plans
  • Minimal prep required
  • Clear checkpoints
  • Progress tracking

If you’re new to homeschooling, this is a fantastic place to start because it feels organized and manageable.

4. Tynker (Paid, with free intro options)

Best for: Kids who love games

Tynker offers structured courses and themed coding activities (Minecraft modding, robotics basics, etc.). It’s more game-like, which keeps many kids engaged longer.

Watch out:
Because it’s highly gamified, some kids rush through without understanding concepts. Sit nearby occasionally and ask them to explain what they’re building.

5. Unplugged Coding Activities (Ages 4–8)

Yes—coding without screens.

Unplugged coding teaches sequencing and logic using:

  • Arrow cards
  • Grid games
  • Lego building challenges
  • Step-by-step obstacle courses

Example:
Give your child directions to move you across the living room using only “forward,” “turn left,” and “turn right.” When you “crash,” they learn debugging in real life.

This works beautifully for screen-conscious families.

How To Add Coding To Your Homeschool Without Overwhelm

You do not need a separate “Computer Science” block on your schedule.

Start small. Think 15–20 minutes, twice a week.

Here’s a simple rollout plan:

Week 1:

  • Explore ScratchJr or Code.org together.
  • Treat it as exploration time, not formal instruction.

Week 2:

  • Set a tiny project goal (make a character move, build a 3-level game).

Week 3:

  • Let your child design something connected to another subject.

Common mistake to avoid:
Turning coding into another worksheet-driven subject. Coding should feel like building with digital Legos.

Another mistake?
Doing it for them. It’s tempting to grab the mouse when they get stuck. Instead, ask:

  • “What do you think the problem is?”
  • “What happens if we change this block?”

Let them wrestle with it.

That productive struggle builds real problem-solving muscles.

One of the most beautiful things about teaching coding at home is the way it shifts the dynamic between parent and child. You don’t have to be the expert. In fact, it’s often better when you’re learning alongside them. When your child sees you say, “Hmm, I’m not sure why that didn’t work. Let’s figure it out together,” they internalize resilience. Homeschooling isn’t about knowing everything—it’s about modeling how to learn.

Common Questions Parents Ask About Coding In K–5

“Do I need to know coding myself?”

No. Most beginner programs are self-guided. You just need curiosity and willingness to explore.

“Is screen time a concern?”

It can be—but coding is active screen time. It’s creation, not consumption. Balance it with outdoor play and unplugged activities.

“Will this actually help later?”

Absolutely. Coding builds computational thinking—a foundational skill in STEM fields and beyond.

Here’s something we’ve noticed over years of working with homeschool families: coding often becomes the subject kids ask to do. That matters. When children experience success in building something from scratch, it reinforces their belief that they can master new skills. That confidence spills into reading, math, and even public speaking. The goal isn’t to raise programmers at age eight. It’s to raise confident problem-solvers.

FAQ: What is the easiest coding program for elementary homeschoolers?
ScratchJr and Code.org are typically the easiest coding programs for elementary homeschoolers. They use drag-and-drop blocks and step-by-step lessons that require no prior programming experience. For younger K–2 students, ScratchJr is often the most beginner-friendly coding option.

FAQ: How much time should homeschoolers spend learning coding each week?
For K–5 students, 30–60 minutes per week is usually enough to build strong coding basics. Two short sessions work better than one long one. Consistency matters more than duration when teaching computer programming for kids at home.

FAQ: Can coding replace part of the math curriculum in homeschool?
Coding shouldn’t fully replace math, but it reinforces logical thinking, sequencing, and problem-solving skills. Many homeschool families integrate coding projects into math lessons for a practical application of concepts, especially in upper elementary grades.

Simple Steps You Can Take This Week

If you’re feeling motivated but unsure where to begin, here’s your action plan:

  1. Pick ONE platform (ScratchJr, Scratch, or Code.org).
  2. Schedule two 20-minute sessions.
  3. Sit nearby but let your child lead.
  4. Ask them to explain what they built.

That’s it.

No curriculum overhaul required.

If your child loves it, you can gradually increase complexity. If they don’t? Try unplugged coding or revisit in a few months. Homeschooling allows for timing that fits your child—not the school calendar.

Here To Help With Homeschool Confidence

Coding for homeschoolers doesn’t have to be complicated, expensive, or overwhelming. Start small, keep it playful, and focus on growth—not perfection. Whether your child becomes a software engineer or simply gains stronger critical thinking skills, coding is a powerful tool in your homeschool toolbox.

If you’re looking for more practical homeschool advice, curriculum ideas, encouragement, and step-by-step guidance, explore more articles here at DKM Homeschool Resource. We’re here to help you homeschool with confidence, clarity, and a little bit of joy along the way.

How to Teach Ecology Using Your Own Backyard

Ecology is one of the easiest science topics to teach at home because it is already happening all around your family. You do not need a lab, a fancy curriculum, or a long prep list. In fact, one of the best places to teach ecology is right outside your door.

Your backyard, patio, garden, or even a small outdoor space can become a living classroom where your child learns how plants, animals, insects, weather, soil, and water all work together. That is what ecology is all about. It helps children understand relationships in nature, not just memorize facts from a textbook.

For homeschool families, this makes ecology a great fit. It is hands-on, flexible, and naturally encourages observation, curiosity, and discussion. Whether your children are early elementary or middle school age, you can adapt backyard ecology lessons to fit their level.

What Is Ecology in Simple Terms?

Ecology is the study of how living things interact with each other and with their environment. That includes plants, animals, insects, fungi, soil, sunlight, air, and water.

When kids study ecology, they begin to notice that nature is connected. A bee depends on flowers. Birds depend on insects or seeds. Plants depend on sunlight, rain, and healthy soil. Worms help break down dead leaves, which adds nutrients back into the ground. Everything has a role.

Teaching ecology this way helps children see science as something alive and meaningful. It also builds important skills like observing, comparing, recording data, and asking thoughtful questions.

Why Backyard Ecology Works So Well for Homeschooling

Homeschool science often works best when it feels natural and manageable. Backyard ecology gives you both. Instead of trying to force a complicated lesson, you can step outside and let learning begin with what your child notices.

One day they may spot ants carrying food. Another day they may notice birds searching for worms after a rainstorm. In spring, they can observe new growth on plants. In fall, they can study leaves, seeds, and decomposition. These everyday moments create rich science lessons without adding stress to your schedule.

Backyard ecology also supports multiple subjects at once. Children can write nature journal entries, measure rainfall, graph insect sightings, sketch plants, or read books about habitats and food chains. It becomes a full learning experience, not just a science unit.

What Can You Teach in Backyard Ecology?

What Can You Teach in Backyard Ecology?

A backyard ecology study can include many important science concepts, such as:

  • habitats
  • food chains and food webs
  • producers, consumers, and decomposers
  • pollinators
  • plant life cycles
  • seasonal changes
  • biodiversity
  • ecosystems
  • soil health
  • weather and water cycles

The best part is that you do not need to teach all of these at once. Start small. Pick one focus each week and build from there.

Easy Ways to Teach Ecology Using Your Own Backyard

1. Start with observation

The first step in teaching ecology is helping your child slow down and notice what is already there. Go outside with a notebook and ask simple questions:

What do you see?
What do you hear?
What is moving?
What looks different from last week?
Where do insects or birds seem to gather?

Have your child draw or write what they notice. Younger children can make picture journals, while older kids can record detailed notes.

2. Create a simple nature journal

A backyard nature journal gives structure to your lessons and helps children track patterns over time. They can record weather, temperature, plant growth, animal sightings, and changes in the seasons.

This turns ecology into an ongoing study instead of a one-time lesson. Over time, your child will begin to see how living things change and respond to their environment.

Download Graphic for My Backyard Nature Study

Want to make it even easier? Our printable My Backyard Nature Study Journal gives homeschool families a simple way to record observations, track seasonal changes, and turn outdoor learning into an ongoing nature journal.

3. Study habitats in small spaces

Even a tiny yard can hold multiple habitats. Look for shady spots, sunny patches, garden beds, trees, bushes, puddles, or rock areas. Ask your child which animals or insects might prefer each space and why.

This helps them understand that different living things need different conditions to survive.

4. Watch a food chain in real life

If you see birds eating insects, bees visiting flowers, or worms in the soil, you are seeing ecology in action. Talk about who depends on whom. Explain that plants make their own food from sunlight, herbivores eat plants, carnivores eat other animals, and decomposers break down dead material.

Real-life examples are much easier for children to remember than abstract definitions.

5. Compare healthy and unhealthy spaces

Look at two parts of your yard. Maybe one area has healthy plants, loose soil, and insect activity, while another is dry, compacted, or bare. Ask your child what differences they see and what might be causing them.

This introduces the idea that ecosystems can be balanced or disrupted depending on conditions.

How to Create an Ecosystem in Your Backyard

How to Create an Ecosystem in Your Backyard

A common question homeschool parents ask is: How do you create an ecosystem in your backyard?

The answer is simpler than it sounds. You do not need to build a perfect nature preserve. You just need to create a space where living things can find food, water, shelter, and a place to grow.

Here are a few practical ways to do that:

Add native plants

Native plants are often best because they support local insects, birds, and pollinators. They are also usually easier to maintain because they naturally fit your region.

Include a water source

A shallow birdbath, small dish of water, or simple rain collection area can attract birds and insects. Water plays a big role in a healthy ecosystem.

Leave some natural materials

Logs, rocks, leaves, sticks, and brush piles provide shelter for insects, worms, and small animals. A backyard ecosystem does not need to look perfectly tidy to be valuable.

Support pollinators

Plant flowers that attract bees and butterflies. Pollinators are essential for many plants and help children observe an important ecological relationship up close.

Avoid overusing chemicals

Reducing pesticides and harsh lawn treatments can make your backyard safer for beneficial insects, birds, and soil organisms.

Make room for soil life

Healthy soil is full of living things. Composting, mulching, and letting some organic matter break down naturally can support decomposers and improve soil quality.

When children help create this kind of outdoor space, they begin to understand ecology in a very practical way. They see that ecosystems are built on relationships and balance, not just appearance.

A Simple Backyard Ecology Chart for Homeschool

This chart can help families organize weekly observations:

Backyard Ecology FocusWhat to ObserveQuestions to AskSimple Activity
Plantsleaf shape, color, growthWhat do plants need to grow?sketch a plant each week
Insectsbees, ants, butterflies, beetlesWhere do insects gather? Why?count insects in one area
Birdsfeeding, nesting, movementWhat are birds eating?create a bird observation log
Soiltexture, moisture, wormsWhat lives in the soil?dig a small soil sample
Weathersun, rain, wind, temperatureHow does weather affect living things?track weather for 7 days
Decompositiondead leaves, rotting woodWhat happens to old plant matter?start a mini compost jar

You could also turn this into a simple bar graph activity by having children count how many birds, insects, or plant types they observe over one week and graph the results.

Tips for Making Ecology Easy and Enjoyable

Keep lessons short and consistent. You do not need to spend an hour outside every time. Even 10 to 15 minutes of focused observation can be meaningful.

Let your child lead with curiosity. If they become interested in worms, birds, mushrooms, or flowers, follow that interest. Deep learning often starts with one small question.

Repeat observations across seasons. Backyard ecology becomes much richer when children compare what they see in spring, summer, fall, and winter.

Use simple language first. You can always add scientific vocabulary later. It is more important that your child understands the relationships than memorizes difficult terms right away.

Get Started Today! 

Teaching ecology using your own backyard is one of the most practical and rewarding ways to bring science to life in your homeschool. It shows children that learning does not only happen at a desk. It happens when they pause to look under a rock, watch a bee land on a flower, or notice that birds appear after the rain.

You do not need a perfect yard or a complicated plan. You just need a willingness to observe, ask questions, and explore together. When you use the space you already have, ecology becomes real, memorable, and meaningful for the whole family.

The Best Engineering Curriculum for Elementary Homeschool

The best engineering curriculum for elementary homeschool is one that is hands-on, flexible, and rooted in real-world problem-solving. Young learners don’t need complicated textbooks—they need opportunities to build, test, explore, and think critically in ways that feel like play.

If you’re a busy parent trying to figure out how to add engineering to your homeschool day without overwhelming yourself, you’re in the right place. At DKM Homeschool Resource, we believe engineering can be simple, affordable, and incredibly fun.

Let’s break it down step by step.

How Many Hours A Day Should A Child Be Homeschooled?

Elementary homeschool typically takes 2–4 focused hours per day, depending on age and attention span. Younger children (K–2) often need closer to 2 hours of structured learning, while upper elementary students (3–5) may need 3–4 hours. Engineering activities can fit easily into that block without extending your day.

Here’s what that might look like:

  • Math and language arts: 60–90 minutes
  • Reading: 20–30 minutes
  • Engineering/STEM project: 30–60 minutes
  • Independent play or creative time: flexible

The beauty of homeschooling is flexibility. Engineering doesn’t have to be a separate subject every single day. It can rotate with science, hands-on projects, or enrichment time.

And here’s something many new homeschool parents don’t realize: engineering often reinforces math, reading, and science naturally. When your child builds a bridge and measures its span, that’s math. When they read instructions or write about their design, that’s language arts. When they test materials, that’s science.

You don’t need to “add more.” You simply integrate smarter.

What Makes A Great Elementary Engineering Curriculum?

A strong elementary engineering homeschool curriculum doesn’t look like a thick textbook full of diagrams. It looks like cardboard towers on the kitchen table, paper circuits taped to notebooks, and kids asking, “What if we try this?”

Here’s what to look for:

  1. Hands-on projects over worksheets
  2. Open-ended challenges
  3. Age-appropriate design thinking
  4. Minimal prep for parents
  5. Affordable or reusable materials

Engineering at the elementary level is about learning how to think—not memorizing formulas.

Look for programs or resources that include:

  • Simple design challenges (build a bridge, design a marble run)
  • Basic coding exposure
  • Mechanical systems (gears, levers, pulleys)
  • Problem-solving prompts

Avoid curriculums that:

  • Overwhelm with technical jargon
  • Require expensive lab equipment
  • Expect mastery-level precision
  • Turn engineering into busywork

At this age, curiosity matters more than perfection.

Best Types Of Engineering Curriculum For Elementary Homeschool

There’s something powerful that happens when a child’s tower falls over and they try again. They learn resilience. They learn iteration. They learn that mistakes are part of the process, not something to avoid. Engineering quietly builds character alongside academic skills.

When parents shift from “Did you get it right?” to “What did you learn from that?” the entire atmosphere changes. That mindset is more important than any curriculum you purchase.

Best Types Of Engineering Curriculum For Elementary Homeschool

You don’t need one specific brand to succeed. Instead, think in categories.

1. Project-Based STEM Programs

These provide structured lessons with built-in design challenges.

Examples of features:

  • Weekly engineering themes
  • Step-by-step guidance
  • Reflection questions
  • Extension ideas

Great for parents who want open-and-go simplicity.

2. STEM Subscription Kits

Monthly kits can add excitement without planning pressure.

Pros:

  • Everything arrives ready to use
  • Highly engaging
  • Minimal prep

Cons:

  • Ongoing cost
  • Less flexibility

3. DIY Engineering Challenges (Budget-Friendly Option)

You can build an excellent elementary engineering program using household items.

Try this week:

  • Build the tallest freestanding tower using spaghetti and marshmallows
  • Design a paper airplane that flies the farthest
  • Create a bridge that holds 20 pennies

Cost: almost nothing.

4. Introductory Coding Platforms

Elementary engineering now often includes basic coding.

Look for:

  • Visual, drag-and-drop platforms
  • Game-based learning
  • Short lessons (15–20 minutes)

This adds a modern engineering layer without overwhelming your child.

Engineering does not need to be daily to be effective. Even 2–3 focused sessions per week can build strong STEM foundations.

How To Add Engineering To Your Homeschool Without Overwhelm

This is where many parents freeze. They assume engineering requires a lab or advanced math.

It doesn’t.

Start small.

Here’s a simple weekly rhythm:

Step 1: Pick one challenge per week.
Keep it simple.

Step 2: Let your child plan before building.
Ask:

  • What materials will you use?
  • What might go wrong?
  • How will you test it?

Step 3: Build and test.

Step 4: Reflect.
Have them answer:

  • What worked?
  • What didn’t?
  • What would you change?

That’s engineering.

A common mistake we see is parents taking over the project. If the tape is crooked and the tower leans, let it lean. Resist the urge to “fix” it. Engineering is about thinking, not perfection.

Another mistake? Making it too complicated. Simple challenges often teach more than elaborate builds.

Some of the richest learning moments happen in the messiest projects. A child who accidentally collapses their structure learns more than one whose parent quietly reinforced it behind the scenes. The goal is not a Pinterest-worthy final product. The goal is growth in problem solving, patience, and creative thinking.

When you give your child space to struggle productively, you’re teaching them to trust their own thinking. That confidence will spill into math, science, and even reading.

Real-Life Elementary Homeschool Engineering Examples

Real-Life Elementary Homeschool Engineering Examples

Let’s make this practical.

Example 1: Second Grade Student
Challenge: Build a boat that floats and holds 10 coins.
Materials: Aluminum foil, tape, container of water.
Skills practiced:

  • Measurement
  • Buoyancy concepts
  • Trial and error

Example 2: Fourth Grade Student
Challenge: Design a catapult to launch a cotton ball 3 feet.
Materials: Craft sticks, rubber bands, plastic spoon.
Skills practiced:

  • Force and motion
  • Simple machines
  • Recording results

Example 3: Fifth Grade Student
Challenge: Create a marble maze with obstacles.
Materials: Cardboard box, straws, tape.
Skills practiced:

  • Angles
  • Friction
  • Iterative design

Notice something? None of these required expensive curriculum packages.

You can also integrate engineering into:

  • History (design a pioneer shelter)
  • Geography (build a model levee system)
  • Literature (create a bridge from a story setting)

Engineering becomes cross-curricular enrichment.

Simple Steps You Can Take This Week

If you’re feeling inspired but unsure where to begin, here’s a no-stress action plan.

This Week’s Starter Plan:

  1. Choose one engineering challenge.
  2. Gather materials you already have.
  3. Block 30 minutes on your homeschool schedule.
  4. Ask open-ended questions instead of giving answers.
  5. Take a photo of the final result.

That’s it.

Helpful low-cost resources:

  • Library STEM books
  • Free printable design challenge cards
  • YouTube STEM demonstrations
  • Community science centers
  • Free coding platforms

Engineering doesn’t have to be another heavy subject. It can be the most exciting part of your homeschool week.

When parents approach engineering as exploration instead of performance, children relax. They take risks. They imagine bigger ideas. And suddenly STEM learning feels accessible rather than intimidating.

You don’t need an engineering degree to guide your child. You need curiosity, patience, and a willingness to learn alongside them. That mindset is what truly builds a strong elementary homeschool STEM foundation.

Answering Your Questions About Engineering Curriculum

FAQ: What is the best engineering curriculum for elementary homeschool beginners?
For beginners, the best engineering curriculum for elementary homeschool focuses on simple STEM activities and hands-on design challenges. Project-based STEM programs or DIY engineering projects using household materials are often the easiest starting point. Look for flexible homeschool STEM resources that don’t require heavy prep.

FAQ: Can engineering replace science in elementary homeschool?
Engineering should complement science, not replace it. A strong elementary homeschool curriculum integrates science concepts into engineering design challenges. Many homeschool STEM programs combine both subjects naturally through experiments, building projects, and problem-solving tasks.

FAQ: Do I need expensive STEM kits for elementary engineering at home?
No. While STEM subscription kits can be helpful, many effective elementary engineering homeschool activities use inexpensive household items. Free or low-cost STEM resources, library books, and DIY challenges often provide just as much educational value.

More Practical Homeschool Advice

Engineering in your elementary homeschool doesn’t have to be complicated, expensive, or time-consuming. The best engineering curriculum for elementary homeschool is one that encourages creativity, resilience, and hands-on discovery within your existing schedule.

Start small. Keep it playful. Focus on thinking over perfection.

At DKM Homeschool Resource, we’re here to make homeschooling feel doable and joyful. If this guide helped you, explore more of our blogs for practical homeschool advice, curriculum ideas, and encouragement designed specifically for busy parents like you.

You’ve got this. And your child is more capable than you think.

Book Reports for Homeschool: Easy Formats for Different Ages

Book reports for homeschool don’t have to be complicated or stressful. The best book report format depends on your child’s age, reading level, and personality. With a few simple structures, you can turn reading into meaningful learning—without turning it into a battle.

As homeschool parents, we know you’re juggling a lot. You want your kids to love reading, but you also want proof they understood the book. Let’s make book reports practical, doable, and maybe even enjoyable.

What Is A Book Report?

A book report is a structured way for students to show they understood what they read. It usually includes a summary of the story and key details about characters, setting, and main ideas.

In a homeschool setting, a book report doesn’t have to look like a five-paragraph essay every time. It can be:

  • A verbal narration
  • A drawing with labels
  • A written summary
  • A creative project
  • A short essay

The purpose isn’t busywork. It’s comprehension.

When done right, book reports help children:

  • Practice reading comprehension
  • Learn to organize thoughts
  • Improve writing skills
  • Develop critical thinking
  • Gain confidence expressing ideas

And here’s something important: book reports in homeschool should grow with your child. A 7-year-old’s report should look very different from a 15-year-old’s.

Book Report Formats For Elementary Students (Grades K–5)

For younger students, keep it simple and hands-on. Early elementary children are still developing writing stamina, so focus more on understanding than length.

For Early Readers (K–2)

Try these easy formats:

1. Oral Narration
Ask your child:

  • Who was the story about?
  • What happened first?
  • What was the problem?
  • How did it end?

This builds memory and sequencing skills without overwhelming them.

2. Draw and Tell
Have them:

  • Draw their favorite scene
  • Label 2–3 characters
  • Write 1–2 sentences about what happened

3. Story Map Template
Use a simple worksheet with:

  • Beginning
  • Middle
  • End
  • Favorite part

Free printable book report templates are widely available online and can save you prep time.

Here’s something we’ve seen time and time again at DKM Homeschool Resource: parents often push formal writing too early. A second grader doesn’t need a full-page written summary to demonstrate comprehension. In fact, forcing too much writing too soon can create resistance toward reading. Focus first on discussion and understanding, then gradually build writing expectations as skills grow.

For Upper Elementary (Grades 3–5)

Now you can introduce more structure.

Basic Written Format:

  1. Title and Author
  2. Setting (Where and when?)
  3. Main Characters
  4. Problem in the story
  5. How the problem was solved
  6. Personal opinion (2–3 sentences)

Keep length reasonable:

  • Grade 3: 1 paragraph
  • Grade 4: 2–3 paragraphs
  • Grade 5: 3–4 paragraphs

Creative Options:

  • Write a letter to a character
  • Create a new ending
  • Make a simple book poster
  • Compare two characters

Common Mistake to Avoid:
Don’t assign the same book report format every time. Variety keeps learning fresh.

Book Report Formats For Middle School

Book Report Formats For Middle School (Grades 6–8)

Middle school is where homeschool book reports can really develop thinking skills.

At this stage, we want students to move beyond “what happened” and begin answering “why” and “how.”

Structured Paragraph Format

Have them include:

  • Brief summary (no more than one paragraph)
  • Theme of the book
  • Character development
  • Conflict analysis
  • Personal evaluation

Encourage them to use examples from the book to support their ideas.

Compare and Contrast Report

This works beautifully in homeschool.

  • Compare book to movie version
  • Compare two characters
  • Compare two books in the same genre

The One-Page Response

Limit them to one page. This teaches clarity and avoids rambling.

Middle schoolers often resist book reports because they see them as repetitive or pointless. One of the biggest mindset shifts you can make is allowing choice. Let them pick between a traditional written book report, a presentation, or a creative project. When students have ownership, their effort and quality improve dramatically.

Practical Tip for This Week

Pick one book your child just finished. Instead of assigning a long written report, ask them to:

  • Write 5 strong sentences summarizing it
  • Identify the theme
  • Explain whether they would recommend it and why

That’s it. Done.

Book Report Formats For High School Students

High school homeschoolers need to prepare for college-level writing and critical thinking. This doesn’t mean endless busywork, but it does mean depth.

Formal Literary Analysis

Structure:

  1. Introduction with thesis statement
  2. Summary paragraph
  3. Theme analysis
  4. Character analysis
  5. Conclusion

Length:

  • 2–3 pages for younger high school
  • 3–5 pages for upper grades

Research-Integrated Book Report

Especially useful for historical fiction or classic literature.

Include:

  • Historical background
  • Author biography
  • Cultural context
  • Analysis of accuracy

This strengthens both writing and research skills.

Creative Analytical Options

For reluctant writers:

  • Socratic discussion (recorded)
  • PowerPoint presentation
  • Podcast-style review
  • Debate about character decisions

Still require depth—just delivered differently.

High school book reports in homeschool should prepare students for real-world communication. Instead of assigning generic summaries, ask them to defend opinions, analyze themes, and connect ideas to current events. This builds persuasive writing skills and prepares them for college essays, scholarships, and beyond.

How To Make Book Reports Easier For Busy Homeschool Parents

Let’s talk real life. You don’t need complicated grading rubrics to make book reports meaningful.

Step 1: Decide the Goal

Ask yourself:

  • Are we practicing writing?
  • Are we focusing on comprehension?
  • Are we building analysis skills?

Don’t try to hit all goals at once.

Step 2: Use Simple Rubrics

Create a 5-point checklist:

  • Clear summary
  • Complete sentences
  • Main idea identified
  • Personal response included
  • Effort shown

Quick and effective.

Step 3: Keep Frequency Reasonable

You don’t need a formal book report for every book.

A simple rhythm might look like:

  • 3 books: discussion only
  • 1 book: formal report

That prevents burnout.

One mistake many homeschooling parents make is turning reading into constant assessment. Not every book needs a worksheet attached to it. Sometimes the best comprehension happens in relaxed conversations on the couch. When book reports are used intentionally instead of excessively, children are more likely to stay engaged readers.

Low-Cost Resources You Can Use

  • Free printable book report templates (search Pinterest or homeschool blogs)
  • Library book clubs
  • Audiobooks through your local library app
  • Used curriculum sales groups
  • Simple Google Docs templates

You do not need expensive homeschool curriculum to teach reading comprehension well.

Simple Book Report Plan You Can Start This Week

  1. Choose one completed book.
  2. Select an age-appropriate format from above.
  3. Set a clear length expectation.
  4. Give a due date.
  5. Review together and discuss strengths.

That’s it. No stress.

FAQs About Book Reports

FAQ: How often should homeschool students do book reports?
Most homeschool students benefit from one formal book report every 4–6 weeks. Reading comprehension can also be assessed through narration and discussion in between. In a flexible homeschool curriculum, quality matters more than quantity.

FAQ: Do homeschool book reports have to follow public school standards?
No. Homeschool book reports can be adapted to your child’s pace and ability. While you can align with grade-level expectations, you have the freedom to adjust formats, length, and complexity based on your educational goals.

FAQ: What’s the best book report format for reluctant writers?
Creative formats often work best for reluctant writers. Options like presentations, recorded discussions, or character interviews still build critical thinking skills without overwhelming them. In homeschool language arts, flexibility often leads to stronger long-term writing development.

Explore More Blogs About Homeschooling

Book reports for homeschool don’t have to feel intimidating. With the right format for each age, they become a powerful tool for building reading comprehension, writing skills, and confidence.

Start simple. Adjust as your child grows. Focus on understanding over perfection.

At DKM Homeschool Resource, we’re here to make homeschooling practical and doable. Explore our other blog posts for more homeschool advice, encouragement, and real-life strategies that work for busy families like yours. You’ve got this—and we’re cheering you on every step of the way.

Best Art Curriculum For Non-Artsy Parents

If you feel completely unqualified to teach art, you are not alone. The best art curriculum for non-artsy parents is one that is open-and-go, skill-building, low-prep, and designed to guide both parent and child step by step. You don’t need to be creative to raise creative kids.

At DKM Homeschool Resource, we’ve worked with hundreds of homeschool parents who felt nervous about teaching art. The good news? You don’t need talent. You need a plan.

Let’s break it down in a way that actually helps.

What Is The 70/30 Rule In Art?

The 70/30 rule in art suggests that 70% of a piece should focus on consistency and structure, while 30% adds contrast or creative variation. In homeschool art, this often translates to 70% guided skill-building and 30% creative freedom.

For non-artsy parents, this rule is incredibly freeing.

Instead of thinking you need to invent amazing projects every week, you:

For example:

  • Spend most of the lesson teaching shading.
  • Let your child choose the subject they shade.
  • Guide proportions carefully.
  • Let them pick the colors.

This balance builds skill without killing creativity.

Here’s why this matters for homeschoolers:

Many beginners swing too far in one direction:

  • All structure → rigid worksheets, bored kids.
  • All freedom → frustration because kids lack skills.

The 70/30 rule keeps things steady and manageable.

And if you’re not artsy? Structure is your best friend.

What To Look For In An Art Curriculum (When You’re Not Creative)

Let’s be honest: overwhelmed parents don’t need more complicated plans.

You need something that:

  • Tells you exactly what to do.
  • Lists supplies clearly.
  • Requires minimal prep.
  • Builds skills gradually.
  • Works for multiple ages if possible.

Here’s what we recommend looking for.

1. Open-and-Go Format

If a curriculum requires hours of prep, it won’t last long in real life.

Look for:

  • Scripted lessons
  • Video demonstrations
  • Printable guides
  • Clear objectives

When your morning already includes math tears and spelling tests, art should feel refreshing — not like another planning burden.

2. Skill Progression

The best homeschool art curriculum teaches foundational skills in order:

  1. Lines and shapes
  2. Form and proportion
  3. Shading and value
  4. Color theory
  5. Composition

Avoid random craft-only programs that skip technique altogether. Crafts are fun, but they don’t build drawing confidence.

3. Minimal Supply Chaos

Non-artsy parents often feel intimidated by huge supply lists.

Look for programs that primarily use:

  • Pencil
  • Eraser
  • Basic colored pencils
  • Watercolor set
  • Sketchbook

You do not need a professional studio in your dining room.

Art Curriculum For Non-Artsy Parents

Our Favorite Types Of Art Curriculum For Non-Artsy Parents

We won’t overwhelm you with dozens of programs. Instead, we’ll explain what type of curriculum tends to work best.

Video-Based Art Programs

These are lifesavers.

Video instruction:

Your role becomes facilitator instead of art teacher.

Many families love structured online drawing lessons where the instructor models everything in real time. Kids pause, draw, and continue.

Project-Based with Guided Structure

Some programs combine technique with projects like:

  • Drawing animals
  • Painting landscapes
  • Studying famous artists
  • Creating mixed-media pieces

The key is that they teach how to do it — not just “make something creative.”

If instructions say “Let your child explore materials freely” without guidance, that’s not beginner-friendly.

Simple Sketchbook Curriculum

One of our favorite low-cost approaches is a structured sketchbook plan.

For example:

  • Monday: Practice shading spheres.
  • Wednesday: Draw household objects.
  • Friday: Creative drawing using the week’s technique.

This keeps it consistent and simple.

You don’t need fancy.

You need doable.

Art does not have to look impressive to be effective. It just needs to be consistent. When parents relax about the outcome and focus on practice, children thrive. Skill grows slowly and quietly, and often you won’t notice improvement until you look back at old work. That’s one of the sweetest surprises in homeschooling.

Common Mistakes Non-Artsy Parents Make

Let’s gently talk about the traps.

Mistake #1: Skipping Art Entirely

Many homeschool parents quietly drop art because:

  • “We’re not creative.”
  • “It’s messy.”
  • “It’s not academic.”

But art builds:

  • Fine motor skills
  • Visual processing
  • Confidence
  • Creative problem-solving

It’s worth keeping.

Mistake #2: Overcomplicating It

You don’t need:

  • A separate art room
  • Expensive kits
  • Elaborate Pinterest projects

You need:

  • 30–45 minutes
  • A clear lesson
  • Basic supplies

That’s it.

Mistake #3: Expecting Perfection

This one hits hard.

If you’re uncomfortable with art, you may unintentionally communicate that discomfort. Kids sense it.

Instead:

  • Laugh at mistakes.
  • Model learning.
  • Say, “I’m practicing too.”

Your attitude shapes their experience more than your skill.

When we talk to homeschool parents at DKM Homeschool Resource, we hear this again and again: “I don’t want to mess my kids up.” That fear can sneak into subjects like art because there isn’t one right answer. But creativity actually grows best in imperfect environments. When children see you trying something new, even awkwardly, they learn courage far more than technique.

A Simple 4-Step Plan You Can Start This Week

Let’s make this practical.

Here’s a plan you can implement immediately.

Step 1: Choose One Core Resource

Pick:

  • A video-based drawing program
    OR
  • A structured sketchbook guide
    OR
  • A basic homeschool art curriculum workbook

Commit to 8 weeks before switching.

Consistency beats hopping between programs.

Step 2: Schedule It Like Math

Art often gets pushed aside.

Put it on your weekly schedule:

  • Tuesdays and Thursdays at 1:00 PM.
  • Or Friday afternoons.
  • Or Morning Basket once a week.

Treat it as non-negotiable.

Step 3: Set Supply Boundaries

Keep a simple art bin:

  • Sketchbooks
  • Pencils
  • Colored pencils
  • Watercolor tray
  • Paper towels

No digging through junk drawers.

Step 4: Use the 70/30 Rule

Remember:

  • 70% skill instruction.
  • 30% creativity.

Example week:

  • Learn cross-hatching.
  • Practice shading fruit.
  • Then let them draw a dragon using cross-hatching.

Done.

Homeschool art doesn’t have to feel intimidating when you focus on rhythm instead of results. A predictable routine lowers stress for both parent and child. Over time, art becomes part of your family culture rather than a special event that requires perfect conditions. That shift alone can completely change how you feel about teaching it.

Free And Low-Cost Art Resources To Support Your Curriculum

You don’t need a massive budget.

Here are budget-friendly options:

  • Free YouTube drawing lessons (look for step-by-step structured ones).
  • Library books on famous artists.
  • Printable art appreciation worksheets.
  • Dollar store watercolor sets.
  • Nature journaling outside.

Nature journaling is especially powerful.

Take a clipboard outside and:

  • Sketch leaves.
  • Draw insects.
  • Practice shading rocks.
  • Observe shadows.

It costs nothing and builds real skills.

You can also rotate simple art themes monthly:

  • September: Basic drawing skills.
  • October: Fall landscapes.
  • November: Still life.
  • December: Holiday-inspired projects.

Keep it seasonal and simple.

Remember, art education in a homeschool setting doesn’t need to compete with professional studio training. Your goal is exposure, skill-building, and confidence — not producing museum pieces. When you frame it that way, the pressure lifts. Children who experience regular art practice often develop stronger focus and perseverance across all subjects.

FAQ: What is the easiest art curriculum for homeschool beginners?
The easiest art curriculum for homeschool beginners is one that is open-and-go with video instruction. Programs that teach step-by-step drawing skills and require minimal supplies are ideal for non-artsy parents. Look for structured homeschool art curriculum options that build foundational skills gradually rather than random craft projects.

FAQ: How often should homeschoolers do art?
Most homeschool families benefit from doing art 1–2 times per week for 30–45 minutes. Consistency matters more than duration. A simple weekly art lesson using a structured program helps children steadily improve without overwhelming your homeschool schedule.

FAQ: Do I need to be artistic to teach art at home?
No, you absolutely do not need to be artistic to teach art at home. With the right art curriculum for non-artsy parents, your role is to guide and facilitate, not perform. Video-based lessons and structured skill-building programs make homeschool art approachable and manageable.

DKM: Making This Journey More Simple

Teaching art when you don’t feel creative can feel intimidating at first. But with structure, realistic expectations, and the 70/30 balance, it becomes one of the most enjoyable parts of your homeschool week.

Start small. Stay consistent. Let progress happen quietly.

At DKM Homeschool Resource, we believe homeschooling should feel doable — even in subjects that stretch you. If you’re looking for more practical homeschool advice, curriculum help, and encouragement for beginners, explore our other blog posts. We’re here to make this journey simpler, steadier, and a whole lot more confident for you.

The Best Social Studies Field Trips for Elementary Kids (Even in Small Towns)

The best social studies field trips for elementary kids don’t require big cities, expensive tickets, or complicated plans. Some of the richest learning happens in small-town post offices, local farms, courthouses, and historical markers.

As homeschool parents ourselves at DKM Homeschool Resource, we’ve learned this: you don’t need flashy destinations to build meaningful social studies lessons. You need eyes that see learning everywhere—and a simple plan.

Let’s make this easy.

How Often Should Kids Go On Field Trips?

For most homeschool families, 1–4 field trips per month is realistic and beneficial. Some weeks that might mean a full museum visit. Other weeks, it could be a quick stop at city hall or a short walking tour of downtown. Social studies field trips work best when they’re consistent but low-pressure.

The goal isn’t constant outings. It’s intentional exposure.

Elementary kids learn social studies best when they see real-life examples of:

  • Community helpers
  • Local government
  • Jobs and businesses
  • History in their area
  • Geography in action

You don’t need to wait for the “perfect” trip. A 45-minute visit to a local bank can spark better conversations about economics than a full chapter in a workbook.

One mistake we see often? Parents overcomplicate field trips. They plan long drives, packed schedules, and elaborate worksheets—then burn out. Keep it simple. Choose one learning focus per outing and let curiosity lead.

Small-Town Gold: Hidden Social Studies Field Trips You’re Overlooking

If you live in a small town, you might feel limited. We promise—you’re not.

Some of the most powerful social studies lessons happen in ordinary places.

Here are simple, high-impact field trip ideas:

1. The Post Office

Teaches:

  • How government services work
  • Community infrastructure
  • Geography (where mail travels)

Quick activity: Have your child mail a letter to a relative and track how long it takes to arrive.

2. City Hall or Town Office

Teaches:

  • Local government structure
  • Roles of mayor and council
  • Civic responsibility

Call ahead and ask if someone can explain how decisions are made.

3. Local Police or Fire Station

Teaches:

  • Community helpers
  • Public safety systems
  • Taxes and public services

Many departments offer tours if you ask politely.

4. Historical Markers in Your Town

Teaches:

  • Local history
  • Cause and effect
  • Timeline skills

Take photos and create a simple “Our Town History” scrapbook.

5. Courthouse

Teaches:

  • Branches of government
  • Laws and justice
  • Civic processes

Even sitting quietly in a public session can open powerful discussions.

You don’t need big-ticket attractions. You need everyday examples.

Turning Everyday Errands Into Social Studies Lessons

Turning Everyday Errands Into Social Studies Lessons

Here’s where homeschooling gets fun.

You can turn weekly errands into meaningful social studies field trips without adding anything to your schedule. The grocery store becomes a lesson in economics and supply chains. The bank becomes a conversation about money systems. The farmers market becomes a hands-on exploration of local commerce and agriculture. When you shift your perspective, you realize you’re already surrounded by social studies curriculum.

Start asking simple questions during outings:

  • Who works here?
  • How does this place serve the community?
  • Where do these products come from?
  • What would happen if this service didn’t exist?

These conversations build critical thinking naturally.

A realistic example from one of our DKM families:
A mom in a rural town started asking her kids to notice where products were made during grocery trips. Within weeks, her second grader understood basic geography better than he ever did from a worksheet.

That’s the power of real-world learning.

Planning Simple (Not Stressful) Social Studies Field Trips

If you’re overwhelmed, here’s a simple formula we recommend.

Step 1: Pick One Concept

Choose one focus:

  • Government
  • Economics
  • Community helpers
  • Local history
  • Geography

Don’t try to cover everything.

Step 2: Find a Local Example

Ask:

  • Where in my town can we see this in action?
  • Who could explain this to my child?

Even small towns have more than you think.

Step 3: Prepare 3 Questions

Before you go, write down three simple questions your child can answer afterward.

Example:

  • What does this place do?
  • Who works here?
  • Why is it important?

That’s it. No complicated worksheets required.

Step 4: Reflect Afterward

On the way home, talk about:

  • What surprised you?
  • What did you learn?
  • What would happen if this didn’t exist?

Reflection cements learning.

Common mistake to avoid:
Don’t turn every field trip into a test. Social studies for elementary kids should feel like exploration, not interrogation.

Low-Cost & Free Social Studies Field Trips That Work Anywhere

Homeschool budgets are real. The good news? Most great social studies field trips are free.

Here are low-cost ideas that work in almost any town:

  • Local library (how public services operate)
  • Farm tours (food systems and rural economics)
  • Small businesses (entrepreneurship)
  • Veterans memorials (civic history)
  • Public parks with historical plaques
  • County fairs (agriculture and local industry)

One of the most overlooked field trips is interviewing an older neighbor about how the town used to be. That single conversation can teach more about history and cultural change than an entire chapter in a curriculum guide.

Another powerful idea is mapping your town. Print a simple map and let your child label government buildings, businesses, schools, and parks. You’re teaching geography, civic structure, and spatial thinking all at once.

And remember—consistency beats extravagance. A short monthly outing is more effective than one giant annual trip.

Making Field Trips Stick: What To Do Before And After

The field trip isn’t the whole lesson. The before and after matter just as much.

Before:

  • Read a short library book about the topic.
  • Watch a quick educational video.
  • Discuss what your child already knows.

After:

  • Draw a picture of what they saw.
  • Write 3–5 sentences about it.
  • Create a mini presentation for dad or siblings.

Keep it age-appropriate. A first grader might draw and dictate. A fifth grader might write a short paragraph.

Here’s something important many parents overlook: repetition builds understanding. Visiting the same location multiple times over the years deepens comprehension. A visit to city hall at age 6 looks very different from a visit at age 10.

When learning feels layered instead of rushed, children develop real understanding—not just surface-level knowledge.

And if you’re a beginner homeschool parent feeling unsure? Start tiny. Pick one local place this week. Make one phone call. Ask one question. That small action builds confidence faster than reading ten blog posts about planning.

Got Questions?

FAQ: What are good social studies field trips for homeschoolers in rural areas?
Great rural field trips include farms, post offices, town halls, historical markers, local businesses, and county fairs. Rural communities offer rich hands-on learning about agriculture, local government, and economics. Homeschool social studies becomes more meaningful when kids see how their own community functions.

FAQ: How do I plan a homeschool field trip without feeling overwhelmed?
Keep it simple. Choose one social studies concept, find a local example, and prepare 2–3 discussion questions. You don’t need elaborate worksheets or long drives. Simple, consistent field trips for elementary kids are more effective than complicated plans.

FAQ: Are field trips really necessary for elementary social studies?
While not required, social studies field trips significantly improve understanding and retention. Kids grasp government, history, and economics better when they see real-world examples. Hands-on homeschool learning helps abstract ideas feel concrete and memorable.

Helping You Homeschool With Confidence

Social studies field trips don’t have to be big, expensive, or exhausting. In fact, the best ones usually aren’t. They’re simple, local, and rooted in everyday life.

You are already surrounded by learning opportunities.

When you shift from “Where can we go?” to “What can we notice?” everything changes. Small towns become living classrooms. Errands become economics lessons. Conversations become history discussions.

At DKM Homeschool Resource, we’re here to help you homeschool with confidence—not perfection. Start small this week. Pick one local place. Ask a few questions. Watch how quickly your child connects the dots.

And when you’re ready for more practical homeschool tips, curriculum help, and encouragement, explore the rest of our blog. We’re walking this journey with you.

The Easiest Way to Teach Communities and Citizenship in K–2

Teaching communities and citizenship in K–2 doesn’t require a complicated curriculum or hours of prep. The easiest way is to start with your child’s everyday world—home, neighborhood, helpers—and build outward using simple conversations, stories, and hands-on activities.

At DKM Homeschool Resource, we’ve worked with countless parents who feel unsure about teaching social studies in the early grades. The good news? You don’t need a textbook-heavy approach. You need clarity, consistency, and simple activities that fit into your homeschool rhythm.

Let’s break it down.

How To Teach Community To Kindergarten?

If you’re wondering how to teach community to kindergarten in a way that actually sticks, the answer is simple: start small and make it personal.

Young children understand the world in layers. They don’t begin with “government” or “citizenship.” They begin with:

  • My family
  • My home
  • My neighborhood
  • My helpers

Here’s a simple 4-step method you can use this week:

  1. Start with Home
    • Talk about family roles.
    • Ask: “How do we help each other in our home?”
    • Assign small responsibilities (feeding a pet, setting napkins).
  2. Expand to Neighborhood
    • Take a short walk.
    • Point out mailboxes, sidewalks, street signs.
    • Ask: “Who helps take care of these things?”
  3. Introduce Community Helpers
    • Read picture books about firefighters, doctors, librarians.
    • Role-play with dress-up clothes.
    • Draw pictures of helpers at work.
  4. Practice Simple Citizenship
    • Practice taking turns.
    • Write thank-you notes.
    • Pick up litter at the park.

That’s it. No complicated curriculum required.

Build Citizenship Skills Through Everyday Life

Build Citizenship Skills Through Everyday Life

Citizenship sounds like a big word, but for K–2 students, it simply means learning how to be a responsible and kind member of a group.

In early elementary homeschool, this looks like:

  • Listening when someone else is speaking
  • Following simple rules
  • Helping clean up shared spaces
  • Showing respect

You can teach this naturally through daily routines.

Here are practical ways to build citizenship skills at home:

  • Family Meetings (5 minutes once a week)
    • Let your child suggest a “family rule.”
    • Practice voting by raising hands.
    • Discuss how decisions affect everyone.
  • Chore Charts
    • Emphasize teamwork.
    • Say: “Everyone contributes to our community.”
  • Story Discussions
    • After reading a book, ask:
      • “Was that character being a good citizen?”
      • “How could they have helped?”
  • Conflict Practice
    • Teach simple phrases:
      • “Can I have a turn next?”
      • “That hurt my feelings.”
    • Model problem-solving calmly.

One common mistake we see? Parents jump straight into worksheets about “government” or “laws” before children understand cooperation at home. Citizenship begins in the living room long before it reaches the courthouse.

Sometimes, parents worry they are not doing “enough” when teaching social studies in the early grades. But the truth is, young children learn citizenship more from watching you than from any lesson plan. When they see you return your shopping cart, thank the cashier, or speak kindly to a neighbor, they are absorbing what it means to belong to a community. These small, everyday actions are powerful teaching tools that require no extra prep time at all.

Make It Hands-On (Because Worksheets Alone Don’t Work)

If you want community lessons to stick, make them tangible.

Young learners thrive on movement, pretend play, and real experiences. Instead of explaining what a firefighter does, act it out. Instead of describing a library, visit one.

Try these hands-on homeschool activities:

  • Community Helper Dress-Up Day
    • Let your child choose a helper.
    • Use simple props (toy stethoscope, apron, notepad).
    • Ask: “How does this person help others?”
  • Build a Paper Town
    • Use construction paper to create:
      • A school
      • A hospital
      • A grocery store
    • Arrange them on the floor and pretend to travel through town.
  • Neighborhood Scavenger Hunt
    • Look for:
      • Stop signs
      • Mail trucks
      • Streetlights
    • Discuss who maintains these things.
  • Kindness Project
    • Bake cookies for a neighbor.
    • Make thank-you cards for community workers.
    • Leave encouraging chalk messages on the sidewalk.

Hands-on learning turns abstract ideas into real experiences.

Another mistake to avoid: overcomplicating it. You don’t need themed weeks, elaborate crafts, or expensive unit studies. A simple library trip and thoughtful conversation can be more meaningful than a Pinterest-perfect lesson.

Simple Weekly Plan For Teaching Communities In K–2

If you’re busy (and we know you are), here’s a plug-and-play weekly outline you can use.

Day 1: Home as a Community

  • Talk about family roles.
  • Create a simple “Our Family Rules” poster.

Day 2: Neighborhood

  • Take a walk.
  • Draw a map of your street.

Day 3: Community Helpers

  • Read one picture book.
  • Role-play the helper’s job.

Day 4: Good Citizenship

  • Practice sharing and taking turns intentionally.
  • Talk about fairness.

Day 5: Service Activity

  • Write a thank-you note.
  • Clean up a shared space.

That’s a complete, meaningful social studies plan in under 30 minutes a day.

Free or low-cost resource ideas:

  • Local library picture books
  • Printable community helper coloring pages
  • Google Maps to explore your town virtually
  • YouTube read-alouds (preview first)
  • Printable blank map templates

You do not need a boxed curriculum to successfully teach communities and citizenship in K–2. Consistency beats complexity every time.

When children begin to see themselves as important members of their family and neighborhood, something shifts. They stop seeing rules as random restrictions and start understanding that rules protect people. They begin to recognize that their choices matter. This awareness builds confidence and empathy at the same time, which is exactly what early elementary social studies should nurture.

Common Homeschool Mistakes (And How To Avoid Them)

Let’s talk honestly about what trips parents up.

1. Teaching It Once and Moving On
Community and citizenship are not one-week topics. They are ongoing conversations.

2. Making It Too Abstract
Avoid starting with:

  • Government branches
  • Complex civic vocabulary
  • Long definitions

Start with lived experience.

3. Skipping Discussion
Worksheets without conversation don’t build understanding. Always ask follow-up questions.

4. Ignoring Real-Life Opportunities
If your child argues over toys, that’s a citizenship lesson waiting to happen.

Here’s what to do instead:

  • Revisit concepts regularly.
  • Tie lessons to current events in simple ways.
  • Encourage empathy through questions like:
    • “How do you think that person felt?”

Small moments shape character more than formal lessons ever will.

There’s something beautiful about watching a kindergartener begin to grasp the idea that they belong to something bigger than themselves. It’s not about memorizing facts about city councils or reciting definitions of citizenship. It’s about recognizing that their actions affect others. That realization builds the foundation for responsible, compassionate adults, and it starts with the small choices they make every day in your homeschool.

Common FAQs

FAQ: What is the best way to teach citizenship in early elementary homeschool?
The best way to teach citizenship in early elementary homeschool is through daily habits and real-life practice. Focus on responsibility, kindness, and cooperation before introducing formal civics lessons. Use community helper activities, family discussions, and simple service projects to make the concept practical and age-appropriate.

FAQ: How do I explain community to a first grader?
Explain community to a first grader by starting with what they know: family, neighbors, and helpers. Show how people work together to make places safe and helpful. Hands-on social studies activities like drawing a neighborhood map or visiting the library make the idea concrete and easier to understand.

FAQ: Do I need a full curriculum to teach communities and citizenship in K–2?
No, you don’t need a full curriculum to teach communities and citizenship in K–2. Many homeschool parents successfully teach these concepts through conversation, read-alouds, and real-world experiences. Simple weekly themes and consistent discussion are often more effective than expensive programs.

Exploring More Homeschooling Advice

Teaching communities and citizenship in K–2 doesn’t have to feel overwhelming. Start small. Keep it practical. Focus on your child’s real world. When you build lessons around everyday life, social studies becomes natural and meaningful.

You are already laying the groundwork every time you model kindness, responsibility, and respect. With a few intentional conversations and simple activities, you can confidently teach community and citizenship in your homeschool.

If this helped you, explore more practical homeschool advice, step-by-step guides, and encouragement right here at DKM Homeschool Resource. We’re here to make homeschooling clearer, simpler, and more joyful for your family.