Reading Strategies for Reluctant Readers

If your child resists reading, you’re not alone. Many homeschooling parents encounter reluctant readers at some point. The good news? A few simple strategies—like choosing the right book level and creating a relaxed reading environment—can make a huge difference.

One of the easiest tools parents can use is the 5 finger rule for reading, which helps children quickly determine whether a book is too easy, too hard, or just right for their reading level.

At DKM Homeschool Resource, we’ve worked with countless parents who felt overwhelmed when their child struggled with reading. The key isn’t forcing more reading time—it’s using smart strategies that build confidence and curiosity.

Let’s start with one of the simplest and most powerful tools.

What Is The 5 Finger Rule For Reading?

The 5 finger rule is a simple way to help children select books that match their reading ability.

Here’s how it works:

  1. Open a book to any page.
  2. Have your child read the page aloud.
  3. Each time they come across a word they don’t know, they raise one finger.
  4. Count the fingers at the end of the page.

The results tell you a lot:

  • 0–1 fingers: The book is very easy
  • 2–3 fingers: Perfect reading level
  • 4–5 fingers: The book may be too challenging right now

This rule works especially well for homeschooling families because it gives children independence when choosing books.

Instead of constantly asking, “Is this book okay?” they can evaluate it themselves.

Why this matters for reluctant readers

When books are too difficult, kids feel frustrated. When books are too easy, they feel bored.

The sweet spot is confidence with a small challenge.

A reluctant reader who feels successful is much more likely to keep going.

Quick tip:
Try this rule during library visits. It turns book selection into a game instead of a struggle.

Why Some Kids Become Reluctant Readers

Many parents assume a reluctant reader simply “doesn’t like books,” but the truth is usually more complicated. Often children resist reading because it has become associated with frustration, pressure, or embarrassment. If a child struggles with decoding words or feels behind peers, they may avoid reading entirely to protect their confidence.

Another common reason is lack of interest in the material. Many reading programs push books that are technically appropriate but emotionally boring for the child. A kid who hates princess stories or historical fiction may suddenly become engaged when given books about dinosaurs, sports, mysteries, or science experiments.

Homeschool parents sometimes worry they’ve done something wrong if their child resists reading. In reality, reading development is highly individual. Some children become strong readers early, while others take longer but eventually thrive once they find books that match both their ability and interests.

Simple Reading Strategies That Actually Work

Reluctant readers rarely improve with pressure. What they need instead are small wins and engaging experiences.

Here are strategies we recommend to homeschooling parents all the time.

1. Let Kids Choose the Books

Choice is powerful.

Instead of assigning every book, allow children to select reading material they genuinely enjoy.

Great options include:

  • Comic books
  • Graphic novels
  • Joke books
  • Fact books
  • Short adventure stories
  • Sports magazines

Even silly books count as reading.

2. Read Aloud Every Day

Even older kids benefit from hearing books read aloud.

This builds:

  • Vocabulary
  • Listening comprehension
  • Interest in stories

Try reading one chapter every evening from a fun novel.

Kids who hear exciting stories often become curious enough to read on their own.

Simple Reading Strategies That Actually Work

3. Use Short Reading Sessions

Long reading sessions can overwhelm reluctant readers.

Instead try:

  • 10 minutes in the morning
  • 10 minutes after lunch
  • 10 minutes before bed

Short bursts build stamina over time.

4. Try Paired Reading

Paired reading means reading together.

You might:

  • Alternate sentences
  • Alternate paragraphs
  • Read dialogue together

This removes pressure and keeps the child engaged.

5. Celebrate Progress

Reluctant readers need encouragement.

Celebrate things like:

  • finishing a chapter
  • reading a new word
  • completing a book

Even simple praise can boost motivation.

Practical Steps You Can Try This Week

Homeschooling parents often ask us, “What should I actually do tomorrow morning?”

Here are simple steps you can implement immediately.

Step 1: Create a Relaxed Reading Space

Kids read better when they feel comfortable.

Consider adding:

  • a bean bag chair
  • a reading lamp
  • a cozy blanket
  • a small bookshelf

A dedicated space can make reading feel special.

Step 2: Visit the Library With a Mission

Instead of wandering the library randomly, give your child a goal.

Example mission:

  • Find three books using the 5 finger rule
  • Choose one fun book just for enjoyment

Libraries remain one of the best free homeschool resources available.

Step 3: Introduce “Reading Snacks”

Some kids focus better when reading feels like a treat.

Try pairing reading time with:

  • apple slices
  • popcorn
  • warm tea or cocoa

Small rituals make reading enjoyable.

Step 4: Mix Reading With Movement

Some reluctant readers learn better when they move.

Ideas include:

  • reading while standing
  • reading on the floor
  • acting out story scenes

Learning doesn’t have to happen at a desk.

Common Mistakes Homeschool Parents Should Avoid

One of the biggest mistakes we see is pushing reading levels too quickly. Parents naturally want their children to progress fast, but assigning books that are too difficult often leads to frustration. When reading becomes stressful, children start associating books with failure rather than curiosity.

Another mistake is focusing only on traditional books. Many parents don’t realize that graphic novels, comic books, and illustrated nonfiction can dramatically improve reading confidence. These formats provide visual support that helps reluctant readers understand context and stay engaged.

A third issue is turning reading into a constant test. Asking too many comprehension questions can make reading feel like schoolwork instead of exploration. Sometimes the best approach is simply enjoying the story together without stopping every few minutes to check understanding.

Low-Cost Resources That Help Reluctant Readers

Homeschooling doesn’t have to be expensive.

Here are affordable resources parents love.

Public Libraries

Libraries often provide:

  • reading challenge programs
  • homeschool meetups
  • audiobook apps
  • free digital books

Apps like Libby or Hoopla allow kids to borrow books instantly.

Graphic Novel Series

Many reluctant readers become hooked through graphic novels.

Popular choices include:

  • Dog Man
  • Amulet
  • The Bad Guys
  • InvestiGators

These books build confidence quickly.

Audiobooks

Audiobooks are powerful tools.

They:

  • model fluent reading
  • expand vocabulary
  • make stories exciting

Kids can listen while drawing, building Legos, or relaxing.

Reading Trackers

Simple trackers help kids visualize progress.

Try:

  • sticker charts
  • book bingo cards
  • reading passports

Small rewards can build momentum.

Building Confidence In Young Readers

Confidence is the hidden ingredient behind successful reading. When children believe they are capable readers, they approach books with curiosity instead of anxiety. This shift often happens gradually as kids experience repeated success with books that match their level.

Homeschooling provides a unique advantage here because parents can adjust pacing immediately. If a book proves frustrating, you can switch to something easier without worrying about classroom comparisons or rigid reading lists. This flexibility allows children to grow at their own pace, which often leads to stronger long-term reading skills.

Many reluctant readers eventually become enthusiastic readers once they discover the right genres. A child who struggles with traditional chapter books might thrive with mysteries, science books, or humorous stories. The goal is not forcing a specific type of reading but helping children develop a genuine relationship with books.

Common Reading FAQs

FAQ: What are the best books for reluctant readers?
Short, engaging books with humor or illustrations often work best. Graphic novels, joke books, and high-interest nonfiction are excellent choices. These types of books help reluctant readers build confidence while still developing strong reading skills.

FAQ: How long should a reluctant reader read each day?
For many children, 15–30 minutes of reading practice spread throughout the day is ideal. Short sessions prevent frustration and help build stamina gradually. Consistency matters more than long reading sessions.

FAQ: Can audiobooks help struggling readers?
Yes, audiobooks are a powerful homeschool reading strategy. They expose children to vocabulary, storytelling, and fluent reading patterns. Listening to audiobooks alongside physical books can significantly improve comprehension and confidence.

Keep Learning With DKM Homeschool Resource

Helping a reluctant reader can feel overwhelming, but small changes often create big breakthroughs. Choosing the right books, using tools like the 5 finger rule for reading, and creating positive reading experiences can transform how children view books.

Remember, reading development isn’t a race. Some kids take longer to gain confidence, and that’s perfectly normal. What matters most is building a supportive environment where curiosity and effort are celebrated.

At DKM Homeschool Resource, our goal is to equip parents with practical strategies, encouragement, and simple tools that make homeschooling easier and more joyful.

If you’re navigating reading challenges or exploring new homeschool methods, be sure to explore more articles on the blog. You’ll find ideas, resources, and guidance designed specifically for homeschooling families just like yours.

How Reading Aloud Supports Learning at Every Age

Reading aloud is one of the most powerful tools in homeschooling—and it works for every age. Whether your child is a preschooler or a teenager, shared reading builds vocabulary, comprehension, and a love for learning.

Reading aloud doesn’t have to be complicated or time-consuming. Even a few minutes a day can transform how children engage with books and ideas.

How Often Should You Read Aloud To Children?

The short answer: every day if possible.

Daily reading aloud builds language skills faster than almost any other activity you can do with your child. The key isn’t reading for hours—it’s building a consistent rhythm that fits naturally into your homeschool day.

Here are general guidelines many homeschooling families find helpful:

Toddlers & Preschoolers

  • 2–3 short reading sessions daily
  • 5–10 minutes each
  • Picture books and repetition are great

Early Elementary

  • 15–20 minutes daily
  • Mix picture books with early chapter books
  • Let children ask questions and talk about the story

Upper Elementary

  • 20–30 minutes daily
  • Chapter books, biographies, and historical fiction work well
  • Encourage prediction and discussion

Middle School & Teens

  • 10–20 minutes several times a week
  • Complex literature or historical works
  • Use it as a discussion starter

Even older students benefit from hearing books read aloud. It exposes them to vocabulary, sentence structure, and storytelling styles they may not encounter when reading independently.

For busy parents, bedtime reading or a post-lunch read-aloud time often works best.

Why Reading Aloud Is Powerful For Homeschool Learning

Many parents assume reading aloud is mainly for younger children. In reality, it supports learning across nearly every subject and age group.

Reading aloud helps children:

  • Build stronger vocabulary
  • Improve listening comprehension
  • Learn complex sentence structures
  • Develop imagination and curiosity
  • Strengthen parent-child relationships

It also supports subjects beyond language arts.

For example:

History

  • Historical fiction brings events to life

Science

  • Narrative science books explain concepts clearly

Character education

  • Stories introduce moral decisions and empathy

Critical thinking

  • Children learn to analyze characters and events

When children hear language spoken fluently, they naturally absorb grammar, storytelling patterns, and new ideas.

This is one reason many successful homeschool families consider reading aloud the backbone of their curriculum.

Reading aloud also creates something that many educational approaches overlook: shared intellectual experiences. When a parent and child hear the same story together, they develop a common reference point that sparks conversations later in the day. A simple story can turn into discussions about history, science, ethics, or personal decisions.

Children often remember books read aloud long after worksheets and lessons are forgotten. The emotional connection to a story makes ideas stick in ways that purely academic instruction rarely achieves. Over time, these shared reading experiences quietly shape how children think, reason, and interpret the world around them.

Perhaps most importantly for homeschooling families, reading aloud slows learning down in the best possible way. It creates a pause in the day where curiosity can grow naturally. Instead of rushing through curriculum checklists, families can explore ideas together through stories.

How Reading Aloud Strengthens Vocabulary And Comprehension
#image_title

How Reading Aloud Strengthens Vocabulary And Comprehension

One of the biggest advantages of reading aloud is exposure to advanced language.

Children can understand words spoken aloud long before they can read them independently.

For example:

A 7-year-old may struggle to read a sentence like this:

“The weary travelers trudged across the barren landscape.”

But when hearing it read aloud, they easily grasp the meaning.

This allows parents to introduce richer vocabulary earlier.

Try these simple strategies:

Pause to explain unfamiliar words

Example:
“Trudged means walking slowly because you’re tired.”

Ask quick comprehension questions

  • What do you think will happen next?
  • Why do you think that character did that?

Encourage predictions

  • How might the story end?
  • What would you do in that situation?

Make connections

  • Does this remind you of something we’ve studied?

These small moments help children develop critical thinking and comprehension skills naturally.

Simple Ways To Add Read-Aloud Time To Your Homeschool Day

Many parents love the idea of reading aloud but worry they don’t have time.

The good news is that it fits easily into everyday routines.

Here are simple ways homeschool families make it work.

1. Start the day with reading

Morning read-aloud time sets a calm tone.

  • Read a chapter book
  • Share a poem
  • Read a short biography

2. Use reading during lunch

Many families read while children eat.

This works especially well with:

  • Historical fiction
  • Adventure stories
  • Audiobooks if needed

3. Make it a family tradition

Older and younger children can listen together.

Great multi-age books include:

  • Little House on the Prairie
  • The Chronicles of Narnia
  • The Hobbit

4. Add it to bedtime

Bedtime reading:

  • Strengthens parent-child bonding
  • Ends the day peacefully
  • Encourages independent reading later

5. Use audiobooks strategically

If parents feel tired or busy, audiobooks can help.

Free options include:

  • LibriVox
  • Local library apps
  • Hoopla or Libby

Even listening in the car counts as learning.

Common Read-Aloud Mistakes Homeschool Parents Make

Reading aloud is simple, but a few common mistakes can reduce its effectiveness.

Avoid these pitfalls.

Mistake #1: Stopping when children learn to read

Some parents stop reading aloud once kids become independent readers.

That’s actually when read-aloud time becomes even more valuable because it introduces complex ideas beyond their reading level.

Mistake #2: Choosing only educational books

Educational books are great—but stories matter too.

Balance your reading with:

  • Adventure stories
  • Humor
  • Fantasy
  • Historical fiction

Fun books often create lifelong readers.

Mistake #3: Reading without interaction

Children benefit most when reading includes conversation.

Ask questions like:

  • Why do you think that happened?
  • Was that a good decision?
  • What would you do?

Mistake #4: Feeling pressure to perform

You don’t need theatrical voices or acting skills.

Children care far more about the shared experience than dramatic storytelling.

Mistake #5: Giving up if kids seem restless

Some children fidget while listening.

This is normal.

Allow quiet activities like:

  • coloring
  • building with blocks
  • drawing

They are often listening more than you realize.

A common surprise for new homeschooling parents is how quickly read-aloud time becomes the highlight of the day. What starts as a simple learning activity often grows into a family ritual everyone looks forward to. Children begin asking for “just one more chapter,” and discussions about the story continue long after the book closes.

This shared reading time also strengthens family relationships in subtle but meaningful ways. Sitting together with a story removes the pressure of formal instruction and allows learning to feel natural. Parents and children experience the story side by side, which builds trust, curiosity, and emotional connection.

Over months and years, these moments accumulate into something powerful. Children develop stronger listening skills, deeper vocabulary, and a genuine love of books—all while spending meaningful time with their parents.

Books And Resources That Make Reading Aloud Easier

Parents often ask what types of books work best for read-aloud time.

The answer depends on your child’s age and interests, but a few categories consistently work well.

Great books for younger children

  • The Very Hungry Caterpillar by Eric Carle
  • Where the Wild Things Are by Maurice Sendak
  • Frog and Toad series by Arnold Lobel

Elementary read-aloud favorites

  • Charlotte’s Web by E.B. White
  • The Boxcar Children series
  • My Father’s Dragon

Upper elementary and middle school

  • The Chronicles of Narnia
  • Little House on the Prairie
  • Anne of Green Gables

Teen read-aloud options

Free or low-cost resources

  • Local libraries
  • Thrift stores
  • Online used book marketplaces
  • Free audiobook apps

Rotating books from the library helps families explore many genres without spending much money.

Keep Learning With DKM Homeschool Resource

Homeschooling doesn’t have to be complicated to be effective. Sometimes the most powerful learning tools are also the simplest—and reading aloud is one of them.

Just a few minutes of shared reading each day can strengthen vocabulary, deepen comprehension, and create meaningful connections between parents and children. Over time, these small moments help children develop curiosity, imagination, and confidence in learning.

If you’re feeling overwhelmed by homeschooling, remember that meaningful learning often happens through consistent, simple habits. Reading together is one of the easiest ways to build those habits.

At DKM Homeschool Resource, our goal is to help parents homeschool with confidence by sharing practical ideas, encouragement, and helpful tools you can start using right away.

Explore more articles on the blog to discover:

  • homeschool organization tips
  • curriculum guidance
  • simple teaching strategies
  • encouragement for new homeschool parents

Every homeschool journey looks different, but you don’t have to figure it out alone.

Reading FAQs

FAQ: Does reading aloud help struggling readers?
Yes. Reading aloud improves listening comprehension and vocabulary, which supports reading development. For homeschooling families teaching struggling readers, shared reading removes the pressure of decoding words while still building understanding and confidence.

FAQ: Should I keep reading aloud if my child already reads independently?
Absolutely. Independent reading and read-aloud time serve different purposes. Reading aloud exposes children to more complex language, deeper storytelling, and advanced ideas, making it an important homeschool reading strategy even for strong readers.

FAQ: What if my child doesn’t want to listen to read-aloud books?
Start with topics they enjoy—adventure, animals, humor, or mysteries. Short sessions also help. Many homeschool parents find that once children become invested in a story, read-aloud time quickly becomes one of their favorite parts of the day.

Creating a Homeschool-Friendly Science Lab at Home

Creating a homeschool-friendly science lab at home doesn’t require a dedicated room, expensive equipment, or a science degree. Most families can build an effective homeschool science space using everyday items, a few key tools, and an organized learning area.

A homeschool science lab at home can be as simple as a small table, basic measuring tools, safety gear, and common household supplies like baking soda, vinegar, and magnifying glasses. Add a few science kits, storage bins, and notebooks, and you have everything needed for engaging hands-on science experiments.

Hands-on science is one of the most exciting parts of homeschooling. Kids get to explore, test ideas, and learn by doing instead of just reading a textbook. The good news is that creating a science-friendly home environment is far easier than most parents expect.

At DKM Homeschool Resource, we’ve seen thousands of parents successfully turn kitchen counters, garage corners, and spare desks into amazing learning labs. The key isn’t perfection—it’s creating a space where curiosity is welcome and experiments can happen easily.

Let’s walk through exactly what you need to set up a homeschool science lab that works for your family.

What Equipment Do You Need For A Homeschool Science Lab?

Most homeschool science labs need only a few basic tools to support experiments, observation, and hands-on learning.

Here are the essential items many homeschool families start with:

Basic Observation Tools

  • Magnifying glass
  • Microscope (optional but helpful)
  • Binoculars for nature studies
  • Flashlight

Measurement Tools

  • Measuring cups and spoons
  • Kitchen scale
  • Thermometer
  • Ruler and measuring tape
  • Stopwatch or timer

Experiment Supplies

  • Baking soda
  • Vinegar
  • Food coloring
  • Balloons
  • Plastic cups
  • Pipettes or droppers
  • Baking trays

Recording Materials

  • Science notebook
  • Graph paper
  • Colored pencils
  • Clipboards

Safety Equipment

  • Safety goggles
  • Apron or lab coat
  • Rubber gloves

You likely already have many of these items at home. A homeschool science lab is less about specialized gear and more about giving children tools to explore the world around them.

Choosing The Best Location For Your Homeschool Science Lab

Choosing The Best Location For Your Homeschool Science Lab

One of the biggest misconceptions about homeschooling science is that you need a separate room or a formal lab setup. In reality, many families run excellent science programs right from their kitchen table.

What matters most is having a predictable space where experiments can happen without stress. When kids know where science supplies live and where experiments happen, they become more independent learners. That consistency also helps reduce the chaos many parents worry about.

You also don’t need a large area. A simple corner with a storage bin, a foldable table, and a few shelves can become a fantastic learning hub. Some families even keep their science supplies in a rolling cart that moves between rooms depending on the day’s activities.

Here are a few popular homeschool science lab locations:

Kitchen Table Lab

Great for younger kids and quick experiments.

Pros:

  • Easy cleanup
  • Access to water and sink
  • Good lighting

Garage Science Station

Perfect for messier projects.

Pros:

  • Space for larger experiments
  • Safe for chemical reactions
  • Good for engineering projects

Desk or Study Table

Ideal for observation-based science.

Pros:

  • Good for microscope work
  • Organized learning environment
  • Quiet focus time

Outdoor Science Area

Amazing for nature-based learning.

Pros:

  • Weather experiments
  • Plant studies
  • Biology observations

If you’re just starting out, choose the easiest location in your home. You can always expand later.

Budget-Friendly Science Tools Every Homeschool Family Should Have

You do not need expensive lab equipment to teach excellent science at home. In fact, many of the most memorable homeschool experiments use items already sitting in your pantry.

At DKM Homeschool Resource, we encourage parents to focus on versatile tools that can support dozens of different experiments rather than buying single-purpose kits. A good magnifying glass, measuring tools, and a few reusable lab supplies can cover an entire year of science activities.

Here are some low-cost tools worth investing in:

1. Basic Microscope

A beginner microscope can often be found for $40–$70 and opens the door to a whole new world of discovery.

Kids can examine:

  • leaves
  • onion cells
  • pond water
  • salt crystals

2. Dropper Pipettes

Incredibly useful for chemistry experiments and easy to use for younger students.

3. Clear Beakers or Measuring Cups

Perfect for mixing solutions and observing reactions.

4. Digital Kitchen Scale

Helpful for chemistry experiments and learning measurement skills.

5. Storage Containers

Plastic bins help keep supplies organized and easy to access.

Free or nearly free science resources:

  • Nature collections (rocks, leaves, insects)
  • Recycling materials for engineering projects
  • Library science books
  • Free printable experiment guides

When kids can easily access these tools, science stops feeling like a chore and starts feeling like an adventure.

Organizing Homeschool Science Supplies Without The Chaos

Science can quickly turn into a mess if supplies aren’t organized well. The trick is to make everything visible, labeled, and easy to put away.

A simple organization system can make a huge difference in how often your children engage with science activities.

Here’s a practical setup many homeschool families use:

1. Use Clear Bins

Label bins for categories like:

  • Chemistry supplies
  • Biology tools
  • Nature collection items
  • Experiment materials

2. Keep a “Current Experiment” Tray

This holds the supplies needed for the week’s science project.

3. Store Liquids Separately

Place liquids in sealed containers inside a plastic tub to prevent spills.

4. Create a Science Notebook Station

Keep notebooks and pencils near the experiment area so kids can record observations right away.

5. Rotate Materials

You don’t need every supply out at once. Rotate items to match what you’re studying.

An organized science space encourages kids to take initiative. When supplies are easy to find, curiosity turns into action much faster.

Common Homeschool Science Lab Mistakes (And How To Avoid Them)

Many parents worry they’ll “mess up” science education at home. Fortunately, the most common mistakes are easy to fix once you know what to watch for.

One mistake we see often is focusing too heavily on complicated experiments. Parents sometimes believe science must involve dramatic reactions or advanced equipment to be meaningful. In reality, simple observations—like watching seeds sprout or tracking the phases of the moon—teach powerful scientific thinking skills.

Another common issue is waiting for the perfect curriculum before starting hands-on learning. Science exploration can begin immediately using everyday materials and simple questions. Children learn a tremendous amount just by observing, predicting outcomes, and discussing results with a parent guiding the process.

Some families also unintentionally remove the fun from science by turning every experiment into a graded assignment. While recording observations is valuable, the heart of science is curiosity. Allow kids to explore, ask questions, and sometimes make a mess while they discover how things work.

Simple Science Lab Activities You Can Start This Week

You don’t need months of planning to begin using your homeschool science lab. A few simple activities can spark excitement right away.

Here are some easy ideas you can try this week.

1. Baking Soda Volcano

Supplies:

  • baking soda
  • vinegar
  • dish soap
  • food coloring

Concepts learned:

  • chemical reactions
  • gas formation

2. Seed Germination Experiment

Place seeds in a clear bag with a damp paper towel and tape it to a window.

Kids observe:

  • root development
  • plant growth stages

3. Density Rainbow

Use sugar water and food coloring to create layered liquids.

Concepts learned:

  • density
  • liquid properties

4. Nature Observation Journal

Go outside and document:

  • insects
  • leaves
  • weather patterns

5. Simple Engineering Challenge

Give kids household materials and ask them to build a bridge that holds a book.

Materials:

  • paper
  • tape
  • cardboard
  • popsicle sticks

These types of projects build real scientific thinking while keeping learning exciting.

Homeschool-Friendly Science Lab

Creating a homeschool-friendly science lab at home doesn’t require perfection, expensive equipment, or a dedicated room. With a few simple tools, an organized space, and a willingness to explore alongside your kids, science can quickly become one of the most exciting parts of your homeschool routine.

The real magic of homeschooling science isn’t in fancy experiments—it’s in watching curiosity grow. When children can ask questions, test ideas, and see results with their own eyes, they begin to think like scientists. Those moments of discovery are what make science stick for life.

If you’re just beginning your homeschool journey, remember that small steps matter. Start with a few supplies, try one experiment this week, and build from there. Over time, your homeschool science lab will grow naturally as your kids’ interests expand.

At DKM Homeschool Resource, we love helping parents feel confident in their homeschooling journey. Explore more of our blog for practical homeschooling strategies, curriculum ideas, organization tips, and encouragement for every stage of homeschool life.

Science Lab FAQs

FAQ: Do homeschoolers really need a science lab at home?
A full laboratory isn’t necessary for effective homeschooling science. Many families use a kitchen table or small workspace with simple science tools like measuring cups, magnifying glasses, and notebooks. The goal is creating a consistent place where experiments and observation-based learning can happen easily.

FAQ: What age should kids start doing science experiments at home?
Children can start simple homeschool science activities as early as preschool. Young kids enjoy sensory experiments, nature observation, and basic reactions like baking soda and vinegar. As they grow, parents can gradually introduce more structured homeschool science lab activities and recording methods.

FAQ: What are the best homeschool science resources for beginners?
Some excellent beginner homeschool science resources include library experiment books, nature study guides, and simple science kits. Many families also use free online experiment ideas combined with basic science lab supplies to create engaging lessons without expensive curriculum programs.

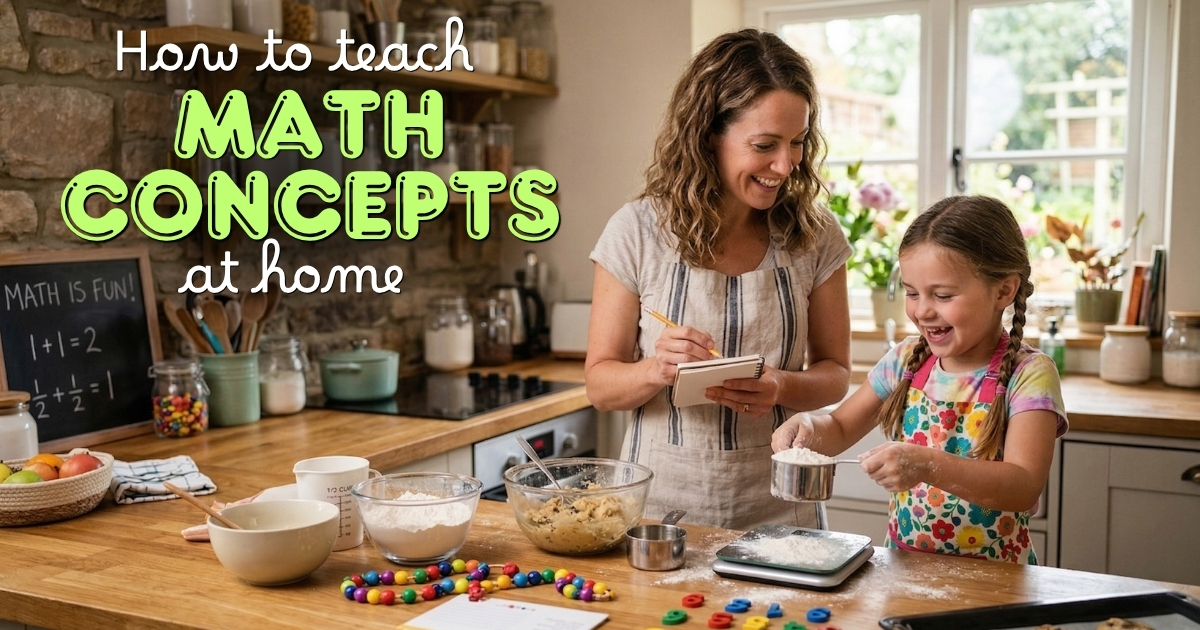
How to Teach Math Concepts Through Everyday Activities

Homeschooling parents often ask how to make math less stressful and more engaging. The truth is, you don’t need expensive curriculum or complicated lesson plans to teach strong math skills. Many of the best math lessons happen during ordinary moments at home.

At DKM Homeschool Resource, we often remind parents that math isn’t just a school subject—it’s a life skill. When math becomes part of your daily routine, learning happens naturally, and kids often don’t even realize they’re practicing important concepts.

Let’s explore simple ways to turn everyday moments into powerful math lessons.

How Do You Make Math Fun At Home?

The easiest way to make math fun at home is to move it off the worksheet and into real life. Kids naturally enjoy activities where they can touch, measure, count, and experiment.

Instead of saying, “Let’s do math,” invite them into everyday tasks that involve numbers.

Here are a few quick examples:

• Measuring ingredients while cooking
• Counting change at the store
• Estimating time during chores
• Tracking steps during a walk
• Playing board games that use numbers

Children tend to resist math when it feels abstract or forced. But when math solves a real problem—like doubling a recipe or figuring out how many cookies each person gets—it suddenly makes sense.

Try this simple approach this week:

  1. Choose one daily activity (like cooking dinner).
  2. Ask your child one math-related question.
  3. Let them help solve it.

Even small moments build strong understanding over time.

Everyday Activities That Naturally Teach Math

Some of the best math lessons happen in the most ordinary places. The kitchen, grocery store, backyard, and even the laundry room can become powerful learning environments.

Cooking is one of our favorite math-rich activities at DKM Homeschool Resource.

Kids practice:

• Fractions
• Measurement
• Multiplication
• Ratios

For example:

“Half a cup plus another half cup equals what?”

Suddenly, fractions aren’t confusing anymore—they’re delicious.

Shopping trips are another excellent opportunity. Ask your child questions like:

• “Which item costs less?”
• “If we buy two, how much will it cost?”
• “How much change should we get back?”

Even younger kids can participate by counting items or comparing prices.

Yard work also builds math skills. Measuring garden rows, spacing plants, or calculating how much soil is needed teaches practical geometry and estimation.

The key is letting kids participate, not just watch.

Many parents worry that everyday activities aren’t “real math lessons,” but in reality, they build the exact thinking skills children need. When kids see numbers connected to real situations, they develop number sense instead of simply memorizing procedures.

A child who measures ingredients, divides snacks, and compares prices understands math in a meaningful way. These experiences create mental connections that worksheets alone rarely achieve. Over time, those connections make formal math lessons easier and less intimidating.

Children also gain confidence because they feel capable and helpful. When math helps them solve a problem in the real world, they begin to view themselves as problem-solvers rather than students who are “good” or “bad” at math.

Simple Games That Reinforce Math Skills

Simple Games That Reinforce Math Skills

Games are one of the most powerful (and overlooked) teaching tools for homeschooling parents.

Many classic games reinforce math concepts naturally.

Try these family favorites:

Card Games

Great for practicing addition, subtraction, and number recognition.

Examples:
• War (compare numbers)
• Blackjack (mental addition)
• Make Ten

Board Games

Many games teach counting, strategy, and probability.

Examples:
• Monopoly Junior
• Yahtzee
• Ticket to Ride
• Uno

Dice Games

Dice are fantastic for quick math challenges.

Try asking:
• “Add the two numbers.”
• “Multiply them.”
• “What’s the difference?”

These short activities strengthen mental math skills without the pressure of formal lessons.

Quick tip:
Keep a small basket of math-friendly games in your homeschool space. Rotate them regularly so they stay exciting.

Turning Daily Chores Into Math Lessons

Chores are another hidden goldmine for math learning.

Instead of rushing through tasks alone, invite your child to help and ask simple math questions along the way.

Here are some easy examples:

Laundry

Ask:

• “If we have 12 socks, how many pairs can we make?”
• “If we fold 3 shirts every minute, how long will it take?”

Setting the Table

Practice multiplication:

• “We need forks for 6 people. How many do we need?”

Cleaning Projects

Teach estimation:

• “How many toys do you think are in this bin?”
• “Let’s count and see how close your guess was.”

Kids love guessing and checking—it turns simple tasks into games.

Another idea is creating weekly chore charts with numbers.

Children can track:

• time spent
• tasks completed
• points earned

Older kids can even calculate totals or averages at the end of the week.

These small habits reinforce math skills without requiring extra school time.

There’s something powerful about learning math in the flow of everyday life. Children stop thinking of math as a separate subject and begin to see it as a tool they use constantly. That shift changes their attitude toward learning in a meaningful way.

Parents often notice that once math becomes practical, resistance fades. Kids who previously disliked worksheets suddenly enjoy solving real problems. They feel more engaged because they can see the purpose behind the numbers.

Homeschooling offers the freedom to create these kinds of learning moments. Instead of rushing through a rigid schedule, families can slow down and let curiosity guide the lesson.

Common Mistakes Parents Make When Teaching Math

Even experienced homeschoolers sometimes fall into a few common traps.

Avoiding these mistakes can make math much more enjoyable.

1. Teaching Only Through Worksheets

Worksheets have a place, but they shouldn’t be the only way kids experience math.

Hands-on learning builds deeper understanding.

2. Moving Too Fast

Many parents worry about “keeping up” with grade levels.

But math understanding matters more than speed. If a child truly grasps a concept, future lessons become easier.

3. Making Math Feel Like a Test

Constantly correcting mistakes can discourage kids.

Instead:

• ask questions
• encourage thinking
• celebrate effort

Mistakes are part of learning.

4. Skipping Real-Life Applications

When math only exists in textbooks, kids struggle to see why it matters.

Daily activities solve this problem naturally.

5. Forgetting That Fun Matters

Kids learn more when they enjoy the process.

Games, puzzles, and real-life challenges help maintain motivation.

Simple Steps Parents Can Start This Week

If you’re feeling overwhelmed, don’t worry. You don’t need to redesign your homeschool plan overnight.

Start small.

Here are five easy steps you can try this week:

1. Cook One Meal Together

Let your child measure ingredients and double a recipe.

2. Play One Math Game

Even 10 minutes makes a difference.

3. Ask One Math Question Daily

Examples:
• “How long will this take?”
• “How many do we need?”
• “What’s the total?”

4. Use Real Money

Let kids count coins or make change.

5. Keep a Math Notebook

Write down interesting math discoveries from daily life.

These tiny habits add up quickly.

Many parents are surprised how much learning happens when math is woven into everyday routines.

Teaching Math At Home

Teaching math at home doesn’t require complicated lessons or expensive materials. Some of the best learning moments happen during everyday activities—cooking dinner, playing games, folding laundry, or planning a family project.

When math becomes part of daily life, children develop confidence, curiosity, and strong problem-solving skills. Instead of seeing math as something stressful, they begin to recognize it as a helpful tool they use every day.

If you’re homeschooling or considering homeschooling, remember that small steps matter. A single math question during dinner or a quick game after lunch can build powerful learning habits over time.

At DKM Homeschool Resource, we’re here to help you every step of the way. Explore our other blog posts for practical homeschool advice, encouragement for busy parents, and simple strategies that make learning at home both effective and enjoyable.

Math Concepts FAQs

FAQ: How can homeschooling parents teach math without a curriculum?
You can teach math through everyday activities like cooking, budgeting, games, and shopping. Real-life math builds strong number sense and problem-solving skills. Many homeschooling families combine these experiences with a simple math workbook or online resource for structure.

FAQ: What are the best everyday activities for teaching math concepts?
Cooking, board games, budgeting, gardening, and building projects are excellent ways to teach math concepts. These activities help children practice measurement, fractions, estimation, and mental math in meaningful contexts.

FAQ: Is hands-on math better for homeschool learning?
Hands-on math is extremely effective because children can see and apply math concepts in real situations. Activities like measuring ingredients or calculating costs reinforce understanding far better than memorization alone.

Pen Pals in a Digital Age: Bringing Back Letter Writing for Homeschool Language Arts

If you remember the excitement of licking a stamp and dropping a handwritten letter in the mailbox, then you know the special charm of old‑fashioned communication. That feeling of anticipation before a reply arrived — that’s part of why “homeschool pen pal ideas” feel so magical.

Today, even though our world runs on screens, homeschoolers can still enjoy that same magic. By weaving pen pals into our homeschool routine, we combine nostalgia with meaningful learning. These homeschool pen pal ideas can help children slow down, express themselves, and practice writing in a way that feels personal and exciting.

Why Letter Writing Still Matters in a Digital World

In recent years, screen time for children has surged. Kids ages 5–8 now spend, on average, about 3.5 hours a day on screen media. While digital tools can be helpful, overuse of screens has been linked to reduced focus, sleep problems, and emotional challenges.

That’s why “digital detox homeschool language arts” is more than a trend — it’s a healthy choice. Reintroducing traditional letter writing gives kids a break from screens and helps them reconnect with slow, thoughtful communication. Writing by hand also stimulates memory, sensory processing, and cognitive development in ways typing cannot.

For homeschool families, integrating pen pals isn’t just nostalgic — it’s a way to build strong writing habits, deeper thinking, and a healthier balance with technology.

Boosting Writing Skills Through Thoughtful Letters

One of the greatest gifts of pen pal projects is how they naturally boost writing skills. Unlike fast typing, writing by hand encourages children to slow down and think about each sentence. This extra processing helps improve sentence structure, vocabulary, and clarity.

When kids take time to compose a letter — perhaps describing their week or sharing a story — they practice organizing thoughts, choosing words carefully, and paying attention to grammar and punctuation. You might set up homeschool pen pal ideas like:

  • A weekly “journal to a friend”
  • Themed letters (favorite book review, nature observations, holiday memories)
  • Story-exchange letters — one child writes a beginning, the pen pal continues

Over time, these writing activities help children build stronger handwriting skills and develop a deeper command of language — all while doing something that feels fun and meaningful.

Developing Social and Emotional Skills Through Connection

Letter writing is more than academic practice — it’s a tool for emotional growth. When children write to a pen pal, they learn to consider another person’s feelings, ask thoughtful questions, share experiences, and respond with care. This kind of reflection builds empathy, communication skills, and emotional intelligence.

Receiving a letter can also be a special moment for a child — the tactile experience of holding a paper envelope, seeing someone’s handwriting, maybe even small drawings or stickers. It teaches patience, anticipation, and kindness. For homeschool parents, this is a chance to encourage safe, meaningful friendships beyond the immediate circle.

With pen pals, homeschool isn’t just about reading and math — it becomes a space for connection, caring, and growing hearts.

Blending Tradition and Modern Convenience

Blending Tradition and Modern Convenience

Of course, you don’t have to be strictly “old‑school” to enjoy pen pals. You can blend the charm of letter writing with helpful modern touches.

Some ideas to get started include:

  • Traditional mailed letters on fun stationery
  • “Email letters” written by hand (scan or photograph them) — keeps the charm but speeds delivery
  • Including small drawings, pressed leaves or flowers, photos — to share parts of your homeschool days

These hybrid homeschool pen pal ideas let kids enjoy the ritual of writing and receiving mail, while staying connected even across long distances. It’s a meaningful compromise between screen time and tangible connection.

Integrating Pen Pals Into Your Homeschool Language Arts Curriculum

If you’re thinking about adding letter writing intentionally, it can easily fit into a homeschool language arts plan. Here are some ways to structure it:

Assignment TypeWhat Kids Practice
Weekly or bi‑weekly lettersLetter format, friendly tone, clarity
Themed letters (nature, holidays, books)Descriptive writing, observation, vocabulary
Story‑exchange lettersCreative writing, narrative flow, peer collaboration
Peer feedback lettersEditing skills, constructive feedback, revision practice

You can even grade or track progress — looking for improvements in grammar, creativity, and handwriting. For older children, pen pals can double as portfolio pieces showing growth over time.

Not only does this support academic skills, but it also gives children a real-world reason to write — something beyond worksheets and assignments.

Making It Fun and Nostalgic for the Whole Family

One of the best parts about pen pals is the nostalgia — and you can lean into that as a family. Here are some fun ideas to make letter writing into a family event:

  • Full stationery kits with decorated paper, envelopes, stickers, stamps
  • A “family mailbox” at home — each child gets a special slot for incoming letters
  • Holiday or seasonal letter swaps — maybe a summer letter, a winter holiday greeting, or a “back-to-school” message
  • Sharing stories of famous historical pen pals or authors who wrote letters to each other for inspiration

These touches add excitement and ritual to the process, making letter writing more than just schoolwork — it becomes something warm and memorable.

Want to jumpstart this adventure? Download our free Digital Detox Letter Writing Pack for fun templates and prompts to help your child get started today!

The Lasting Impact of Homeschool Pen Pal Ideas

Using pen pals in your homeschool isn’t just about reliving nostalgia — it’s a chance to support deeper learning, emotional growth, and a healthier balance with technology.

  • Handwriting helps children remember and process information better than typing alone
  • Reducing screen time can improve focus, sleep, and well-being for children
  • Letter writing fosters empathy, communication, and joy — qualities that enrich homeschooling beyond academics
  • Pen pal projects provide flexibility: you can tailor frequency, themes, and complexity according to your child’s age and interests

In a world saturated with digital noise, these simple acts of pen and paper stand out.

Creating Meaningful Connections, One Letter at a Time

Bringing back letter writing through homeschool pen pal ideas offers a beautiful blend of education, memory, and connection. It gives children the chance to slow down, think deeply, write carefully, and connect sincerely — in a way that typing cannot replace.

Whether you start with simple letters to a friend, themed exchanges, or creative story swaps, these gentle communication habits nurture writing skills, emotional growth, and a sense of wonder.

Give it a try: set up a mailbox, pick up paper and pens, and let your children discover the joy of being pen pals. In doing so, you offer them a glimpse of a slower, more thoughtful way to connect — one letter at a time.

How to Teach Inference with Evidence in Your Homeschool Routine

Helping children understand what they read goes beyond recognizing words on a page. One of the most important skills homeschoolers can develop is learning how to make inferences. Inference allows children to look at clues, think about what they already know, and figure out ideas that are not directly stated.

At first, teaching inference might sound complicated. In reality, it can become a natural part of your homeschool routine. Simple activities like discussing a story, observing nature, or talking about everyday situations can help children practice identifying clues and supporting their ideas with evidence.

When homeschool parents intentionally teach inference, they help children become stronger readers, deeper thinkers, and better problem-solvers. The good news is that you do not need special curriculum or complicated lessons. With a few simple strategies, inference can easily become part of daily learning.

What Is an Example of an Inference in Teaching?

Before teaching inference in your homeschool, it helps to understand what the skill actually looks like in practice. Simply put, an inference is a conclusion based on clues and prior knowledge. Instead of stating something directly, the information is implied, and the learner must piece the clues together.

Think of inference as being a bit like detective work. Children gather evidence, look for patterns, and then make a thoughtful guess based on what they see.

For example, imagine you are reading a story with your child and the text says a character grabs an umbrella, puts on boots, and rushes outside. The book may never say that it is raining, but your child can infer that the weather is probably wet.

Homeschool families can practice this skill in many everyday situations.

Consider these simple examples:

  • A child in a story is rubbing their eyes and yawning.
    Your student might infer that the character is tired.
  • A family in a book is packing towels, sunscreen, and swimsuits.
    Your child may infer that they are going to the beach.
  • During a nature walk, you see dark clouds forming and feel the wind pick up.
    Your student might infer that a storm is coming.

In each of these examples, the conclusion is not directly stated. Instead, children use context clues and prior knowledge to figure out what is likely happening.

This skill becomes especially important as children begin reading longer books. Authors often expect readers to notice subtle hints about characters, emotions, or events. If students do not practice inference, they may miss important parts of the story.

Homeschool parents can support this skill by asking simple questions during reading or daily conversations. Questions like:

  • “What clues helped you figure that out?”
  • “Why do you think that happened?”
  • “What evidence do we see?”

Over time, children begin to recognize that good readers are always thinking beyond the words on the page.

Why Inference Skills Matter for Reading Comprehension

Inference plays a major role in helping children truly understand what they read. While some information in books is stated clearly, many important details are implied rather than directly explained. When students learn how to make inferences, they become better at uncovering these hidden meanings.

For homeschoolers, this skill strengthens overall reading comprehension. Instead of simply recalling facts from a story, children begin to think about motivations, emotions, and cause-and-effect relationships within the text.

For example, a story might describe a character slamming a door and refusing to speak. The author may never say the character is angry, but a child who understands inference can recognize the clues and draw that conclusion.

Why Inference Skills Matter for Reading Comprehension

This kind of thinking helps readers move beyond surface-level understanding.

Inference also encourages children to:

  • Think critically about what they read
  • Analyze context clues in stories and informational texts
  • Connect prior knowledge with new information
  • Predict outcomes based on evidence
  • Understand character emotions and motivations

These abilities become increasingly important as children grow and begin reading more complex books.

Inference skills are not limited to reading, either. They are used in many other areas of learning. In science, students observe clues and form conclusions about what might be happening. In history, they analyze events and consider why people acted a certain way.

Even everyday life involves inference. Children constantly interpret body language, tone of voice, and environmental clues to understand situations around them.

When homeschool parents intentionally practice inference during reading time, they help their children develop a deeper level of understanding. Stories become richer, discussions become more thoughtful, and students begin to approach information with a curious and analytical mindset.

Over time, these habits create stronger readers who are able to think beyond the words on the page and uncover the meaning behind them.

The Difference Between Observations, Evidence, and Inference

When teaching inference in your homeschool, it can be helpful to explain three related ideas: observations, evidence, and inference. These concepts work together and help children understand how conclusions are formed.

Start with the simplest concept: observation. An observation is something a child can directly see, hear, or read. It is a fact that does not require interpretation.

For example, a child reading a story might observe that a character is wearing a heavy coat and gloves. During a nature walk, they might observe dark clouds forming in the sky.

Next comes evidence. Evidence is the collection of clues that support a conclusion. In many cases, observations become the evidence used to make an inference.

Using the previous example, the heavy coat and gloves become evidence that helps the child understand what might be happening.

Finally, there is inference. An inference is the conclusion someone reaches after examining the evidence and thinking about what they already know.

So a child might observe the coat and gloves, use those clues as evidence, and then infer that the weather is cold.

Understanding this process helps children see that good thinking involves more than guessing. Instead, it requires looking for clues and using those clues to support an idea.

Homeschool parents can reinforce these concepts with simple questions during reading or daily activities.

You might ask:

  • “What do you notice?”
  • “What clues tell us that?”
  • “What do you think is happening based on those clues?”

These conversations help children slow down and think through their reasoning.

As students begin to recognize the difference between observations, evidence, and inference, they become more confident in explaining their ideas. They also begin to realize that strong conclusions are built on clear clues and thoughtful reasoning.

This understanding lays the foundation for stronger reading comprehension, deeper discussions, and better critical thinking throughout their homeschool learning.

Simple Daily Activities That Teach Inference Naturally

One of the best parts of teaching inference in your homeschool is that it can happen naturally throughout the day. You don’t need a special curriculum—everyday activities offer opportunities for children to practice using clues and making thoughtful conclusions.

Reading together is a perfect time to practice. Pause during a story and ask questions like:

  • “Why do you think the character did that?”
  • “What clues in the text tell us how they feel?”
  • “What might happen next?”

Nature walks or outdoor observations also provide rich material for inference. Ask your child to look at the clouds, notice the animals, or observe changes in plants. Questions such as:

  • “Why do you think the birds are flying in that direction?”
  • “What clues tell us it might rain soon?”
    help children connect what they see with logical conclusions.

Cooking together is another natural opportunity. If a recipe calls for melted chocolate and whipped cream, your child can infer what the final dessert will look or taste like. Asking questions like:

  • “What do you think will happen if we mix these ingredients?”
  • “Why do we need to let this cool?”
    teaches them to look for clues and predict outcomes.

Even simple family routines can reinforce inference skills. For example, if a child sees you grabbing keys and a coat, they can infer that you are leaving the house. Encourage children to explain their thinking, using evidence to support their inferences.

Other ideas for daily practice:

  • Picture book discussions: Infer character emotions from illustrations.
  • Everyday problem-solving: Ask children what might happen if a plan changes.
  • Observing behavior: Use body language or tone of voice to infer feelings.

By weaving inference practice into everyday activities, it becomes second nature for your child. Over time, they learn to think critically, notice details, and support their conclusions with evidence—skills that strengthen both reading comprehension and everyday reasoning.

Using Books to Teach Evidence-Based Thinking

Books are one of the easiest and most effective tools for teaching inference in your homeschool. Reading together gives children natural opportunities to practice noticing clues, thinking critically, and supporting their ideas with evidence.

Start with books that include strong character actions or emotions. Picture books work well for younger children, while chapter books or historical fiction are great for older students. As you read, pause and ask questions that encourage children to think beyond the words on the page.

Some examples of questions include:

  • “Why do you think the character acted that way?”
  • “What clues in the story tell us how they feel?”
  • “What might happen next?”

Encourage children to point to evidence in the text or illustrations that supports their answers. For instance, if a character is shivering and rubbing their arms, your child might infer they are cold, citing the description as evidence.

You can also use story-based activities to make inference practice more interactive:

  • Prediction games: Pause mid-story and ask children to predict what will happen next, using clues from the plot.
  • Emotion detective: Have children infer characters’ feelings based on actions, dialogue, and illustrations.
  • Cause and effect: Discuss why events happen in the story and what evidence supports those conclusions.

For older children, nonfiction books are perfect for teaching evidence-based thinking. They can read a passage, identify facts, and then make inferences about outcomes or patterns. For example, a science book describing how plants respond to sunlight can lead to inferences about why certain plants grow better in specific conditions.

The key is to connect inferences to evidence, showing children that strong conclusions come from careful observation and reasoning—not guessing. By consistently practicing this during reading time, inference becomes a natural part of how children approach stories, information, and even real-life situations.

Teaching Children to Find Evidence

Once children understand what inference is, the next step is teaching them how to support their ideas with evidence. Evidence is the backbone of a strong inference—it shows that their conclusions are based on clues rather than guesses.

Start by explaining that evidence can come from what they see, hear, or read. Observations in a story, details in pictures, or even clues from everyday life all count as evidence. The goal is for children to connect their observations to logical conclusions.

A helpful way to practice this is with a simple chart. It organizes information and makes the process of reasoning clear for young learners. Here’s an example you can use:

Inference Practice: Clues + Evidence + Conclusion

SituationClues / EvidencePossible Inference
Character shiveringWearing thin jacket, snow outsideThe character is cold
Child rubbing eyesYawning, quiet behaviorThe child is tired
Dark clouds formingWind picking up, distant thunderA storm is coming
Door creaking open slowlyFootsteps inside, lights flickeringSomeone is sneaking in
Spilled cup of waterWet floor, tipped cupSomeone knocked over the cup

To use this chart in your homeschool:

  1. Present a situation from a story, picture, or real-life observation.
  2. Ask your child to list the clues or evidence they notice.
  3. Help them draw a logical inference based on that evidence.
  4. Encourage them to explain their thinking: “Which clues helped you figure that out?”

This chart can be adapted for all ages. Younger children might use drawings instead of words, while older children can add more complex evidence or multiple possible inferences.

By practicing in this structured way, children learn that strong inferences always rely on evidence, building their critical thinking and reading comprehension skills.

Games and Activities That Strengthen Inference Skills

Learning inference doesn’t have to be all worksheets and discussion—it can also be fun and interactive. Using games and hands-on activities in your homeschool routine helps children practice inference while staying engaged and motivated.

One popular activity is the Mystery Bag Game. Place an object in a bag and give children clues about it. They can feel, shake, or listen to it without looking, then make an inference about what’s inside based on the evidence. This encourages careful observation and reasoning.

Another idea is Picture Detective. Use illustrations from books or magazines and ask children questions like:

  • “What do you think is happening here?”
  • “What clues in the picture support your idea?”
    This develops their ability to read visual evidence and draw conclusions.

What Happened Next? is a storytelling activity where you pause a story at a critical moment and ask children to predict the outcome. Encourage them to explain which clues in the text or illustrations guided their predictions.

You can also turn nature walks or outdoor exploration into inference practice. Children might observe animal tracks, weather patterns, or plant changes and make predictions:

  • “These footprints are close together—what animal do you think made them?”
  • “The leaves are turning brown—what does that tell us about the season?”

Other simple ideas include:

  • Using everyday situations: Ask children to infer why a sibling might be upset or why the kitchen is messy.
  • Creating mini mysteries: Hide an object and leave clues around the room for children to find and infer the solution.
  • Board games or story-based games that involve deduction, like guessing characters or predicting events.

The key to all these activities is encouraging children to explain their thinking and point to the clues that support their conclusions. By practicing inference in different ways—visually, verbally, and physically—children build strong reasoning skills that carry over to reading, science, and everyday problem-solving.

Encouraging Children to Explain Their Thinking

One of the most important steps in teaching inference is helping children articulate how they reached their conclusions. Explaining their reasoning not only reinforces the skill but also strengthens communication and critical thinking.

After your child makes an inference, ask questions that guide them to connect evidence with their conclusion. Some examples include:

  • “What clues helped you figure that out?”
  • “Which part of the story or picture gave you that idea?”
  • “Could there be another explanation?”

Encourage children to use full sentences and refer directly to the evidence they observed. For example:

  • “I think the character is nervous because he keeps fidgeting and looking around, which shows he’s worried.”
  • “The spilled cup and wet floor tell me someone accidentally knocked it over.”

This practice helps children see that inferences aren’t guesses—they’re reasoned conclusions based on evidence. Over time, they start to apply this reasoning automatically in reading, science, history, and everyday life.

You can also use pair or group discussions if you homeschool multiple children or do co-op activities. Children can share their inferences, listen to others, and compare evidence, which encourages respectful discussion and critical evaluation of ideas.

For younger children, prompting with sentence starters can help them articulate thoughts:

  • “I know ___ because ___.”
  • “The clues I see are ___, so I think ___.”

For older students, challenge them to explain multiple possible inferences and discuss which one is best supported by the evidence.

By making explanation a regular part of inference practice, children gain confidence in both their thinking and speaking abilities. They learn to justify their ideas, listen to others’ reasoning, and approach information critically.

Making Inference Part of Your Everyday Homeschool Routine

Inference doesn’t need to be confined to reading lessons or special activities. The most effective way for children to master this skill is to integrate it naturally into everyday homeschool life. When inference becomes part of your daily routine, it feels less like a lesson and more like a habit of thinking.

Start with morning reading time. Pause during stories to ask questions about characters’ actions, feelings, or possible outcomes. Encourage children to support their answers with evidence from the text.

During science experiments, ask children to predict what will happen next and explain why. For example, if observing how ice melts, you might ask:

  • “What do you think will happen to the ice if we leave it in the sun? Why?”

In history or social studies lessons, have children infer motivations behind historical events or decisions based on the evidence presented in texts, maps, or timelines.

Even everyday conversations provide opportunities for inference. Notice simple situations like:

  • “The laundry basket is empty—what might that tell us?”
  • “Someone left their shoes by the door—what could that mean?”

You can also integrate inference into family games and activities, like predicting outcomes in board games, drawing conclusions from clues in a scavenger hunt, or solving mini mysteries around the house.

Tips for keeping inference practice consistent:

  • Ask open-ended questions frequently.
  • Encourage children to explain their reasoning.
  • Praise thoughtful connections between evidence and conclusions.
  • Keep charts, journals, or observation notebooks to track ideas.

The key is frequent, low-pressure practice. When children encounter inference in multiple contexts—reading, science, history, daily life—they learn to automatically analyze clues, draw conclusions, and support their thinking with evidence.

Building Strong Thinkers Through Inference

Teaching inference in your homeschool gives children more than just reading skills—it helps them become critical thinkers, problem-solvers, and confident communicators. By learning to gather evidence, analyze clues, and draw thoughtful conclusions, children develop a habit of reasoning that carries across every subject and everyday situation.

With simple strategies—reading together, observing the world, using charts, and playing interactive games—inference can be seamlessly woven into your daily homeschool routine. Over time, these practices help children not only understand what they read but also think deeply about the world around them, making learning both meaningful and fun.

Daily Vocabulary-in-Context Routine: Teach Word Meaning Without Worksheets

Homeschool parents often ask if there’s a better way to teach vocabulary than endless worksheets and memorized word lists. The answer is yes: teaching vocabulary in context during everyday reading and conversation helps children understand and remember words naturally.

Instead of drilling definitions, you can build vocabulary through stories, discussion, and real-life usage. This method is faster, more engaging, and far more effective for long-term learning.

How Do You Teach Vocabulary In Context?

Teaching vocabulary in context means helping children learn new words naturally while reading, listening, and speaking. Instead of memorizing definitions, students discover word meanings from sentences, stories, and discussions. Parents pause during reading, discuss unfamiliar words, and encourage children to use the new vocabulary in conversation and writing.

Many parents are surprised to learn that most vocabulary growth happens through exposure, not memorization. Children learn words best when they encounter them inside meaningful language.

Here’s what this looks like in a homeschool routine:

  1. Read together daily
    Books, articles, and even read-aloud stories expose children to new vocabulary.
  2. Pause briefly for unfamiliar words
    Instead of skipping them, talk about what the word might mean.
  3. Use the sentence as the clue
    Ask your child what the word might mean based on the context.
  4. Confirm or clarify the meaning
    Give a simple explanation.
  5. Use the word later in conversation
    Repetition in real situations locks the word into memory.

For example:

Sentence in a book:
“The explorer felt exhausted after trekking through the dense jungle.”

You might ask:

  • “What do you think exhausted means here?”
  • “What clues does the sentence give?”

Your child may respond:
“It probably means really tired.”

That’s vocabulary learning happening naturally.

Why Worksheets Often Fail For Vocabulary Learning

Why Worksheets Often Fail For Vocabulary Learning

Worksheets look productive, but they rarely produce strong vocabulary growth. Students often memorize a definition long enough to finish the assignment and then forget it days later.

Real vocabulary development happens when words are experienced repeatedly in meaningful situations.

When a child reads a story and encounters the word astonished, they see it connected to a character’s reaction. When they later hear that same word in conversation, the meaning becomes stronger and clearer. Eventually, they begin using the word themselves.

Children who learn vocabulary this way develop deeper language skills because they understand how words behave in real sentences. They notice tone, nuance, and how meaning changes depending on context.

Over time, this builds stronger reading comprehension and better writing ability. Instead of remembering a list of isolated definitions, children develop an intuitive sense of language.

A Simple Daily Vocabulary Routine For Homeschool Families

You don’t need special curriculum or long lessons to teach vocabulary effectively. A short daily routine during reading time is often enough.

Here is a simple approach many homeschool families use.

Step 1: Choose a daily reading time

This could be:

  • Morning read-aloud
  • Independent reading
  • History or science reading
  • Bedtime stories

Any reading works.

Step 2: Notice unfamiliar words

When a child pauses or stumbles on a word, that’s a learning opportunity.

Ask questions like:

  • “Have you heard that word before?”
  • “What do you think it means in this sentence?”

Step 3: Use context clues

Encourage your child to think about:

  • What just happened in the story
  • How the character feels
  • What other words in the sentence suggest

Step 4: Give a simple definition

Keep explanations short.

Example:

“Reluctant means you don’t really want to do something.”

Step 5: Use the word again later

Later in the day you might say:

  • “You seemed reluctant to start math today.”
  • “That dog looks reluctant to get into the bath.”

This repetition builds lasting vocabulary.

Everyday Moments That Naturally Build Vocabulary

Vocabulary learning does not need to stay inside reading time. Some of the best opportunities happen during normal daily life.

Parents often underestimate how powerful everyday conversation can be for language development. Children absorb words quickly when they hear them used naturally in familiar situations.

Think about a typical homeschool day. You might be cooking lunch, discussing a science experiment, or walking outside together. Each of these moments creates opportunities to introduce new words in ways that feel effortless.

When a child hears a word like fragile while helping unload groceries, the meaning becomes attached to a real experience. If you say, “Be careful with those eggs—they’re fragile,” the child immediately connects the word with something breakable.

Over time, these small conversations accumulate into a rich vocabulary foundation. Children begin noticing patterns in language, recognizing words across different contexts, and eventually using them in their own speech.

Here are simple moments where vocabulary can grow naturally:

During science

  • “This rock is porous, meaning it has tiny holes.”

During history

  • “A colony is a place where settlers live far from their original country.”

During cooking

  • “Let’s measure precisely so the recipe works.”

During outdoor play

  • “Those clouds look ominous.”

Children remember these words because they are tied to real experiences.

Common Mistakes Homeschool Parents Make With Vocabulary

Even with the best intentions, some habits can slow vocabulary learning.

Avoid these common mistakes.

1. Teaching too many words at once

Trying to teach 10–20 words per week can overwhelm students.

Focus on 2–5 meaningful words that appear during reading.

2. Over-explaining

Long dictionary definitions confuse younger learners.

Use simple explanations like:

  • “Enormous means really, really big.”

3. Interrupting reading too often

Stopping every few sentences breaks the flow of the story.

Choose only the most important words to discuss.

4. Relying on memorization

Word lists without context are easy to forget.

Children need to hear, see, and use words repeatedly.

5. Skipping discussion

Vocabulary grows through conversation. Asking questions helps children process meaning.

Instead of:

“Here’s the definition.”

Try:

“What do you think this word means?”

Fun Ways To Reinforce Vocabulary Without Worksheets

The goal isn’t just recognizing new words—it’s helping children use them.

These simple activities reinforce vocabulary naturally.

1. The “word of the day” challenge

Choose one word from reading.

Encourage everyone to use it throughout the day.

Example:

Word: delighted

  • “I’m delighted you finished your work.”
  • “The puppy looks delighted.”

2. Vocabulary storytelling

Ask your child to make up a short story using the new word.

Example:

“Write one sentence using the word mysterious.”

3. Family dinner conversation

Ask questions like:

  • “What new word did you hear today?”
  • “Can you use it in a sentence?”

4. Vocabulary notebook

Instead of worksheets, keep a small notebook.

Students can:

  • write the word
  • draw a picture
  • write their own sentence

5. Read-aloud discussions

During read-aloud time ask:

  • “Why do you think the author used that word?”

These activities keep learning fun and meaningful.

Homeschool parents sometimes worry they aren’t doing “enough” vocabulary instruction, especially when they see structured curriculum filled with quizzes and worksheets. But language learning rarely works that way in real life.

Children naturally acquire vocabulary through exposure, curiosity, and conversation. When they encounter interesting words in books and hear those same words used later in daily life, their brains build stronger connections.

The beauty of teaching vocabulary in context is that it blends seamlessly into what homeschool families are already doing. Reading stories together, exploring new subjects, and having thoughtful discussions are already powerful language-learning experiences.

Instead of adding another subject to your schedule, you are simply making your existing homeschool routine more intentional.

Simple Resources For Teaching Vocabulary In Context

You don’t need expensive curriculum to build strong vocabulary skills.

Here are a few helpful resources homeschool families love.

Great books for vocabulary exposure

  • Classic literature read-alouds
  • Historical fiction
  • Nature books
  • Biography series
  • Quality children’s novels

Free or low-cost tools

  • Public library book stacks
  • Audiobooks from Libby or Hoopla
  • Free online dictionaries
  • Vocabulary apps used sparingly
  • Printable reading journals

Helpful homeschool strategies

  • Daily family read-aloud
  • Narration (telling back what was read)
  • Copywork from quality literature
  • Discussion questions after reading

These tools support vocabulary learning without requiring formal worksheets.

FAQs

FAQ: What is vocabulary in context in homeschooling?
Vocabulary in context means teaching word meanings through real sentences, stories, and conversations instead of memorized lists. Homeschool parents use reading time, discussion, and everyday experiences to help children understand how words function naturally. This method improves reading comprehension and long-term vocabulary retention.

FAQ: How many vocabulary words should homeschool students learn each week?
Most homeschool students benefit from learning 3–5 new words per week through context-based reading rather than memorizing long lists. Fewer words allow for deeper understanding, repeated exposure, and real usage during conversation and writing.

FAQ: Do homeschoolers need a formal vocabulary curriculum?
Many homeschool families find that a formal vocabulary curriculum is unnecessary when children read widely and discuss language regularly. Context-based vocabulary instruction through books, narration, and discussion often produces stronger results than traditional worksheets.

Making Homeschooling Easier

Teaching vocabulary doesn’t have to mean stacks of worksheets or long memorization lists. When children learn words through stories, conversations, and real experiences, language becomes meaningful and memorable.

A simple daily reading routine, a few thoughtful questions, and everyday conversations can build an incredibly strong vocabulary foundation. These small moments add up quickly and help children become confident readers, thinkers, and communicators.

At DKM Homeschool Resource, our goal is to make homeschooling easier, simpler, and more encouraging for busy families. If you’re looking for more practical homeschool strategies, helpful routines, and low-stress teaching ideas, explore the rest of our blog for guidance and inspiration.

20-Minute Homeschool PE Fitness Circuit (Indoor Routine)

Yes, 20 minutes of circuit training is absolutely enough for homeschool PE—especially when it’s structured, intentional, and consistent. You don’t need a full gym class to keep your kids healthy. You just need a simple plan and a little movement.

At DKM Homeschool Resource, we work with busy homeschool parents every day. Most feel stretched thin trying to fit in math, reading, meals, and laundry—then suddenly realize, “Oh no… we forgot PE again.” The good news? You don’t need a complicated plan. A simple 20-minute indoor fitness routine can completely change the energy in your homeschool day.

Let’s walk through exactly how to make it work.

Is 20 Minutes Of Circuit Training Enough?

Absolutely. When done 4–5 days per week, a 20-minute homeschool fitness circuit can provide meaningful cardiovascular activity, muscle engagement, and coordination practice. Kids don’t need hour-long workouts. They need consistency, variety, and movement that feels fun rather than forced.

Many parents assume physical education has to look like public school gym class. It doesn’t. In a homeschool setting, you have the advantage of flexibility. A well-designed indoor circuit training routine keeps kids moving efficiently without dragging out the day.

Think about it this way:

  • 20 focused minutes = more movement than a distracted 45-minute gym class
  • Short bursts keep kids engaged
  • It prevents burnout (for you and them)
  • It fits naturally between subjects

If your child already plays outside later in the day, rides bikes, or participates in sports, this 20-minute routine becomes the structured foundation of your homeschool PE curriculum.

And honestly? It often improves focus for the next subject.

How To Set Up A Simple Indoor Homeschool Fitness Circuit

You don’t need fancy equipment. You don’t need a Pinterest-perfect playroom. You need about 6–8 feet of space and a timer.

Here’s the simple structure we recommend at DKM Homeschool Resource:

Step 1: Choose 6 Exercises
Pick movements that alternate between cardio and strength.

Example:

  1. Jumping jacks
  2. Push-ups (wall or floor)
  3. High knees
  4. Squats
  5. Plank hold
  6. Mountain climbers

Step 2: Set a Timer

  • 40 seconds work
  • 20 seconds rest
  • Rotate through all 6 exercises
  • Repeat once (2 total rounds)

That’s 18–20 minutes.

Step 3: Add a Warm-Up (2 minutes)

  • Arm circles
  • March in place
  • Light stretching

Step 4: Cool Down (2 minutes)

  • Slow breathing
  • Forward fold stretch
  • Shoulder rolls

Total time: 20–25 minutes including transitions.

Quick Tip:
If you have multiple kids, assign one child as the “timer captain.” It gives ownership and reduces sibling squabbles.

A Sample 20-Minute Indoor Routine You Can Use Today

A Sample 20-Minute Indoor Routine You Can Use Today

Let’s make this even easier. Here’s a ready-to-use homeschool PE workout you can start this week.

Round 1 (40 seconds each, 20 seconds rest):

  • Jumping jacks
  • Wall sit
  • High knees
  • Modified push-ups
  • Plank hold
  • Skater jumps

Round 2:

Repeat the same sequence.

If your kids are younger (ages 5–8), simplify:

  • Hop in place
  • Bear crawl
  • Star jumps
  • Frog squats
  • Freeze dance
  • Crab walk

For older students (10+), increase difficulty:

  • Burpees
  • Full push-ups
  • Jump squats
  • Plank shoulder taps
  • Speed skaters
  • Mountain climbers

Keep it playful. Play upbeat music. Let them create silly names for exercises. Homeschool physical education should feel energizing—not like boot camp.

One homeschool mom we worked with started doing the circuit right after lunch because her kids were sluggish. Within a week, she noticed math went smoother and afternoon attitudes improved dramatically. Movement resets the brain.

Common Mistakes Parents Make With Homeschool PE

Let’s talk about what not to do.

Mistake #1: Overcomplicating it
You do not need a full homeschool PE curriculum package to get started. Start simple. You can always expand later.

Mistake #2: Inconsistency
Doing a 60-minute workout once a week doesn’t help much. Short daily routines are more effective.

Mistake #3: Turning It Into Punishment
Exercise should never feel like discipline. Avoid phrases like “Since you didn’t finish your work, go do push-ups.”

Mistake #4: Comparing to Other Families
Some families do organized sports every day. Some don’t. Your homeschool fitness routine only needs to serve your children.

Consistency beats perfection every time.

Homeschooling already asks a lot of you. When PE feels complicated, it’s usually the first subject to disappear. The key is to view movement as part of the rhythm of your day rather than another subject to manage. When fitness becomes routine, it stops feeling like one more thing on your checklist and starts feeling like a reset button for everyone.

You might notice that your child resists at first. That’s normal. Many kids are used to sitting for long stretches. After a week or two of daily indoor exercise, most begin to expect it and even remind you when it’s time. The structure becomes comforting, and the energy boost becomes noticeable.

How To Fit PE Into A Busy Homeschool Schedule

This is where most parents struggle.

Try one of these approaches:

Option 1: Morning Energy Boost
Start your homeschool day with the 20-minute circuit. It wakes everyone up.

Option 2: Midday Reset
Do PE right before or after lunch to break up academic blocks.

Option 3: Afternoon Brain Break
When focus fades, hit the timer.

You can even combine subjects:

  • Count jumping jacks for math
  • Spell vocabulary words during rest periods
  • Track heart rate for science

Physical activity supports learning. Studies consistently show that movement improves concentration and memory retention.

If your homeschool day feels chaotic, anchor it with predictable movement. Children thrive on rhythm. A daily indoor workout becomes a cue: “Now we shift gears.”

And here’s the beautiful part—this routine costs nothing. No gym memberships. No expensive equipment. Just intentional time.

Making Fitness Fun For Different Ages

Homeschool families often teach multiple ages at once. That can feel tricky when it comes to physical education.

Here’s how to simplify:

For Preschoolers:

  • Animal walks
  • Freeze dance
  • Follow-the-leader
  • Obstacle courses with couch cushions

For Elementary:

  • Timed circuits
  • Relay challenges
  • Fitness bingo
  • Exercise dice (assign moves to numbers)

For Middle School:

  • Interval training
  • Simple strength tracking
  • Step challenges
  • Online kid-friendly workout videos

You can rotate themes:

  • Superhero workout day
  • Olympic-style challenges
  • Ninja training
  • Dance party circuit

Kids engage more when imagination is involved.

We’ve seen families transform homeschool PE into a highlight of the day simply by shifting mindset. Instead of seeing exercise as another checkbox, they began seeing it as family connection time. Laughter during crab walks and friendly competition during plank holds build memories. Fitness becomes relational, not just physical.

The more positive the environment, the more sustainable the routine becomes. Children who associate movement with encouragement are far more likely to maintain healthy habits long-term.

Simple Steps You Can Take This Week

If you’re feeling overwhelmed, start here:

  1. Pick a consistent time (even 10:30 AM daily).
  2. Choose 6 exercises.
  3. Set a timer for 20 minutes.
  4. Do it for 5 school days straight.

That’s it.

Optional low-cost resources:

  • Free workout timers on YouTube
  • Printable fitness trackers (many free PDFs online)
  • Music playlists for motivation
  • A $10 jump rope

You don’t need more planning—you need momentum.

Remember, homeschool fitness doesn’t have to look perfect. It just has to happen.

Common PE Homeschool Questions

FAQ: How many days a week should we do homeschool PE?
Ideally, aim for 4–5 days per week. A short indoor fitness routine done consistently is more effective than occasional long workouts. Daily movement supports physical health and improves focus during your homeschool schedule.

FAQ: Does circuit training count toward homeschool PE requirements?
Yes, circuit training absolutely qualifies as physical education in most homeschool settings. It includes cardiovascular activity, strength building, and coordination practice. Always check your state homeschool laws, but structured indoor exercise typically meets PE expectations.

FAQ: What if my child hates exercise?
Start small and keep it playful. Use games, music, or themed workouts to build engagement. Many resistant kids respond well to short homeschool fitness challenges rather than long workouts, especially when parents participate alongside them.

Homeschool Advice You Can Trust

You don’t need a perfect homeschool plan—you need sustainable habits. A 20-minute indoor fitness circuit is one of the simplest ways to support your child’s health, improve focus, and bring positive energy into your day.

At DKM Homeschool Resource, we believe homeschooling should feel doable. Practical systems beat complicated curriculum every time. When you build small routines like daily movement, you create stability that supports every other subject.

If this post helped you, explore more of our homeschool advice, encouragement, and ready-to-use resources. We’re here to help you homeschool with confidence, clarity, and a little less overwhelm.

Kitchen Chemistry Lab: 4 Simple Experiments to Teach Acids & Bases at Home

Science doesn’t have to stay in a lab—it can happen right in your kitchen! Teaching kids about acids and bases is both fun and educational, and the best part is, you can do it with everyday household items. From vinegar to baking soda, lemons to soap, these simple ingredients can turn your kitchen into a hands-on chemistry lab.

Hands-on experiments help children see science in action. Watching reactions, mixing substances, and observing color changes makes abstract concepts like pH tangible. These activities also encourage critical thinking, problem-solving, and careful observation—skills that are valuable across all subjects.

In this blog, we’ll share 4 simple, safe experiments that teach acids and bases at home. You’ll find step-by-step instructions, tips for homeschool parents, and ways to extend learning beyond the kitchen. Plus, we’ll show how to use a chart to record observations, making science both organized and interactive for your children.

What Experiments Can You Do with Acids and Bases?

Introducing kids to acids and bases can be both exciting and educational with simple, hands-on experiments. Using everyday items found in your kitchen, children can see chemical reactions in real time and understand how substances interact. Vinegar, baking soda, lemon juice, and even soap can all demonstrate important scientific concepts in a safe, controlled way.

One classic experiment is the vinegar and baking soda reaction, which produces fizzing and bubbling as carbon dioxide gas is released. This reaction is a fun way to show how acids and bases interact. Another experiment uses red cabbage juice as a natural pH indicator, which changes color depending on whether a liquid is acidic or basic. Kids can test lemon juice, soap, or other household liquids to observe these changes.

Homeschool parents can also explore neutralization reactions by mixing acids and bases together and watching what happens. Children can experiment with ratios, predict outcomes, and record their observations to see patterns emerge.

The key learning goals for these experiments include:

  • Understanding the difference between acids and bases
  • Observing chemical reactions and color changes
  • Learning how to predict outcomes and test hypotheses
  • Recording and analyzing results

These experiments are flexible and can be adapted for different ages. Younger children may focus on observation and simple predictions, while older children can measure, record pH levels, and explain the science behind the reactions.

By starting with these simple experiments, children not only gain a hands-on understanding of acids and bases, but they also build curiosity and confidence in their ability to explore science at home.

Experiment 1: Vinegar and Baking Soda Volcano

The vinegar and baking soda volcano is a classic kitchen experiment that excites kids while teaching basic acid-base chemistry. It’s simple, safe, and perfect for homeschool science lessons.

What You Need:

  • Baking soda (base)
  • Vinegar (acid)
  • A small container or cup
  • Optional: food coloring or dish soap for extra fun

How to Do It:

  1. Place the container on a tray or in a shallow dish to catch overflow.
  2. Add 2–3 tablespoons of baking soda to the container.
  3. Optional: Add a few drops of food coloring or a squirt of dish soap to make the reaction more dramatic.
  4. Slowly pour vinegar into the container and watch the fizzing eruption.

What’s Happening:

The reaction occurs because vinegar (acetic acid) reacts with baking soda (sodium bicarbonate), producing carbon dioxide gas, which creates the bubbling effect. This demonstrates a basic acid-base reaction and introduces kids to the concept of chemical change.

Tips for Homeschooling:

  • Ask children to predict what will happen before adding the vinegar.
  • Encourage them to observe and describe the reaction: What do they see, hear, and smell?
  • Try variations: use different amounts of baking soda or vinegar and see how the reaction changes.
  • Discuss why the reaction is safe and why certain experiments should be done in a controlled area.

This experiment is a great starting point because it’s visual, hands-on, and sparks curiosity about chemical reactions. Children learn that acids and bases can interact in fun ways and that science can be exciting and creative.

Simple Experiments to Teach

Experiment 2: Lemon Juice Color Change with Cabbage Indicator

This experiment uses red cabbage juice as a natural pH indicator to teach kids about acids, bases, and pH levels. It’s safe, colorful, and perfect for visual learners in your homeschool science lessons.

What You Need:

  • Red cabbage (for juice)
  • Lemon juice (acid)
  • Baking soda solution (base)
  • Small cups or containers

How to Do It:

  1. Chop a few pieces of red cabbage and boil them in water for 5–10 minutes to extract the purple juice.
  2. Pour the cabbage juice into small containers.
  3. Add lemon juice to one container and baking soda solution to another.
  4. Watch the cabbage juice change color: it turns red or pink with acids and green or blue with bases.

What’s Happening:

Red cabbage contains a natural pigment called anthocyanin, which changes color depending on the acidity or alkalinity of the solution. This demonstrates how acids and bases affect pH and introduces the concept of indicators in chemistry.

Homeschool Tips:

  • Encourage children to predict the color change before adding the liquids.
  • Ask them to describe the differences between acid and base reactions.
  • Experiment with other household liquids like vinegar, soap, or lemon-lime soda to see how they affect the cabbage juice.
  • Have children record their observations in a science journal or chart for comparison.

This activity is perfect for teaching acids and bases in a hands-on way while also encouraging critical thinking and observation skills. Kids see immediate results, making abstract concepts like pH both fun and understandable.

Experiment 3: Soap vs. Acid Test

The Soap vs. Acid Test is a simple way to explore how acids and bases interact with everyday substances. This experiment allows children to observe reactions and learn about neutralization in a safe and engaging way.

What You Need:

  • Liquid hand soap or dish soap (mild base)
  • Vinegar (acid)
  • Lemon juice (acid)
  • Small bowls or cups

How to Do It:

  1. Pour a small amount of soap into one bowl.
  2. In separate bowls, pour vinegar and lemon juice.
  3. Have children slowly add the acid to the soap and observe what happens.
  4. Note differences in reaction between the two acids.

What’s Happening:

Soap is slightly basic, and acids like vinegar and lemon juice can react with it to neutralize the solution. The reaction is usually subtle—bubbles may form, or the texture of the soap may change slightly—but it demonstrates that acids and bases interact differently depending on the substances involved.

Homeschool Tips:

  • Ask children to predict what will happen before adding the acids.
  • Encourage them to compare reactions and explain why the two acids behave differently with the soap.
  • Discuss real-life applications, such as why soap cleans better in some water conditions or how neutralization is used in everyday products.
  • Record observations in a journal or chart to help kids track patterns and differences.

This experiment reinforces key concepts about acids, bases, and neutralization, while also teaching careful observation and reasoning skills. Children begin to see that chemistry is not just theoretical—it happens in the kitchen and the world around them.

Experiment 4: Homemade pH Paper

Creating homemade pH paper is a hands-on way for kids to test the acidity or alkalinity of everyday substances. This experiment combines observation, measurement, and scientific reasoning, making it a perfect addition to your homeschool science lessons.

What You Need:

  • Red cabbage juice (prepared as in Experiment 2)
  • Coffee filters or small strips of paper
  • Small cups of household liquids (vinegar, lemon juice, soap solution, soda, milk, etc.)
  • A tray or plate for drying strips

How to Do It:

  1. Cut coffee filters or paper into small strips.
  2. Dip the strips into the red cabbage juice until fully soaked.
  3. Lay the strips out to dry on a tray or plate.
  4. Once dry, use the strips to test different liquids by dipping them in and observing color changes.
  5. Record the results in a chart, noting which substances are acidic, neutral, or basic.

What’s Happening:

The cabbage juice contains anthocyanins, which change color depending on the pH of the liquid. Acidic liquids turn the strips red or pink, neutral liquids remain purple, and basic liquids turn green or blue. This shows children how indicators reveal chemical properties in everyday materials.

Homeschool Tips:

  • Encourage children to predict the color change before testing each liquid.
  • Compare and contrast the reactions of different liquids.
  • Discuss how scientists use indicators in real labs to determine pH.
  • Extend learning by having children create a pH scale chart and plot their results.

This experiment is perfect for older children or those ready for more investigative science. It teaches careful observation, data recording, and critical thinking, while also showing that chemistry can be both safe and fun at home.

Visualizing Results: Experiment Chart

After completing all four kitchen chemistry experiments, using a chart to organize observations helps children make sense of what they’ve learned. Charts allow kids to compare reactions, identify patterns, and draw conclusions, reinforcing both science skills and critical thinking.

How to Set Up the Chart:

SubstanceExperimentReaction ObservedpH (Acid/Base)Color ChangeNotes/Observations
VinegarVolcanoFizzing, bubblingAcidN/AStrong reaction with baking soda
Lemon JuiceCabbage IndicatorColor turns red/pinkAcidRedHighly acidic
Baking Soda SolutionCabbage IndicatorColor turns green/blueBaseGreenBasic reaction
SoapAcid TestSlight bubblesBaseN/AReaction varies with acid type
Various LiquidsHomemade pH PaperColor changesAcid/Base/NeutralRed, Purple, Blue/GreenCompare and record differences

Homeschool Tips:

  • Encourage children to fill in the chart themselves after each experiment.
  • Ask questions to promote deeper thinking, such as: “Which substances were the strongest acids or bases?” or “Did anything surprise you?”
  • Use the chart to look for patterns, helping kids see how acids and bases behave differently with different materials.
  • Let children draw symbols or use colors to make the chart visually engaging and memorable.

Using a chart not only reinforces observation skills, but it also teaches children how scientists organize data, look for trends, and present findings. It turns a fun kitchen activity into a structured, educational science lesson that builds critical thinking and analysis skills.

Teaching Tips for Homeschool Parents

Kitchen chemistry experiments are more than just fun—they’re an opportunity to teach children critical scientific skills like observation, prediction, and data analysis. With a little guidance, homeschool parents can turn simple kitchen activities into a full science lesson that is safe, engaging, and memorable.

Safety should always come first. Make sure children are supervised while handling liquids and teach them to clean up spills immediately. Simple precautions like using gloves or aprons can keep hands and clothes clean while experimenting.

Encouraging observation and prediction helps children think like scientists. Ask questions such as:

  • “What do you think will happen when we mix these ingredients?”
  • “Why do you think this reaction looks different from the last one?”
  • “What did you notice about the colors or bubbles?”

Recording and comparing data is another important skill. Using an experiment chart allows kids to track results and look for patterns, such as which substances are acidic, which are basic, and which are neutral. Discussing why reactions differ strengthens analytical thinking and introduces the idea of evidence-based conclusions.

You can also extend learning beyond the kitchen:

  • Explore acids and bases in everyday life, like cleaning products, digestion, or gardening.
  • Encourage children to safely design their own experiments to test predictions.
  • Incorporate other skills, such as measuring ingredients (math), writing observations (language arts), or illustrating reactions (art).

Finally, make learning enjoyable. Celebrate “wow” moments and let children choose variations for experiments. Turning these activities into a mini science lab routine helps children build curiosity, confidence, and a lasting love of learning.

Extending the Lesson Beyond the Kitchen

Once your children have completed the four kitchen chemistry experiments, you can take learning further by connecting acids and bases to the world around them. This helps them see that science isn’t just something that happens in a bowl—it’s everywhere in daily life.

Start with household connections. Vinegar, lemon juice, and baking soda aren’t just for experiments—they’re used for cleaning, cooking, and even gardening. Ask children to identify other products that are acidic or basic and discuss how their chemical properties affect their use. For example, vinegar can clean surfaces because its acidity breaks down stains, while baking soda deodorizes because of its basic nature.

Another way to extend learning is through food experiments. Children can test the acidity of orange juice, milk, or soda with homemade pH paper. They can then discuss how acidity affects taste, preservation, and even digestion. This encourages curiosity and makes science practical and relevant.

You can also explore environmental science connections. Rainwater can be slightly acidic, and soil pH affects plant growth. Children can test soil samples from your yard or garden with pH paper, learning how acids and bases impact ecosystems.

Encourage creative extensions as well. Children can:

By connecting kitchen chemistry to real-world examples, children learn to observe, question, and apply scientific thinking beyond the experiments themselves. These extensions make science meaningful, memorable, and a natural part of everyday life.

Making Chemistry Fun at Home

Teaching acids and bases at home doesn’t have to be complicated. With simple kitchen ingredients, children can see chemical reactions, test pH levels, and explore science in a hands-on, memorable way. These experiments build observation, prediction, and critical thinking skills while keeping learning fun and interactive.

By extending lessons beyond the kitchen—through everyday products, food experiments, or environmental observations—homeschoolers can connect chemistry to the real world. With creativity and guidance, parents can turn science into an exciting adventure that inspires curiosity, confidence, and a love of learning that lasts long after the experiment ends.

Easter Egg Learning Activities for Homeschool (Math, Art & Science)

Easter egg learning activities for homeschool are one of the easiest ways to turn regular lessons into something your kids actually look forward to. With just plastic eggs, paper cutouts, or real dyed eggs, you can cover math, art, and science in a playful, hands-on way.

If your homeschool days have started to feel repetitive, this is your reset button.

Let’s break it down into practical ideas you can use this week.

How To Make Homeschool Math Fun?

You make homeschool math fun by turning it into a game, a challenge, or a hands-on activity instead of another worksheet. When kids can move, search, open, build, and create while learning math, retention skyrockets — and resistance drops dramatically.

Here are some of our favorite Easter egg math activities for elementary homeschoolers:

1. Egg Hunt Equation Match

How it works:

  1. Write math problems on small slips of paper.
  2. Write the answers on separate slips.
  3. Place problems in one set of eggs and answers in another.
  4. Kids must find and match them correctly.

What it reinforces:

  • Addition & subtraction
  • Multiplication facts
  • Fractions (match ½ with 2/4)
  • Time conversions
  • Even word problems for older kids

Quick tip: Use different colored eggs for different operations.

2. Place Value Crack & Build

Write numbers inside eggs (example: 347).
Have your child:

  • Break it into hundreds, tens, ones.
  • Build it using base-ten blocks.
  • Write it in expanded form.

This is especially helpful for visual learners who struggle with abstract numbers.

3. Skip Counting Egg Toss

Number plastic eggs by 2s, 5s, or 10s. Toss them into a basket in order.

You can:

  • Time it for a challenge.
  • Call out the next number.
  • Let siblings compete.

Movement + math = much better focus.

When we work with overwhelmed parents at DKM Homeschool Resource, we often see math becoming the daily struggle. Kids tense up before you even open the book. That tension usually isn’t about ability — it’s about monotony. When math becomes predictable and worksheet-heavy, even capable learners disengage. A simple twist like hiding problems in Easter eggs can completely shift the atmosphere of your homeschool day. Suddenly, math isn’t something they dread — it’s something they hunt for.

Common Math Mistakes to Avoid

  • Turning it into a competition too early.
  • Making the problems too hard “just because it’s a game.”
  • Overcomplicating the setup.

Keep it simple. If prep takes more than 15 minutes, scale it back.

Easter Egg Art Activities That Build Real Skills

Easter Egg Art Activities That Build Real Skills

Art isn’t just crafting for fun (though that’s important too). Easter egg art can build fine motor skills, creativity, and even art history understanding.

Here are easy homeschool art ideas:

1. Pattern Design Challenge

Give each child:

  • A blank egg template (paper cutout works fine).
  • A simple rule (stripes only, polka dots only, geometric shapes only).

This strengthens pattern recognition and symmetry — both helpful for math later.

2. Famous Artist Egg Study

Choose an artist like:

  • Vincent van Gogh (bold swirls)
  • Piet Mondrian (geometric color blocks)
  • Georgia O’Keeffe (large floral focus)

Have your child design an egg in that style.

Low-cost resource tip: Use library books or free online museum galleries to preview artwork before designing.

3. Watercolor Resist Eggs

Draw designs with white crayon on paper eggs. Paint over with watercolor.

Kids love the “magic reveal” effect.

Sometimes parents feel guilty when they shift into art because it doesn’t look “academic enough.” We want to gently remind you: creativity is foundational learning. When your child designs, experiments with color, and plans patterns, they’re building problem-solving skills and visual literacy. Art days often become the moments kids remember most about homeschooling. Those memories matter more than another perfectly completed workbook page.

Simple Art Extension

Have kids:

  • Write 3 sentences describing their design.
  • Explain why they chose certain colors.
  • Create a short story about their egg character.

Boom — you just added language arts.

Easter Egg Science Experiments For Curious Minds

Science with eggs is practically made for homeschool.

You likely already have what you need in your kitchen.

1. The Classic Vinegar Egg Experiment

Place a raw egg in vinegar for 24–48 hours.

What happens?

  • The shell dissolves.
  • The egg becomes rubbery.
  • Kids observe chemical reactions in action.

Have them record:

  • Predictions
  • Observations
  • Final conclusions

2. Egg Drop STEM Challenge

Give your child:

  • Plastic egg or hard-boiled egg
  • Paper
  • Tape
  • Cotton balls
  • Recycled materials

Goal: Build a structure to protect the egg from a drop.

This builds:

  • Engineering thinking
  • Planning skills
  • Testing & revision mindset

3. Sink or Float Predictions

Fill a large bowl with water.

Test:

  • Hard-boiled egg
  • Raw egg
  • Egg in salt water

Discuss density in simple terms.

One of the biggest benefits of Easter egg science activities is that they feel like play while secretly teaching scientific thinking. When your child makes predictions, observes changes, and adjusts their approach, they are learning how real scientists work. You don’t need a fancy lab or expensive curriculum. Curiosity and conversation are more powerful than any worksheet. And when science feels approachable, kids are far more likely to stay interested long term.

Common Science Mistakes to Avoid

  • Explaining everything before they observe.
  • Skipping the prediction step.
  • Rushing cleanup and ending the discussion too fast.

Let them wonder first. Explanation comes after curiosity.

How To Plan An Easter-Themed Homeschool Week (Without Overwhelm)

Here’s a simple 5-day framework you can use immediately:

Monday:
Egg math hunt + journal reflection

Tuesday:
Artist-style egg design + writing extension

Wednesday:
Vinegar egg experiment start + prediction chart

Thursday:
Egg drop STEM challenge

Friday:
Review game using egg trivia questions

You don’t need to replace your entire curriculum. Just swap one subject block per day with a themed activity.

Keep It Age-Flexible

If you have multiple ages:

  • Younger kids do single-digit math.
  • Older kids do multi-step problems.
  • Everyone participates in art and science together.

Family-style learning builds connection and saves your sanity.

Budget-Friendly Supplies List

  • Plastic eggs (dollar store)
  • Paper egg printables (free online)
  • Vinegar
  • Food coloring
  • Tape & scrap materials
  • Watercolor set

Most of this costs under $15 total.

Simple Steps You Can Take This Week

  1. Buy or gather 12 plastic eggs.
  2. Write basic math problems on scrap paper.
  3. Schedule one 30-minute themed block.
  4. Don’t aim for perfection — aim for engagement.

That’s it.

Homeschool Learning FAQs

FAQ: What ages are Easter egg learning activities best for?
These homeschool Easter activities work best for preschool through upper elementary, but you can easily adapt them for middle school by increasing math difficulty or adding deeper science explanations. Easter egg math games and simple science experiments are flexible enough to grow with your child.

FAQ: Can I use Easter activities if we aren’t religious?
Absolutely. Many parents use Easter egg learning activities as a seasonal theme rather than a religious lesson. The focus can stay on spring learning activities, creative art projects, and hands-on math games that bring excitement into your homeschool routine.

FAQ: How long should an Easter-themed homeschool unit last?
Most families find that a 3–5 day Easter homeschool unit works well. You don’t need an entire month. Short, focused bursts of themed homeschool activities prevent burnout while keeping learning fresh and engaging.

Homeschooling Doesn’t Have To Feel Heavy

Easter egg learning activities are more than cute Pinterest ideas — they’re powerful tools for engagement, connection, and deeper learning. With a little creativity and very little prep, you can transform ordinary math, art, and science lessons into something your kids genuinely enjoy.

Remember, homeschooling doesn’t have to feel heavy to be effective. When you bring joy into your homeschool day, learning naturally follows. If you’re looking for more practical homeschool help, encouragement, and ready-to-use ideas, explore more articles here at DKM Homeschool Resource. We’re here to make homeschooling simpler, lighter, and far more doable for real families like yours.